Showing posts with label Halloween. Show all posts

Friday, October 21, 2022

Trio of Witch Hats Pumpkin Candy Wrapper

Today's project is a chocolate treat wrapper decorated with a trio of witch hats from the Bewitching stamp set and the Witch Hat Builder Punch. I make a lot of boxes and bags for treats that I thought a wrapper would be a fun way to package a treat!

chocolate pumpkin candy wrapped with a horizonal band of paper decorated with three witches hats in the center; halloween, treat holder, Bewitching, Best Witches, 3D, witch hat builder punch


Halloween is one of my favorite holidays. Halloween also has the best candy! I cannot go to the grocery store during the fall or any month with a holiday in it and not buy seasonal candy. In the grocery store that I most often go to the candy is in the center of the store, and you cannot go to the cash registers without passing buy it. So, of course, I have to look for the new candy!

This particular chocolate pumpkin candy is available during other times of the year, especially at Easter. I love the strawberry cream eggs that this brand makes! I was pleasantly surprised to see this chocolate pumpkin filled with caramel and marshmallow in the grocery store.

Below are the measurements and supply list to recreate this frightfully delicious candy wrapper. If you need supplies to recreate this project, please, shop my online store HERE.


Measurements

  • Belly Band: 2" x 8-1/2" (Parakeet Party Cardstock); trim excess cardstock as needed
  • Witch Hats (stamp all 3): 2-1/2" x 8-1/2" (Basic White Cardstock)
  • Greeting: 1" x 2" (Basic White Cardstock)


Supply List

Stamps
#159855 Bewitching Stamp Set (also available with the Witch Hat Builder Punch as a bundle with item #159857 Bewitching Bundle)
#159860 Best Witches Stamp Set

Paper
#159259 Parakeet Party Cardstock
#159276 Basic White Cardstock

Ink
#47099 Gorgeous Grape Ink Pad
#159208 Parakeet Party Ink Pad
#132708 Memento Tuxedo Black Ink Pad

Embellishments
#104430 Dimensionals

Tools
#159856 Witch Hat Builder Punch
#110755 Multipurpose Liquid Glue
#102300 Bone Folder
#103579 Paper Snips
#130148 Grid Paper
#152392 Paper Trimmer
#126200 Stampin' Scrub
#153648 Stampin' Mist Cleaner
#118485 Clear Block D
#118489 Clear Block G


close up of a chocolate pumpkin candy wrapped with a horizonal band of bright green paper decorated with three witches hats in the center; halloween, treat holder, Bewitching, Best Witches, 3D, witch hat builder punch


This candy wrapper comes together relatively quickly with little paper. You can cut 5 belly bands from one piece of 8-1/2" x 11" cardstock and 4 greeting strips from the inch left at the bottom, which makes it perfect for making multiples of for a party, a get together, coworkers, neighbors, community members, and more!

You can also customize the basic shape of this candy wrapper to fit any holiday or occasion. I can imagine making more of these for Thanksgiving to put one at each person's place setting! How would you customize this candy wrapper? Tell me in the comments below!

I hope you enjoyed today's Bewitching treat wrapper. If you need supplies to make this sweet treat wrapper, please, shop my online store HERE.

If you have any questions about today's project, please, don't hesitate to ask me.

Thanks for stopping by!
Beth

Wednesday, October 19, 2022

Love at First Bite Halloween Treat Holder

Today's Halloween treat box features a peanut butter cup so big that even Count Dracula might not be able to bite through it!

orange box decorated with black and gray striped paper around the side and an image of costomed trick-or-treaters underneath the moon and some bats; halloween, treat holder, Scary Cut, 3D, box


I found this enormous peanut butter cup at my favorite local sandwich shop - the one with the yellow and white striped bags. This sandwich shop sources a lot of locally made and small business food products. This peanut butter cup comes from a company in Nashville, TN. They always have something new and interesting to try!

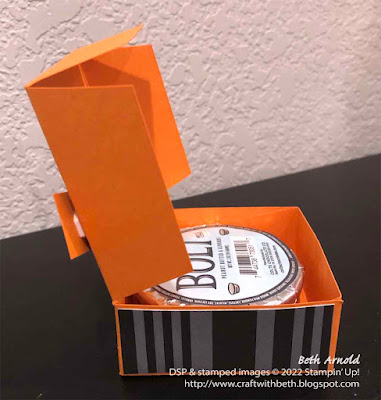
opened view of the orange box decorated with black and gray striped paper around the side and an image of costomed trick-or-treaters underneath the moon and some bats showing a large peanut butter cup inside of the box; halloween, treat holder, Scary Cut, 3D, box


I created this box to hold the peanut butter cup as a Halloween treat for my husband. Peanut butter cups are one of his top favorite types of candy. You could also put other types of treats or small gifts in this box.

The style of this box is similar to a pizza-style box. The peanut butter cup sits inside of the bottom part and the back of the box has a hinged lid. I measured the diameter and the height of the peanut butter cup to determine the dimensions of the box. Then I added a little more to accommodate the fold lines.

side view of the opened orange box decorated with black and gray striped paper around the side and an image of costumed trick-or-treaters underneath the moon and some bats; Halloween, treat holder, Scary Cut, 3D, box


Below are the measurements and supply list to recreate this fa-boo-lous Halloween treat box. If you need supplies to recreate this treat box, please, shop my online store HERE.

Measurements

  • Box Base: 8-7/8" x 5"; scored on the short side at 1-1/8" & 3-7/8" and scored on the long side at 1-1/8", 3-7/8", 5", & 7-3/4" (see template below for cutting and scoring guide) (Pumpkin Pie Cardstock)
  • Side Panels (cut 4): 1" x 2-5/8" (Black and White Designs Designer Series Paper)
  • Top Panel #1: 2-1/2" x 2-1/2" (Black and White Designs Designer Series Paper)
  • Top Panel #2: 2-1/4" x 2-1/4" (Basic White Cardstock)
  • Greeting: 1-3/4" x 2" (Pumpkin Pie Cardstock) - then trim with paper snips to fit the greeting


Supply List

Stamps
#159850 Scary Cute Stamp Set

Paper
#105117 Pumpkin Pie Cardstock
#159276 Basic White Cardstock
#159861 Black and White Designs Designer Series Paper

Ink
#132708 Memento Tuxedo Black Ink Pad

Embellishments
#104430 Dimensionals
#141897 Clear Wink of Stella

Tools
#122334 Simply Scoring Scoring Tool
#110755 Multipurpose Liquid Glue
#102300 Bone Folder
#103579 Paper Snips
#130148 Grid Paper
#152392 Paper Trimmer
#126200 Stampin' Scrub
#153648 Stampin' Mist Cleaner
#118487 Clear Block A
#118490 Clear Block H


I created a template showing the cutting and scoring lines for this Halloween treat box. The red lines indicate the cut lines. The blue dashed lines indicate the scoring lines. Be sure to angle cut or notch the side tabs as indicated, so that the box closes smoothly and neatly.

Halloween treat holder box template graphic; halloween, treat holder, Scary Cut, 3D, box

I hope you enjoyed today's Scary Cute peanut butter cup treat holder box. If you need supplies to make this Halloween treat box, please, shop my online store HERE.


If you have any questions about today's project, please, don't hesitate to ask me.

Thanks for stopping by!
Beth

Tuesday, October 4, 2022

Happy October! 3 Variations of 1 Aperture Card

Happy October! I just sent out my October newsletter to my mailing list. This month I shared how to make an aperture card with dies and punches. 


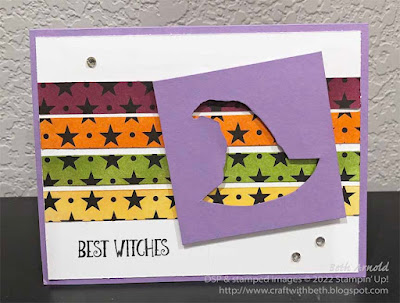
Best Witches Halloween Aperture Card Witch Hat Builder Punch

You can create an aperture with most dies and punches. I even shared how to make an aperture with a builder punch.


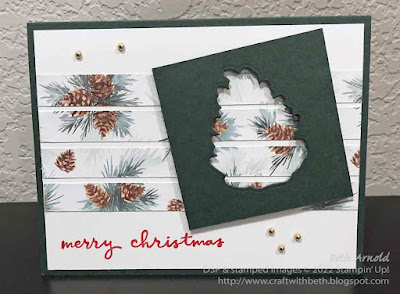
Christmas Season Pine Cone Aperture Christmas Card

I also shared some tips to make card assembly easier. 


Painted Poppies Friendship Aperture Card

My October newsletter is available all month to new subscribers. If you sign up for my email list during October, you will also receive a copy of my October newsletter with the instructions, supply list, and measurements for all 3 cards. 

Sign up for my mailing list today HERE or in the bright blue box to the right. I can't wait to welcome you as a subscriber!

Beth

Friday, September 16, 2022

Using a Card Sketch to Make a Halloween Card

The Scary Cute stamp set (#159850) is my go to Halloween stamp set this season. The silhouettes of the trick-or-treaters are too adorable and fun! I made this card to send to my niece for Halloween using the fairy princess silhouette stamp.


Scary Cute stamp set Halloween fairy princess card Halloween card


The layout comes from a card sketch by Teresa Kline. I was drawn to the three horizontal stripes and the ribbon at the top of her sketch.

I often use card sketches for inspiration, whether they are my own card sketches or another's. Card sketches provide a starting point for my creativity. I look at the scale of the elements on the card sketch to get an idea of which stamps and papers would fit.

There were no measurements included with Teresa's card sketch, so I used my grid paper to draw an approximation. Then I cut my paper and adjusted the measurements as I created.

I chose mostly neutral colors with the Basic Black, the Basic Gray, and the Basic White. I added a burst of Highland Heather to contrast with the neutral colors.

I chose the star patterned paper because it echoed the star on the fairy princess' wand and because the size of the stars well fit in a 3/4" strip of DSP. The stars did not lose their definition when cut to such a narrow piece of DSP. I kept the three strips of DSP the same to avoid the card becoming overly busy with too many patterns.

Scary Cute stamp set Halloween fairy princess card Halloween card


On the inside I stamped the moon and some bats at the top and the row of trick-or-treaters at the bottom to create a nighttime Halloween scene.

You can customize this card too. The silhouette stamps are mostly the same size, so the stamps with one trick-or-treater should fit in this circle die cut. You can also adjust the size of the circle die cuts. You can change the color palette to your recipient's favorite colors or to suit the occasion.

Below are the measurements and the supply list that I used to make this Scary Cute Halloween card. You can find stamping supplies in my online store HERE.

Measurements

  • Card Base: 8-1/2" x 5-1/2"; score at 4-1/4" (Basic Gray Cardstock)
  • 1st Mat: 4" x 5-1/4" (Basic Black Cardstock)
  • 2nd Mat: 3-1/2" x 4-3/4" (Highland Heather Cardstock)
  • Stripes (cut 3): 3/4" x 3-1/2" (Black and White Designer Series Paper)
  • Scalloped Circle: 2-3/4" x 2-3/4" (Basic Black Cardstock) - use the 2-1/2" scalloped circle die
  • Circle: 2-1/2" x 2-1/2" (Basic White Cardstock) - use the 2-1/8" circle die
  • Greeting Mat: 2-1/2" x 1" (Basic Black Cardstock)
  • Greeting: 2" x 3-3/4" (Basic White Cardstock)
  • Inside Mat: 4" x 5-1/4" (Basic White Cardstock)


Supply List

Supplies Specific to this Card

  • #159850 Scary Cute Stamp Set
  • #159852 Scary Cute Bundle (The Scary Cute Stamp Set is can also be purchased as part of a bundle with the Scary Silhouette Dies)
  • #121044 Basic Gray Cardstock
  • #146986 Highland Heather Cardstock
  • #121045 Basic Black Cardstock
  • #159276 Basic White Cardstock
  • #159861 Black and White Designer Series Paper (DSP)
  • #132708 Memento Tuxedo Black Ink Pad
  • #156408 White 3/8" Glittered Organdy Ribbon
  • #144220 Rhinestone Basic Jewels
  • #104430 Dimensionals
  • #141705 Layering Circles Dies

 Basic Tools

  • #110755 Multipurpose Liquid Glue
  • #102300 Bone Folder
  • #103579 Paper Snips
  • #130148 Grid Paper
  • #152392 Paper Trimmer
  • #149653 Stampin' Cut & Emboss Machine
  • #126200 Stampin' Scrub
  • #153648 Stampin' Mist Cleaner
  • #118487 Clear Block A
  • #117147 Clear Block B
  • #118486 Clear Block C
  • #118490 Clear Block H


I liked working with this card sketch and would try it again. I think it would be fun to make a Christmas or birthday card with this card sketch too! How would you customize this card sketch?

I hope you enjoyed today's Halloween card. If you need supplies to make this adorable fairy princess Halloween card, please, shop my online store HERE.

If you have any questions about today's project, please, don't hesitate to ask me.

Thanks for stopping by!
Beth

Friday, July 8, 2022

Patterned Paper Patchwork Card Two Ways

Today's patchwork cards were inspired by a card made by Bobby at Bits and Pieces. She used floral patterned paper and hand-drawn stitching lines to create a quilted patterned birthday card. Bobby's card was so sweet, and her layout was fantastic! So, of course, I made my own patchwork cards! I am using her card and measurements as my inspiration.

He's the Man Designer Series Paper DSP card patchwork quilt happy birthday card masculine Peaceful Moments stamp set


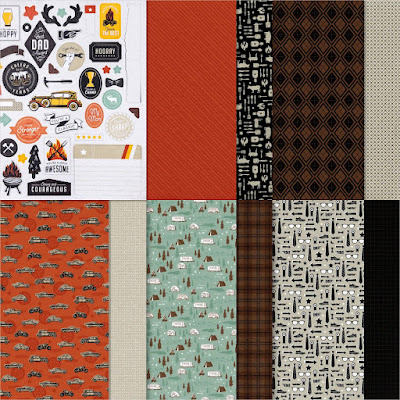
The first card I am sharing today uses the He's the Man Designer Series Paper (#159068). I used the argyle, diagonal stripes, diamonds, grid decking, cookout, and vehicle patterned papers to create my first patchwork card. 


He's the Man Designer Series Paper Graphic DSP

I tried to vary the positions of the linear and icon patterns, so that the patterns did not look too busy.

He's the Man Designer Series Paper DSP card patchwork quilt happy birthday card masculine Peaceful Moments stamp set


I also picked patterns with similar colors. I am loving this color combination of Sahara Sand, Cajun Craze, Early Espresso, and Basic Black! It has warmth from the orange-red of the Cajun Craze and the richness of the Early Espresso that is very striking.

He's the Man Designer Series Paper DSP card patchwork quilt Halloween card Scary Cute stamp set


The second card I am sharing today uses the Host reward Celebrate Everything Designer Series Paper (#159913) from the July-December Mini Catalog. I highlighted the fall and Halloween patterned papers here, using Stampin' Blends to color in the background of the leaves pattern, the woodgrain pattern, and the pumpkins. The faces on the pumpkins are too cute!

He's the Man Designer Series Paper DSP card patchwork quilt Halloween card Scary Cute stamp set


The Celebrate Everything Designer Series Paper is a gigantic designer series paper pack with patterns for fall and winter holidays and occasions. It has 48 sheets with 4 each of 12 double-sided designs. Wow! That is a lot of designer series paper in one pack! Yes, please!

Celebrate Everything Designer Series Paper DSP Graphic


All of the patterns are beautiful! There is a good balance of bold, bigger patterns and more subtle, smaller scale patterns. Having a variety of scales in patterned paper is helpful because the patterns don't overwhelm each other and become too busy. It is also helpful because not all projects are the same size. I wouldn't necessarily use a very large pattern on a small 3" x 3" card because it would be hard to see what the pattern is.

I can see myself easily using this entire pack of paper. I love the color palette and all of the patterns, but I especially love the fall and Halloween patterns! The Christmas ornament pattern is also one of my favorites.

Stampin' Rewards Chart Graphic


Celebrate Everything Designer Series Paper is a Host item. This means you need to place a qualifying order that earns enough Stampin' Rewards to get the Celebrate Everything Designer Series Paper. Stampin' Rewards can start to be earned on qualifying orders of $150 USD or more (before shipping and tax).

Below are the measurements and supplies I used to make these designer series paper patchwork cards.

Measurements

  • Card Base: 8-1/2" x 5-1/2"; scored at 4-1/4" (Thick Basic White Cardstock)
  • Squares (cut 2): 1-1/4" x 1-1/4" (He's the Man DSP or Celebrate Everything DSP)
  • Vertical Rectangles (cut 3): 1-1/4" x 2-1/2" (He's the Man DSP or Celebrate Everything DSP)
  • Horizontal Rectangles (cut 2): 1-1/4" x 2-5/8" (He's the Man DSP or Celebrate Everything DSP)
  • Pumpkin: 1-1/2" x 1-1/2" (Basic White Cardstock)


Supplies

#159850 Scary Cute Stamp Set
#151595 Peaceful Moments Stamp Set
#159276 Basic White Cardstock
#159229 Thick Basic White Cardstock
#159068 He's the Man Designer Series Paper
#159913 Celebrate Everything Designer Series Paper
#132708 Memento Tuxedo Black Ink Pad
#154830 Balmy Blue Stampin' Blends Combo Pack
#154843 Basic Black Stampin' Blends Combo Pack
#154897 Pumpkin Pie Stampin' Blends Combo Pack
#154906 Soft Suede Stampin' Blends Combo Pack
#154882 Crumb Cake Stampin' Blends Combo Pack
#144220 Rhinestone Basic Jewels
#104430 Dimensionals
#110755 Multipurpose Liquid Glue
#102300 Bone Folder
#103579 Paper Snips
#130148 Grid Paper
#152392 Paper Trimmer
#117147 Clear Block B


I hope you enjoyed today's patchwork patterned paper cards featuring the He's the Man Designer Series Paper and the Celebrate Everything Designer Series Paper. If you need supplies to make this card, please, shop my online store HERE.


If you have any questions about today's project or would like to host a party, please, don't hesitate to ask me. I am happy to help you with your stamping and to help you host your own stamping party!

Thanks for stopping by! Have a great day!
Beth

Friday, June 24, 2022

Sneak Peek: Scary Cute Sponged & Embossed Halloween Card

Are you ready for another sneak peek from the 2022 July-December Mini Catalog? Today's card features the Scary Cute Stamp Set and Scary Silhouette Dies as well as sponging with the blending brushes and embossing with the Simply Scored Scoring Tool.

Scary Cute Scary Silhouette Dies Halloween Card Sponging Blending Brushes Embossing


Did you know that you can create embossed patterns with the Simply Scored Scoring Tool? That's right! You can! I used the Simply Scored Scoring Tool to create an embossed grid on a piece of Smoky Slate cardstock. I placed the Smoky Slate cardstock in the upper left corner of the Simply Scored and scored every 1/4" across the cardstock. Then I rotated the cardstock 90 degrees and scored every 1/4" across the cardstock. This created an embossed grid pattern.

Scary Cute Scary Silhouette Dies Halloween Card Sponging Blending Brushes Embossing


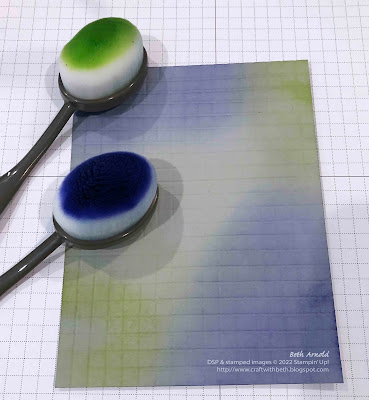
Next I sponged Starry Sky and Parakeet Party around the edges of the Smoky Slate cardstock to highlight the embossed grid pattern.

I also sponged the Parakeet Party ink all over the Basic White cardstock mat with the stamped Frankenstein's monsters cardstock mat and Orchid Oasis ink around the edges to give it a creepy Halloween glow to the center.

On the inside of the Card Base I stamped the moon image in the upper right corner and the group of trick-or-treaters in the lower left corner with Momento Tuxedo Black in. It looks like the moon was not stamped correctly, however, this is the texture of the stamp. I also got a "seagull" or an extra line of ink around the right side of the trick-or-treaters.

Scary Cute Scary Silhouette Dies Halloween Card Sponging Blending Brushes Embossing


This extra line of ink is from pressing the stamp into the ink pad too hard and from rocking the stamp's edges into the stamp pad. My best friend's mom calls these extra lines of ink "seagulls".

Instead of editing the photo to remove the "seagull," I am leaving it in for two reasons.

  • One reason is that even demonstrators and stampers that have been stamping for a long time make stamping mistakes.
  • The second reason is that the "seagull" acts as a motion or action line, giving the impression that the trick-or-treaters are running to get more candy. It is a great way to make a stamping mistake into a design element. That is the story, and I am sticking with! Lol!


Below are the measurements and supplies to recreate this sponged and emboss Scary Cute Halloween card.

Measurements

  • Card Base: 4-1/4" x 11"; scored at 5-1/2" (Thick Basic White Cardstock)
  • 1st Mat: 4-1/4" x 5-1/2" (Smoky Slate Cardstock)
  • 2nd Mat: 3-3/4" x 5" (Orchid Oasis Cardstock)
  • 3rd Mat: 3-5/8" x 4-7/8" (Basic White Cardstock)
  • Greeting: 2-1/4" x 1-1/4" (Orchid Oasis Cardstock)
  • Greeting Banner: 1/4" x 2-1/2" (Basic White Cardstock)


Supplies

#159850 Scary Cute Stamp Set (also available as a bundle - #159852 Scary Cute Bundle)
#159276 Basic White Cardstock
#159229 Thick Basic White Cardstock
#159267 Orchid Oasis Cardstock
#131202 Smoky Slate Cardstock
#132708 Memento Tuxedo Black Ink Pad
#159214 Orchid Oasis Ink Pad
#159208 Parakeet Party Ink Pad
#104430 Dimensionals
#110755 Multipurpose Liquid Glue
#102300 Bone Folder
#103579 Paper Snips
#130148 Grid Paper
#152392 Paper Trimmer
#149653 Stampin' Cut & Emboss Machine
#118487 Clear Block A
#117147 Clear Block B
#118486 Clear Block C
#153611 Blending Brushes
#159851 Scary Silhouette Dies


I know I will be making more of these cards for my favorite tricker-or-treaters! The Scary Cute stamp set will be in the July-December Mini Catalog which is debuting on July 1st - only a week away. I hope you enjoyed today's Scary Cute Halloween card and add the Scary Cute Bundle to your wish list!  Then shop my online store HERE starting July 1st.

If you have any questions about today's project, please, don't hesitate to ask me. I am happy to help you with your stamping questions!

Thanks for stopping by! Have a great day!
Beth

Wednesday, June 15, 2022

Sneak Peek: Scary Cute Luminaries

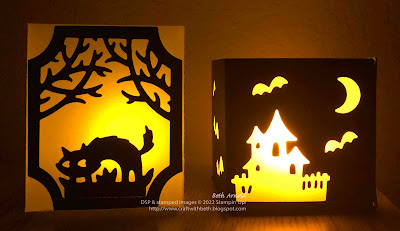
I am so excited to share with you a sneak peek from the upcoming 2022 July-December Mini Catalog! Today's projects are a pair of Halloween tea light luminaries features the Scary Silhouette Dies.


Scary Silhouettes Dies Halloween Luminary Tea Light Candle Home Decor decoration 3D

There are so many wonderful new products in the 2022 July-December Mini Catalog that I know you are going to love! It was so hard to choose what to share first! I am starting with Halloween because it is one of my favorite holidays and because it is one of the first holidays in fall.


Scary Silhouettes Dies Halloween Luminary Tea Light Candle Home Decor decoration 3D

I created these luminaries to highlight the Scary Silhouettes Dies versatility and to display on my mantle in my family room for the Halloween season. Luminaries were the first idea that I had when I saw these dies! I noticed how the tree label shaped die could be used to cut a window out of the center of the solid label shaped die and thought how fun that would be to be a panel on a luminary!


Scary Silhouettes Dies Halloween Luminary Tea Light Candle Home Decor decoration 3D


I was determined to make luminaries this year even before I saw the July-December Mini Catalog. I have been sitting on this idea since early January when I made treat bags for Valentine's Day with hearts die cut around the tops of the bags. I thought they would be a perfect shape for a luminary!


Scary Silhouettes Dies Halloween Luminary Tea Light Candle Home Decor decoration 3D


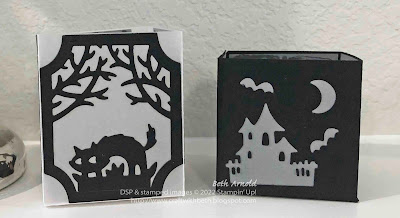
The size and shape of my luminary was determined by the size of the solid label die. I measured the solid label die and drew up a template on my grid paper. The Basic Black cardstock luminary was my first prototype. I was really happy with my first attempt, but I quickly realized that I was a half an inch short for the solid label die. So, I used the other dies in the Scary Silhouettes Dies to cut bats, haunted houses, and moons out of the Basic Black cardstock. I adhered squares of vellum to the inside of the luminary and added a tea light candle inside.


Scary Silhouettes Dies Halloween Luminary Tea Light Candle Home Decor decoration 3D

I adjusted my measurements and cut a second luminary with vellum cardstock. My second attempt was a success! The solid label die cuts fit perfectly on each of the four sides of the luminary.


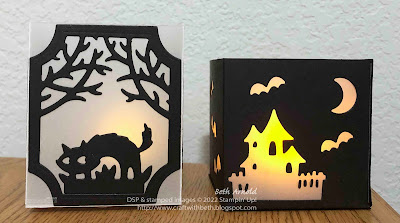
I die cut four solid labels and then cut the tree label from the center of each solid label to make each of the four side panels. Then I die cut cats, haunted houses, and bats to decorate each panel and placed a tea light candle inside.


Scary Silhouettes Dies Halloween Luminary Tea Light Candle Home Decor decoration 3D

Look at beautiful they look at night! You can really see how the vellum intensifies the light from the candle through the die cut areas!


Scary Silhouettes Dies Halloween Luminary Tea Light Candle Home Decor decoration 3D


I hope you enjoyed today's projects! How would you decorate your own luminaries? Below are the measurements and the supply lists for both versions of the Scary Silhouettes Halloween luminaries.


Vellum Luminary Measurements

  • Luminary Base: 5-1/2" x 10-1/2"; scored at 2-1/2", 5", 7-1/2", and 10" then rotate 90 degrees and score at 2-1/2"
  • Cardstock Side Pieces (cut 4): 3-1/2" x 3" (Basic Black Cardstock)
  • Cat: 2-1/2" x 2" (Basic Black Cardstock)
  • Haunted House (cut 2): 3" x 3" (Basic Black Cardstock)
  • Bats: 2" x 2" (Basic Black Cardstock)

Cardstock Luminary Measurements

  • Luminary Base: 5" x 10-1/2"; scored at 2-1/2", 5", 7-1/2", and 10" then rotate 90 degrees and score at 2-1/2"
  • Vellum Pieces (cut 4): 2-3/8" x 2-3/8" (Vellum Cardstock)


Supplies

  • #101856 Vellum Cardstock
  • #121045 Basic Black Cardstock
  • #110755 Multipurpose Liquid Glue
  • #102300 Bone Folder
  • #103579 Paper Snips
  • #130148 Grid Paper
  • #152392 Paper Trimmer
  • #149653 Stampin' Cut & Emboss Machine
  • #159851 Scary Silhouettes Dies 
  • Tea light battery-operated candles


EDITED: Below is a template for the vellum luminary. 

Scary Cute Vellum Halloween Luminary Template


The July-December Mini Catalog is coming July 1st! The Scary Silhouettes Dies will become available starting July 1st which is only a few weeks away. I hope you add the Scary Silhouette Dies to the top of your wish list!

Starting July 1st, if you would like to recreate these luminaries and need some supplies, please, shop my online store HERE. If you have any stamping questions, I am happy to help!

Thanks for stopping by!

Beth

Sunday, October 13, 2019

Second Sunday Sketches #06

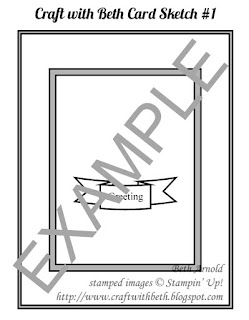
It is time for another Second Sunday Sketches challenge! If you are new to Second Sunday Sketches, please review the rules here or below. Each second Sunday of the month, I will post a card sketch. A sketch is graphic or drawing of how the elements of a card are layed out.

Craft with Beth: Stampin' Up! Second Sunday Sketches sketch card sketch challenge sample graphic

You will then use the sketch as a guide to create your own card. Your card must be a new creation and reflect the challenge guidelines. Your card must include the major elements of the card sketch, such as the number of layers and the general position of the embellishments and/or die cuts. You can rotate the sketch for a top-folding card or for a side-folding card.

You choose the occasion and the color palette as well as the stamp set(s) and the embellishments. I do ask that you use Stampin' Up! products (current or retired).

The measurements will also be included in the blog post for each Second Sunday Sketches sketch challenge. You can use the measurements as given or increase them or decrease them. For example, if a greeting is stamped on a 1" circle on the sketch, but the greeting you choose is 1-3/4", then increase the size of the circle to 1-3/4". You can also change the shape. Instead of a circle, you can use an oval, a square, a daisy punch, etc.

The challenge will run from the second Sunday of the month until the last day of that month.

Below is October's card sketch.

Craft with Beth: Stampin' Up! Second Sunday Sketches card sketch challenge graphic 06 with measurements

October's challenge will run from October 13th, 2019 until October 31st, 2019 at 5pm EST.

If you would like to participate in the Second Sunday Sketches sketch challenge, please create a card using the sketch above and email me a photo of your card by October 31st, 2019 at 5pm EST with the subject line Second Sunday Sketches Entry.

Craft with Beth: Stampin' Up! Second Sunday Sketches Card Sketch Challenge Prize Graphic Item #150457 Holiday Rhinestones

The day after the last day of the month (November 1st), I will place all of the names of the participants in a hat and randomly draw a winner. The winner will receive a prize! The prize each month will change and will be announced at the start of each challenge. October's Second Sunday Sketches sketch challenge prize is Item #150457 Holiday Rhinestones and three hand-made cards from me.

If you are the winner, I will notify you by email. Please respond to my email with your complete mailing address, and I will mail you your prize! If the winner does not respond to my email within 7 days, I will draw another winner.

I will also post all of the entries on my blog (with your names attached to the photos) and the name of the winner.

Here are a few samples of how I interpreted this card sketch using the Boo to You stamp set and the Monster Bash Designer Series Paper.

Craft with Beth: Stampin' Up! Second Sunday Sketches card sketch challenge Halloween Boo to You stamp set Stitched Rectangle Framelits Dies Triple Banner Punch Woodlands Embossing Folder Monster Bash DSP Designer Series Paper Monster Bash Enamel Shapes

There are many ways to change this card to make it your own! You can make the banner longer or shorter, add another layer to the small rectangle, move the small rectangle to the center, and more!

Below are the measurements I used to create this card sketch.


Layers
Dimensions
Card Base
4-1/4” x 11”; scored at 5-1/2”
1st Mat
4” x 5-1/4”
2nd Mat
4” x 2”
Small Rectangle
2” x 3”
Banner
1” x 2-1/2”

I am looking forward to seeing your personal take on the sixth Second Sunday Sketches sketch challenge! If you have any questions about this card sketch challenge, please let me know! I am happy to assist!

The supply list for my sample challenge card is also listed at the end of this post.

Thanks for stopping by!
Beth

Host Codes & Current Promotions:
October Host Code - N2ZJMRB2
When placing an order, please use host code N2ZJMRB2 for orders under $150 USD. Please don't use the host code if your order is more than $150. Use Host Code N2ZJMRB2 if you are attending the Stamp of the Month Class long distance to have your Stamp of the Month Bundle mailed directly to you.

http://craftwithbeth.blogspot.com/2019/09/the-2019-holiday-catalog-is-here.html

From September 4th, 2019 through January 2nd, 2020 shop the 2019 Holiday Catalog! The 2019 Holiday Catalog is filled with Autumn, Halloween, Thanksgiving, Christmas, News Years, and a sprinkling of Valentine's Day stamps, Designer Series Paper, embellishments, and more to spark your creativity! Check out all of the new products today!

Craft with Beth: Stampin' Up! Storage by Stampin' Up! organization stamp craft room Banner Graphic

Stampin' Up! is launching a NEW line of storage solutions called Storage by Stampin' Up! for ink pads, Stampin' Write Markers, Stampin' Blends, and accessories! Each of the modular cubes, trays, and bins are stackable and can be configured in hundreds of ways! Check out the new storage solution on my online store. Check out the product flyer here and the configuration idea flyer here.

Craft with Beth: Stampin' Up! Paper Pumpkin Winter Wonders 2019 October November Project Kit Graphic Banner

For the months of October and November, Paper Pumpkin is making back-to-back coordinating Christmastime themed project kits! October's kit will make 10 Christmastime cards and coordinating envelopes. November's kit will make 24 holiday-themed gift tags in various sizes of 4 designs. The coordinating colors are Early Espresso, Pool Party, Poppy Parade, and Shaded Spruce. Sign up for Paper Pumpkin by October 10th to receive October's Kit! Be sure to sign up by or to keep your subscription active by November 10th to receive November's Paper Pumpkin Kit! Click here for more information about October's and November's Paper Pumpkin kits!

Craft with Beth: Stampin' Up! 2019-2020 Annual Catalog Graphic Banner

June 4th, 2019 - June 2nd, 2020 - Shop from the 2019-2020 Annual Catalog for all of your stamping needs! This catalog is bursting with must have stamp sets, dies, embossing folders, ribbons, rhinestones, and more! I love the entire catalog! I think you will too! Check out all of the new products today!

http://www.stampinup.com/ecweb/category/110090/experience-creativity-projects?dbwsdemoid=2123316

Are you new to stamping? The Beginner Brochure may be the right place to start! The Beginner Brochure features a collection of stamp sets, kits, and bundles that are specifically designed to help you build your stamping skills! Check out our Beginner Brochure today! View the Beginner Brochure products in my online store. Download the Beginner Brochure here.

P.S. If you are a Magnolia Lane Product Suite Fan, there is a companion stamp set Magnolia Blooms (Item #152729) in the Beginner Brochure!

Craft with Beth: Stampin' Up! Join my team banner graphic

Do you love Stampin' Up! products? Do you enjoy sharing the joy of stamping with others? Have you considered joining Stampin' Up! as a demonstrator even for the discount? I would love to have you be a part of my Purrfect Stampers Demonstrator Team! You can build your own Starter Kit (valued at $125 USD) for $99 +tax! Join Stampin' Up! and build your own Starter Kit today!


Boo to You Zombie Card Supply List
Stamps
#150550 Boo to You (Cling-Mount)
Paper
#121045 Basic Black Cardstock
#100730 Whisper White Cardstock
#105117 Pumpkin Pie Cardstock
Ink
#132708 Momento Tuxedo Black Ink Pad
#144578 Light Pumpkin Pie Stampin’ Blend
#146876 Light Granny Apple Green Stampin’ Blend
#144582 Light Crumb Cake Stampin’ Blend
#146874 Light Soft Suede Stampin’ Blend
#145054 Light Smoky Slate Stampin’ Blend
Embellishments
#150448 Monster Bash Enamel Shapes
#104430 Dimensionals
Tools
#126889 Stampin’ Trimmer
#102300 Bone Folder
#103579 Paper Snips
#148551 Stitched Rectangle Dies
#139673 Woodlands Embossing Folder
Die Cutting Machine