Showing posts with label sending love. Show all posts

Monday, February 13, 2017

Valentine's Mailbox Treat Holder

When I think of Valentine's Day, I think of giving chocolate! I think of the sweetness of the holiday too, but most of all the candy! Valentine's Day is a perfect day to give your loved ones a little sweet treat. What better way to give your special someone than this adorable mailbox treat holder?!?!

Craft with Beth: Sending Love Valentine Mailbox Treat Holder

I have been making bunches and bunches of these cuties for my family, friends, and my doctor's and dentist's offices. This is also one of the treat holders we made at my Valentine's Day class.

Let's get started! Cut your cardstock. You will need Whisper White and Blushing Bride cardstock.

 Craft with Beth: Sending Love Valentine Mailbox Treat Holder


Sending Love Mailbox Treat Holder Measurements

Color
Dimensions
Mailbox Base
Blushing Bride
3-1/2” x 1”
Mailbox Cover
Whisper White
4-5/8” x 1-1/4
Flag
Blushing Bride
1-1/4” x 1/4"
Flag Heart Embellishment
Whisper White
1” x 1” or small scrap
Teeny Tiny Heart
Whisper White
1” x 1” or small scrap

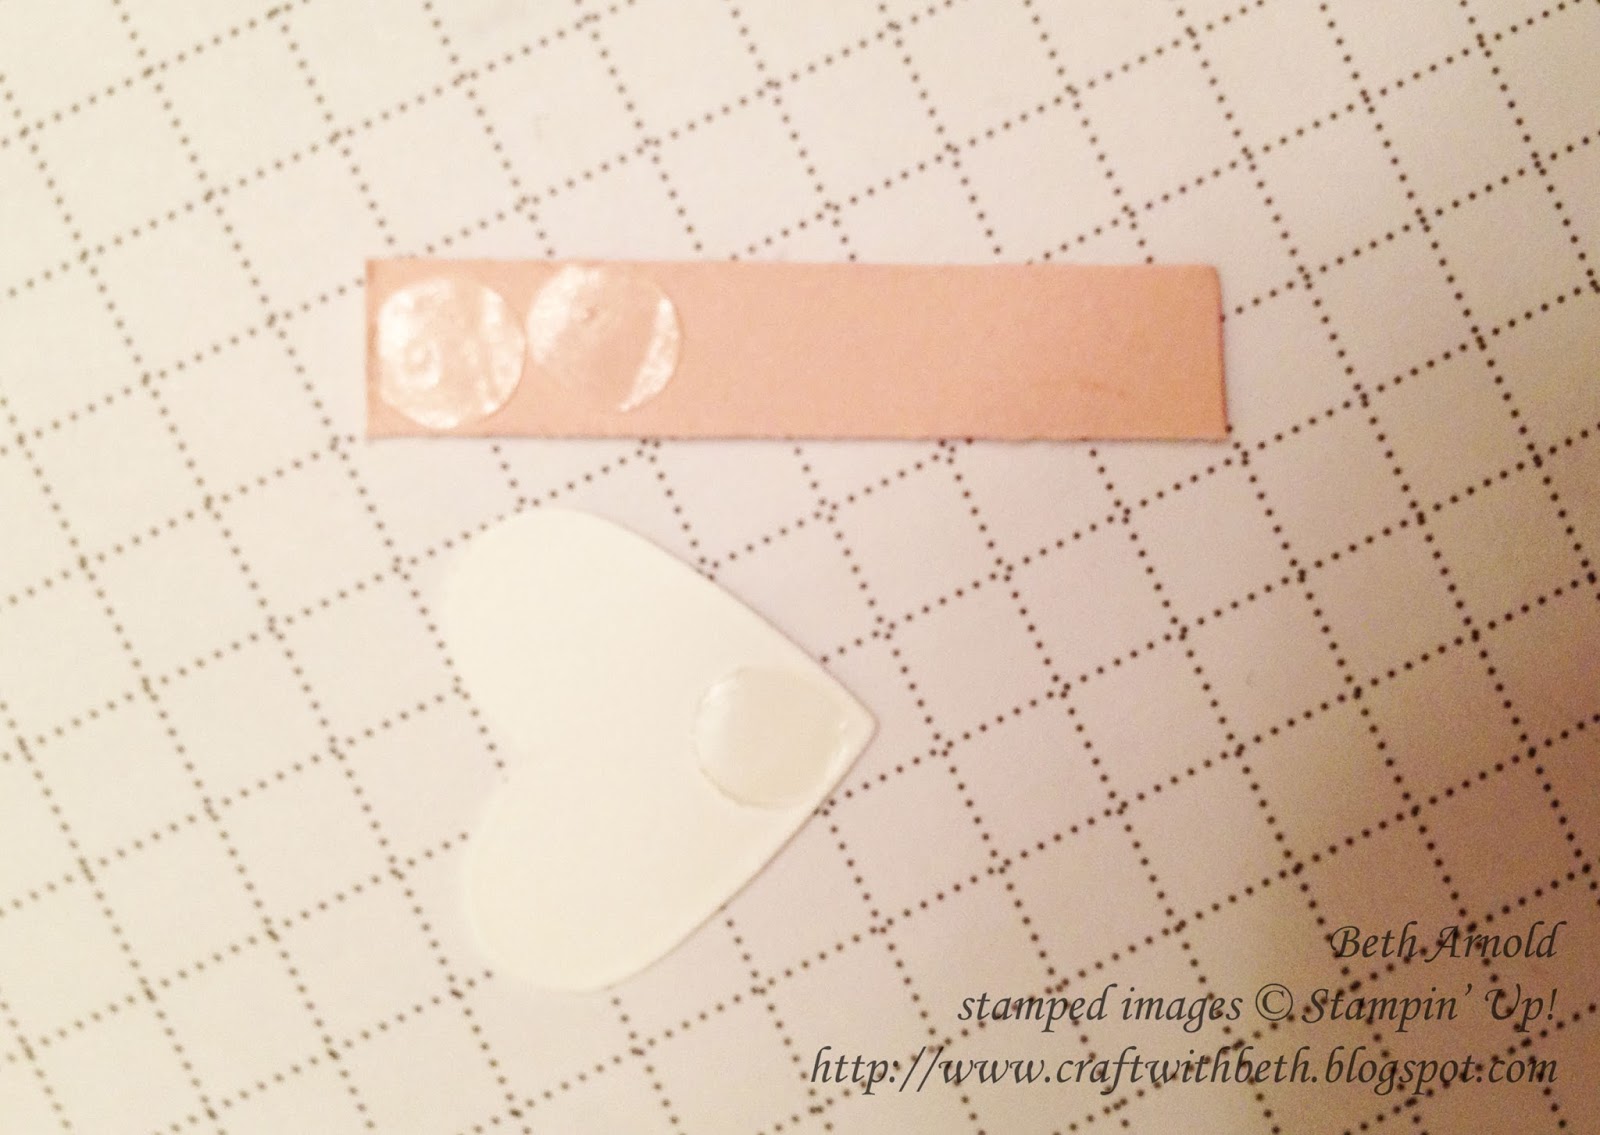
For the Flag Heart Embellishment, die cut the heart shape from the Sending Love Thinlits.

Score the Mailbox Base at 1-1/8" and at 2-3/8".

Craft with Beth: Sending Love Valentine Mailbox Treat Holder

Round the edges of both sides using the smallest circle die from the Layering Circles Framelits Collection. Insert one end of the Mailbox Base into the circle die so that the edge is barely on the cutting line on the die.

Craft with Beth: Sending Love Valentine Mailbox Treat Holder

Flip it over and run the Mailbox base through the Big Shot. Repeat on the other end. Now your Mailbox Base should look like a little bandage. Side this aside for now.

Craft with Beth: Sending Love Valentine Mailbox Treat Holder

Next score the Mailbox Cover at 5/8" and at 3-5/8".

Craft with Beth: Sending Love Valentine Mailbox Treat Holder

Stamp the Mailbox Cover with the heart medallion image in Blushing Bride ink in the center between the 2 score lines. Stamp the heart with the heart image with the small leaves and hearts in Blushing Bride ink.

Craft with Beth: Sending Love Valentine Mailbox Treat Holder

Put a strip of Tear and Tape on both ends on the back of the Mailbox Cover.

aft with Beth: Sending Love Valentine Mailbox Treat Holder

With your bone folder, curl the Mailbox Cover. This will make the shape of the mailbox.


Line up and adhere the 5/8" scored end of the Mailbox Cover with the edge of the Mailbox Base edge in the center of the score lines.

Craft with Beth: Sending Love Valentine Mailbox Treat Holder

Attach two chocolate nuggets together with a few glue dots. Then place them on the center of the Mailbox Base.


Wrap the Mailbox Cover around the nuggets and adhere the 3-5/8" score end to the underside of the Mailbox Base.

Craft with Beth: Sending Love Valentine Mailbox Treat Holder

Add a few glue dots to the back of the Mailbox base.

Craft with Beth: Sending Love Valentine Mailbox Treat Holder

Press the back of the Mailbox base up and adhere to the nuggets.

Craft with Beth: Sending Love Valentine Mailbox Treat Holder

Add glue dots to the base of the flag and the heart embellishment.


Stick the flag onto the side of the Mailbox Cover. Stick the heart embellishment on top of the flag. Punch a Whisper White heart from the Confetti Heart Punch and adhere to the open end of the Mailbox Base.


Once you make one mailbox, you will be quicker at each subsequent one.

For another variation, you can add a piece of patterned paper to the Mailbox Cover instead of just stamping it. Cut a 3" by 1" piece of Sending Love Designer Series Paper and adhere with Tear and Tape to the Mailbox Cover. Instead of a heart embellishment on the flag, cut a 1" by 3/4" piece of Whisper White and stamp it with the sending love image.

I hope you try this adorable treat holder! I would love to see what you create!

Thanks for stopping by!
Beth


Sending Love Mailbox Treat Holder Project Supply List
Stamps
#144705 Sending Love Bundle
Paper
#100730 Whisper White
#131198 Blushing Bride
Ink
#131172 Blushing Bride
Embellishments
Chocolate Nuggets
Tools
#143263 Big Shot
#126199 Stampin’ Pierce Mat
#126889 Stampin’ Trimmer
#141705 Layering Circles Framelits
#137415 Heart Confetti Punch
#103683 Glue Dots
 

Sunday, February 12, 2017

Cute & Quick Sending Love Card

This is a cute Valentine's Day card I created for my Stamp of the Month class. It uses the Sending Love stamp set and Designer Series Paper.

Craft with Beth: Sending Love Valentine's Day Card

I used Basic Black, Pool Party, Real Red, and Whisper White as my color scheme. The Pool Party adds a splash of brightness and freshness.

Craft with Beth: Sending Love Valentine's Day Color Scheme Palette

On the inside of the card I added the sending love sentiment and the larger heart image. I just love the two font combination on the sending love sentiment! It's neat but pretty. Too cute!

Craft with Beth: Sending Love Valentine's Day Card

This card comes together in no time at all! First cut your paper and your circles. I used the 2-11/16" circle and the 2-13/16" scalloped circle framelits from the Layering Circles Framelits Collection. I measured the inside of the die where the cutting line is to get these measurements.


Sending Love Valentine’s Day Card Measurements

Color
Dimensions
Card Base
Pool Party
5-1/2” x 8-1/2”; scored at 4-1/4”
Card Front
Whisper White
5-1/4” x 4”
Sending Love DSP Top Mat
Sending Love DSP
3-1/4” x 4”
Sending Love DSP Bottom Mat
Sending Love DSP
2” x 4”
Inside Mat
Whisper White
5-1/4” x 4”
Ribbon
Whisper White
4-1/2” long (strip) & 6” long (bow)
Circle
Whisper White
3-1/4” x 3-1/4”
Scalloped Circle
Real Red
3-1/4” x 3-1/4”

Stamp all of your images. I like to stamp before I adhere just in case I made a mistake. That way I can avoid having to start over.

Then adhere the Sending Love Designer Series Paper to the white card front. Then use glue dots to attach the ribbon to cover the seam where the two papers meet. Adding the white card front underneath the two pieces of Designer Series Paper creates a solid surface to attach the ribbon. Otherwise, it can be tricky to tuck the ribbon ends under two detached pieces of paper.

Adhere this to your Pool Party card base.

Attach the two circles together and adhere to the card front with dimensionals. Add a few enamel shapes to frame the sentiment. Then glue the bow on top of the ribbon.

Adhere the inside of the card, and you are finished. I hope you try this quick and cute Valentine's Day card!

Would you like to see more of the cards and projects that I create for the Stamp of the Month class? Sign up for my next Stamp of the Month class by contacting me today.

Thanks for stopping by!
Beth


Sending Love Valentine’s Card Project Supply List
Stamps
#144705 Sending Love Bundle
Paper
#121045 Basic Black
#100730 Whisper White
#122924 Pool Party
#102482 Real Red
Ink
#140931 Basic Black Archival
#126949 Real Red
Embellishments
#142737 Sending Love Ribbon Combo Pack
#141680 Brights Enamel Shapes
#141679 Subtles Enamel Shapes
Tools
#143263 Big Shot

#126199 Stampin’ Pierce Mat
#126889 Stampin’ Trimmer
#141705 Layering Circles Framelits