Showing posts with label support. Show all posts

Wednesday, June 22, 2022

You are Simply Fabulous Circle Easel Card

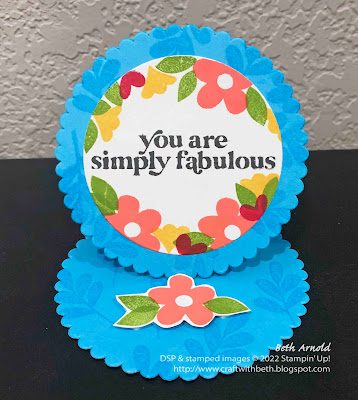
Today's project is a circle easel card featuring the Simply Fabulous stamp set. The Simply Fabulous stamp set is one of my top must-have stamp sets from the 2022-2023 Annual Catalog. It has cute little flowers and leaves stamps along with greetings perfect for friendship, encouragement, and celebration.

Simply Fabulous Circle Easel Card


The varied scale of the flowers and leaves stamps ranges from small to large and makes this a fantastic set for building bouquets, wreaths, clusters, and more! Use the larger flowers and leaves for focal images. Sprinkle in the smaller flowers and leaves to fill in the spaces between to create a cohesive bouquet or wreath!

Simply Fabulous Circle Easel Card


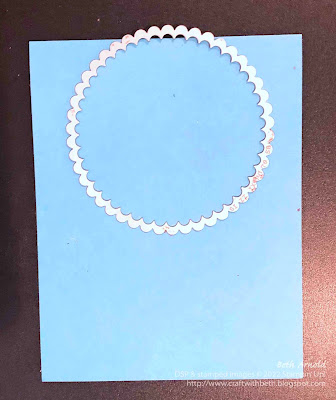
The base for the circle easel card is made of two connected scalloped circles. To connect the scalloped circles, I cut a piece of Tahitian Tide cardstock and folded it in half, then I placed the largest Layering Circle die on the Tahitian Tide cardstock with about 1/8" of the die above the fold, and ran it through the Stampin' Cut & Emboss Machine.

Simply Fabulous Circle Easel Card


Moving the topmost edge of the scalloped circle die above the fold line means that the area that the die is not touching the cardstock will not be cut.

Simply Fabulous Circle Easel Card


A second scalloped circle is die cut and adhered to one of the card base scallop circles to make the easel stand up.

 
Below are the measurements and supplies to recreate this Simply Fabulous Circle Easel Card.

Measurements

  • Card Base: 4-1/4" x 8"; scored at 4" (Tahitian Tide Cardstock)
  • Scalloped Circle: 3-1/2" x 3-1/2" (Tahitian Tide Cardstock)
  • Circles: 5" x 2-3/4" (Basic White Cardstock) - cut 2 of the 2-3/8" circles from this piece of cardstock and cut 1 of them in half
  • Stopper: 2" x 3"


Supplies

#159133 Simply Fabuous Stamp Set
#159261 Tahitian Tide Cardstock
#102283 Versamark Watermark Ink Pad
#147052 Flirty Flamingo Ink Pad
#147094 Daffodil Delight Ink Pad
#147095 Granny Apple Green Ink Pad
#147051 Melon Mambo Ink Pad
#132708 Momento Tuxedo Black Ink Pad
#104430 Dimensionals
#110755 Multipurpose Liquid Glue
#102300 Bone Folder
#103579 Paper Snips
#130148 Grid Paper
#152392 Paper Trimmer
#149653 Stampin' Cut & Emboss Machine
#118487 Clear Block A
#117147 Clear Block B
#118490 Clear Block H
#151770 Layering Circle Dies


A circle easel card makes a great display card. I chose "You are simply fabulous" for the greeting on this circle easel card. It is a kind reminder that we are fabulous too! It can be easy to focus more on the care of others and forget to care for and appreciate yourself too. This card could be a visual reminder that you are simply fabulous too!

I hope you give this circle easel a card and make one for each of your best friends! I think you will really enjoy stamping with the Simply Fabulous stamp set! If you need supplies to make this card, please, shop my online store HERE.

If you have any questions about today's project, please, don't hesitate to ask me. I am happy to help you with your stamping questions!

Thanks for stopping by! Have a great day!
Beth
Friday, June 17, 2022

Stamped and Sponged Beauty of Friendship Card

There are some times when we need encouragement or support in trying or difficult times. I created this card as a thinking of you and support card for those times. I was inspired by the beautiful trees and the bright sunny days that we have been having lately and how much joy a warm sunny day brings me. 


Beauty of Friendship Encouragement Thinking of You Support Card Sponging Blending Brushes Masking Reverse Masking

Looking up at the sky, seeing the trees circled around me and the sun above seemed like kind friends. The inside of the card is stamped with a tree in the lower left corner, leaving room for a comforting message.


Beauty of Friendship Encouragement Thinking of You Support Card Sponging Blending Brushes Masking Reverse Masking

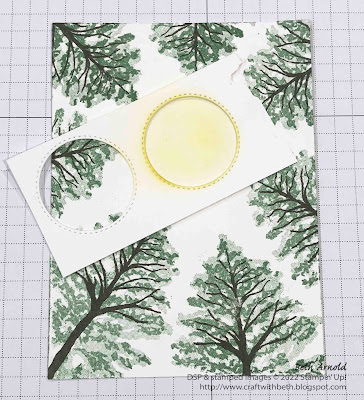
The looking up at the tree and sun scene is created by first stamping the tree leaves and tree trunk images around the edges of the 2nd Mat. I knew where I wanted to place the sun, so I was careful to leave plenty of room for the sun.

Next I created a mask and a reverse mask for the sun. I used a piece of Basic White cardstock and die cut the 2nd smallest stitched circle from it. I kept both the circle die cut and the piece of cardstock. The piece of cardstock with the circle cut out of it will become the mask. I used a blending brush to sponge So Saffron ink through the mask to make a sun shape.


Beauty of Friendship Encouragement Thinking of You Support Card Sponging Blending Brushes Masking Reverse Masking


Then I removed the mask and replaced it with the reverse mask - the circle die cut. I added the tiniest bit of Stampin' Seal adhesive to the back of the circle die cut to temporarily attach the circle die cut to the 2nd Mat. The circle die cut will keep the ink from covering the sun area while I sponged the sky.

I lightly added Tahitian Tide ink to a blending brush and applied it to the 2nd Mat in a swirling motion. I left some areas with patches of the white cardstock showing through to give the idea of sunlight shining through a whisper of clouds.


Beauty of Friendship Encouragement Thinking of You Support Card Sponging Blending Brushes Masking Reverse Masking


The greeting with stamped on a piece of Basic White cardstock and added to the lower right corner of the 2nd Mat. The 2nd Mat was adhered to the center of the 1st Mat and then to the card front.

You can use sticky note paper or computer paper in place of the Basic White cardstock for the mask and reverse mask. I had cut an extra circle for another project that I ended up not using, so it was right next to me on my desk.

Below are the measurements and supply list for this stamped and sponged Beauty of Friendship card.


Measurements

  • Card Base: 4-1/4" x 11"; scored at 5-1/2" (Thick Basic White Cardstock)
  • 1st Mat: 4" x 5-1/4" (Early Espresso Cardstock)
  • 2nd Mat: 3-5/8" x 4-7/8" (Basic White Cardstock)
  • Greeting: 1/2" x 1-3/4" (Basic White Cardstock)
  • Circle Mask/Reverse Mask: 2" x 3" (Basic White Cardstock, sticky note paper, or computer paper) - use the 2nd smallest stitched circle die


Supplies

  • #154983 Beauty of Friendship Stamp Set
  • #159229 Thick Basic White Cardstock
  • #119686 Early Espresso Cardstock
  • #159276 Basic White Cardstock
  • #147089 Garden Green Ink Pad
  • #159210 Tahitian Tide Ink Pad
  • #147109 So Saffron Ink Pad
  • #147114 Early Espresso Ink Pad
  • #110755 Multipurpose Liquid Glue
  • #152813 Stampin' Seal Adhesive
  • #118485 Clear Block D
  • #118490 Clear Block H
  • #118489 Clear Block G
  • #102300 Bone Folder
  • #103579 Paper Snips
  • #130148 Grid Paper
  • #152392 Paper Trimmer
  • #149653 Stampin' Cut & Emboss Machine
  • #159183 Stylish Shapes Dies
  • #153611 Blending Brushes 
  • Optional: sticky note paper or computer paper


I hope you enjoyed today's card! I hope you give this stamped and sponged Beauty of Friendship card a try! If you need supplies to make this card, please shop my online store HERE

Thanks for stopping by!

Beth


Monday, April 27, 2020

Patchwork Ornate Garden Friendship Card

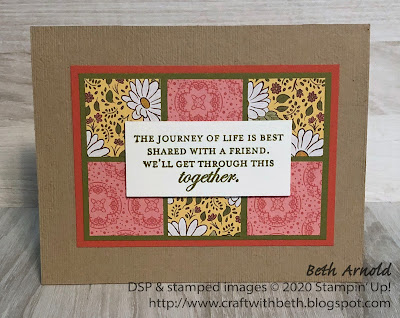
Today's card highlights the Ornate Garden Product Suite as well as the Good, Morning Magnolia stamp set. My favorite greeting from Good, Morning Magnolia, "The journey of life is best shared with a friend. We'll get through this together," is reassuring during these stressful times, especially when we are far apart from each other.

Craft with Beth: Stampin' Up! stamping card Ornate Garden Specialty Designer Series Paper Good Morning Magnolia stamp set friendship support thinking of you Subtle 3D Embossing Folder patchwork dsp Designer Series Paper

I used the Ornate Garden Specialty Designer Series Paper in a patchwork pattern with sashing between each square or a tile pattern with spacing or "grout" between each square.

Ornate Garden Friendship Card Measurements

Paper
Dimensions
Card Base
Crumb Cake Cardstock
8-1/2” x 5-1/2”; scored at 4-1/4” & 4-1/4" x 5-1/2"
1st Mat
Old Olive Cardstock or Terracotta Tile Cardstock
4-3/8” x 3”
2nd Mat
Old Olive Cardstock or Terracotta Tile Cardstock
4-1/8”x 2-3/4”
Squares (cut 6)
Ornate Garden Specialty DSP
1-1/4” x 1-1/4”
Greeting
Whisper White Cardstock
2-3/4” x 1-1/4”
Inside Mat
Whisper White Cardstock
4” x 5-1/4”
DSP Inside Mat
Ornate Garden Specialty DSP
3/4" x 4"

This inside of the card is decorated with a strip of Ornate Garden Specialty Designer Series Paper with the same sweet daisy pattern, leaving room for a special message.

Craft with Beth: Stampin' Up! stamping card Ornate Garden Specialty Designer Series Paper Good Morning Magnolia stamp set friendship support thinking of you Subtle 3D Embossing Folder patchwork dsp Designer Series Paper

The card base is embossed with the Subtle 3D Embossing Folder. Let me tell you! This is my favorite texture embossing folder of all time! Yes, it's true! This is my all time favorite texture embossing folder!

Craft with Beth: Stampin' Up! stamping card Ornate Garden Specialty Designer Series Paper Good Morning Magnolia stamp set friendship support thinking of you Subtle 3D Embossing Folder patchwork dsp Designer Series Paper

It adds that little extra something special without detracting from the rest of the design. Plus, the texture looks beautiful whether this embossing folder is used horizontally or vertically and on the embossed side or the debossed side.

I embossed a separate 4-1/4" x 5-1/2" piece of Crumb Cake cardstock and adhered it to the front. You can emboss the whole card front instead too.

Craft with Beth: Stampin' Up! stamping card Ornate Garden Specialty Designer Series Paper Good Morning Magnolia stamp set friendship support thinking of you Subtle 3D Embossing Folder patchwork dsp Designer Series Paper

I enjoyed creating with the patterned paper with the small daisies on the Bumble Bee background so much that I made two different variations of this patchwork card. The card pictured below on the right has a patchwork of squares that together form a compete picture.

The card pictured below on the left has two different sides of the same patterned paper in a staggered pattern. The Terracotta Tile and the Old Olive cardstock orders are also switched on both cards. The "grout" on one card is Old Olive and Terracotta Tile on the other.

Craft with Beth: Stampin' Up! stamping card Ornate Garden Specialty Designer Series Paper Good Morning Magnolia stamp set friendship support thinking of you Subtle 3D Embossing Folder patchwork dsp Designer Series Paper

Which card do you like best - the card on the left with 2 patterned papers or the one on the right with 1 patterned paper? Let me know which card you like best in the comments below!

I hope you give this patchwork Designer Series Paper card a try. What patterned papers will you use? I would love to see what you create! Post a project photo on my Facebook page today! I can't wait to see what you create!

Thanks for stopping by!
Beth

Ornate Garden Friendship Card Supply List
Stamps
#149298 Good, Morning Magnolia (Cling-Mount) or #151087 Good, Morning Magnolia BUNDLE
Paper
#100730 Whisper White Cardstock
#120953 Crumb Cake Cardstock
#100702 Old Olive Cardstock
#150884 Terracotta Tile Cardstock
#152488 Ornate Garden Specialty Designer Series Paper
Ink
#147090 Old Olive Ink Pad
Embellishments
#104430 Dimensionals
Tools
#152392 Stampin’ Trimmer
#102300 Bone Folder
#103579 Paper Snips
#149658 3D Embossing Plate (Only if you have the NEW style of 3D Embossing Folders)
Die Cutting Machine