Wednesday, April 27, 2022

Sneak Peek: Tea Boutique Tea Boxes

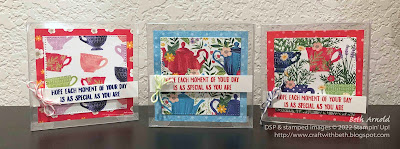
Tea Boutique Designer Series Paper Tea Bag Box


One of my favorite things that I look forward to in each new Annual Catalog are the new In Colors! It is fun to see what new and trendy colors Stampin' Up! will offer! The 2022-2024 are bold, vibrant, and beautiful! The five new colors are Parakeet Party, Tahitian Tide, Sweet Sorbet, Starry Sky, and Orchid Oasis.

2022-2024 In Colors graphic

Today's tea box project was inspired by the 2022-2024 In Colors and my love of tea. I love how they are featured in the Tea Boutique Designer Series Paper (#158659). Tea cups and tea pots are paired with flowers, leaves, and stems.


Tea Boutique Designer Series Paper Graphic


It is a sweet, well done designers series paper! The scale of each pattern is perfect and easy to use on a variety of smaller and larger projects without losing the detail of the overall pattern, which can be difficult with the smaller 6" x 6" designer series paper packs. I love the paper with the flowers inside of the envelopes!


Tea Boutique Designer Series Paper Tea Bag Box


The 3-1/8" Acetate Card Boxes can hold 4-5 tea bags, depending on their size and how much tea is in each bag. You can also add 3" x 3" cards and envelopes, chocolates, or small gifts instead of tea.


Measurements

  • Treat Box Base - 3-1/8" x 3-1/8" Ace Card Boxes (#150428 - retiring)
  • 1st Mat - 2-3/4" x 2-3/4" (Tea Boutique Designer Series Paper)
  • 2nd Mat - 2-3/4" x 2-3/4" (Tea Boutique Designer Series Paper) - die cut with the 2-3/8" x 2-3/8" Stylish Shapes square die
  • Greeting - 1/2" x 3" (Basic White cardstock)


Materials

  • #155090 Garden Birdhouses Stamp Set
  • #158659 Tea Boutique Designer Series Paper
  • #159276 Basic White Cardstock
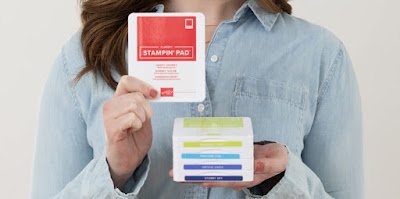
  • #159216 Sweet Sorbet Ink Pad
  • #159212 Starry Sky Ink Pad
  • #154031 Tear and Tape Adhesive
  • #104430 Dimensionals
  • #159195 2022-2024 In Color Baker's Twine Pack
  • #150428 3-1/8" x 3-1/8" Acetate Card Boxes (retiring)
  • Teabags


I can imagine bringing a few of these tea boxes to a friend's house for an afternoon cuppa! I hope you enjoyed today's Tea Boutique Tea Boxes and create your own tea boxes! You can customize your tea boxes with any of the papers in the Tea Boutique Designer Series Paper pack or use your favorite designer series papers. 


If you would like to purchase the supplies used for today's project, please call me to place an order or you can shop my online store HERE.


Thanks for stopping by!

Beth
Friday, April 22, 2022

Q & A: How I Make Large Amounts of Treat Holders

One of my favorite types of papercrafting projects is a treat holder. I enjoy making treat holders for different holidays and occasions. I try to make a variety of treat containers, including boxes, bags, and pockets, that fit specific types of treats. Most often the treat is candy! 


May Day Flower Peanut Butter Treats Daiy Punch Treat Holder


And, of course, you can't just make one treat holder. I make quite a large number of treat holders for each holiday and occasion and give them to family, friends, customers, and community members. 


I get a lot of questions from my family, friends, and customers about how I make my treat holders. One of the most frequent questions I get is "how do I make so many treat holders all at once?". The answer is organized batching. I make a prototype, break it down into basic components, and make a plan for each step. Let's look at my thought process further.


Make a Treat Holder Prototype

The first step is to design the treat holder itself. Determine what kind of shape you would like the treat holder to be. Use grid paper to make a to-scale drawing or sketch it on a piece of paper. Once you are happy with your design, make a treat holder prototype. The prototype should be the actual size of your treat holder designer.

Tip: Write down your measurements for each part of the treat holder. Keep those measurements handy to refer to when cutting cardstock and designer series paper.


Break Down the Steps to Make the Treat Holder

Next, think about the steps it took to create your treat holder. Did you cut cardstock? Did you score or die cut? Make a list of each step. It is ok to have simple steps, such as place the candy in the box or score at 2". 

Tip: Breaking down the steps makes your preparation and assembly more efficient and less overwhelming.


Prepare One Step at a Time

Once you have your list of steps to prepare and make your treat holder, it is time to cut your materials and gather your supplies. Cut one step at a time. For example, if you have 3 parts to your treat holder, cut all of part 1, then all of part 2, and finally all of part 3. Keep your measurements close by to refer to.

Tip: If the treat holder has both scoring and cutting, I will score all of the pieces and then cut all of the pieces instead of scoring and cutting one piece at a time. 


May Day Flower Peanut Butter Treats Daiy Punch


Assemble One Step at a Time

Clear your workspace or table before beginning the preparation. Be sure to have plenty of room for each step's pieces, punches, die cuts, etc. Complete one step for each of the treat holders. Then move on to the next step and so on.

Tip: Have a landing area ready to hold completed treat holders such as a tray, a large bowl, or a platter to keep the clutter down and to avoid knocking a treat holder on the floor.


Sometimes, I will put on music, a podcast, or the tv. I catch up the latest episodes of my favorite shows while I assemble treat holders.


I hope this post helps you to see how I make large numbers of treat holders. What stamping questions do you have? Email your stamping questions. I would love to help answer your stamping questions in a future blog post!

Thanks for stopping by!

Beth

Friday, April 15, 2022

How I Store Cardstock and Cardstock Scraps

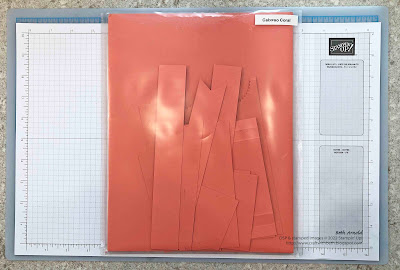
I like to store my 8-1/2" x 11" cardstock in clear job ticket holders like Jennifer McGuire. I also like to keep my scraps with the full sheets of cardstock. 


Cardstock sheets in a clear job ticket holder
 

I found my job ticket holders at my local office supply store, but you can also find them online. I have used the regular thickness and the heavy duty thickness over the last several years. I find both thicknesses to be well-suited to holding a full pack of solid cardstock (24 sheets) as well as a full pack of Basic White cardstock (40 sheets) plus scraps. 


Storing my scraps with my full sheets of cardstock helps me

  • to remember what color that scraps are, 
  • to use the scraps on a more regular basis, and
  • to not feel as if I am wasting as much paper.


I save small and large scraps. I like to die cut and punch different shapes, especially for treat holders and for classes. So, it makes sense for me to save smaller pieces too. I allow myself a period of time to keep it to see if I use and then toss after that time period is up without judgment (but limited to only one job ticket holder per color of cardstock).


Once I have more scraps in the clear envelope than full sheets of cardstock, I re-evaluate what scraps I still have. 


empyting out the paper scraps from the job ticket holder


I take all of the scraps out of the job ticket holder and sort them. If I haven't used it and it is a smaller scrap, I will toss it. 


sorted paper scraps
 

Then I put a new pack of full sheets of cardstock into the job ticket holder, followed by the remaining scraps (if there are any, and sometimes there isn't).


clear job ticket holder refilled with cardstock sheets and scraps

Keeping scraps is a personal choice and even which scraps to keep can vary from crafter to crafter. What size(s) of scraps one keeps can range from teeny tiny to not having scraps smaller than 3" square. 


Your crafting style can help you determine which scraps you keep and which you toss. If you do a lot of small die cutting, it may be beneficial to keep smaller scraps. If you do a lot of larger sized cards and die cutting, it may be beneficial to keep more of the larger scraps. This can even change as your crafting style changes or the types of projects you are making changes. 


How do you store your cardstock? How do you feel about scraps? Do you keep scraps? If so, do you store them with your full sheets of cardstock or in a separate storage system? I would love to hear how you store your cardstock and scraps! Leave me a comment below!


Thanks for stopping by!

Beth
Sunday, April 10, 2022

Second Sunday Sketches #36 Starts Today!

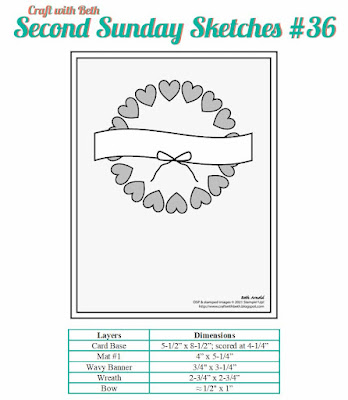
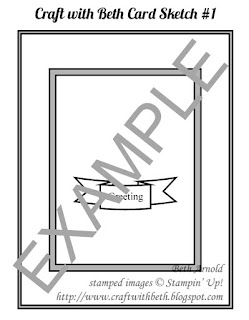
 Craft with Beth Second Sunday Sketches graphic title graphic banner card sketch challenge with measurements


It is time for another Second Sunday Sketches challenge! If you are new to Second Sunday Sketches, please review the rules here or below. Each second Sunday of the month, I will post a card sketch. A sketch is graphic or drawing of how the elements of a card are arranged.

Craft with Beth: Stampin' Up! Second Sunday Sketches sketch card sketch challenge sample graphic

You will then use the sketch as a guide to create your own card. Your card must be a new creation and reflect the challenge guidelines. Your card must include the major elements of the card sketch, such as the number of layers and the general position of the embellishments and/or die cuts. You can rotate the sketch for a top-folding card or for a side-folding card.

You choose the occasion and the color palette as well as the stamp set(s) and the embellishments. I do ask that you use Stampin' Up! products (current or retired).

The measurements will also be included in the blog post for each Second Sunday Sketches sketch challenge. You can use the measurements as given or increase them or decrease them. For example, if a greeting is stamped on a 1" circle on the sketch, but the greeting you choose is 1-3/4", then increase the size of the circle to 1-3/4". You can also change the shape. Instead of a circle, you can use an oval, a square, a daisy punch, a monogram, etc.

The challenge will run from the second Sunday of the month until the last day of that month.

Below is April's card sketch.

Craft with Beth: Stampin' Up! Second Sunday Sketches card sketch challenge graphic #36 with measurements

Challenge Dates

April's challenge will run from April 10th, 2022 until April 30th, 2022 at 5pm EDT.

If you would like to participate in the Second Sunday Sketches sketch challenge, please create a card using the sketch above and email me a photo of your card by April 30th, 2022 at 5pm EDT with the subject line Second Sunday Sketches Entry.

Prize Drawing

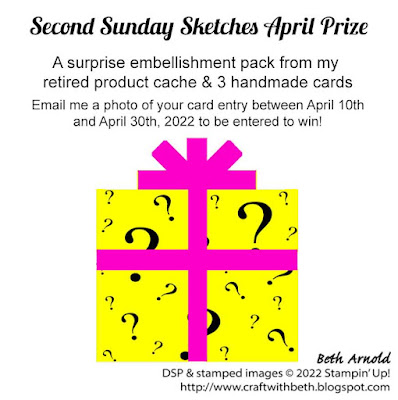
The day after the last day of the month (May 1st), I will place all of the names of the participants in a proverbial hat and randomly draw a winner. The winner will receive a prize (US Residents only)! The prize each month will change and will be announced at the start of each challenge. April's Second Sunday Sketches sketch challenge prize is a surprise embellishment pack from my retired product cache and three hand-made cards from me.

Craft with Beth: Stampin' Up! April 2022 Second Sunday Sketches #36 card challenge sketch challenge prize graphic

Winner Announcement

If you are the winner, I will notify you by email. Please respond to my email with your complete mailing address, and I will mail you your prize! If the winner does not respond to my email within 7 days, I will draw another winner.

I will also post all of the entries on my blog (with your names attached to the photos) and the name of the winner.


Some Ideas on How to Make this Card Sketch Your Own

There are many ways to change this card to make it your own! You can rotate the card layout 90 degrees,make the banner longer or shorter, use a circle die to make the wreath shape, add a mat layer beneath the wreath, use embossing folders to add more texture to a mat layer, and more!

Share Second Sunday Sketches with a Friend

Be sure to join in on the fun and share with a friend! If you enter the Second Sunday Sketches challenge, you can get a bonus surprise prize by sharing this challenge with a friend (for US residents only)! Here's how to get a bonus surprise prize. Limit two bonus surprise prizes per person per month.
  1. Enter into this month's Second Sunday Sketches challenge
  2. Share this month's Second Sunday Sketches challenge with a friend (that hasn't participated before)
  3. Have your friend submit their this month's challenge card entry
  4. Email me that your friend has submitted their card entry. Submit your complete mailing address and the name of the friend that you shared with. I will confirm their entry and then send you a bonus surprise prize.

I am looking forward to seeing your personal take on the 36th Second Sunday Sketches sketch challenge! If you have any questions about this card sketch challenge, please let me know! I am happy to assist!

Happy Stamping!
Beth

Friday, April 1, 2022

The Winner of the Second Sunday Sketches #35 is...

Toni Shaw! Congratulations, Toni! Toni is the winner of the 35th Second Sunday Sketches card sketch challenge! Your prize, a mystery embellishment pack from my retired cache and 3 handmade cards, will be in the mail on Monday, April 4th, 2022.


Craft with Beth Second Sunday Sketches #35 card entry Easter card Toni Shaw card sketch challenge with measurements


The Easter greeting stamp is so cute, especially with the grass stamp and the bunny die cut! The marble designer series paper is perfect for springtime and sunny days!

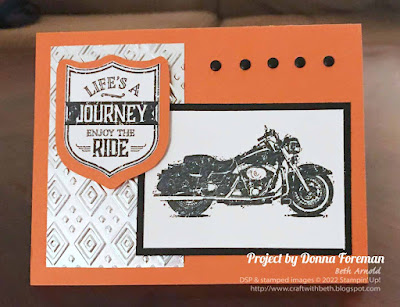
Check out the other entries for the 35th Second Sunday Sketch card challenge. I love Donna's motorcycle card, especially the iconic orange, white, and black color palette! The embossing folder is a fantastic textural element! Turning the card sketch sideways was a great idea too! Well done everyone!


Craft with Beth Second Sunday Sketches #35 card entry motorcycle card Donna Foreman card sketch challenge with measurements


Want more Second Sunday Sketches? 

The next Second Sunday Sketches card challenge starts on April 10th, 2022. The prize will be a mystery embellishment package from my retired product cache and 3 handmade cards from me.

Craft with Beth Second Sunday Sketches April 2022 Prize Graphic

Share Second Sunday Sketches with a Friend

Be sure to join in on the fun and share with a friend! If you enter the Second Sunday Sketches challenge, you can get a bonus surprise prize by sharing this challenge with a friend (for US residents only)! Here's how to get a bonus surprise prize. Limit two bonus surprise prizes per person per month.
  1. Enter into April's Second Sunday Sketches challenge
  2. Share April's Second Sunday Sketches challenge with a friend
  3. Have your friend submit their April's challenge card entry. Email me that your friend has submitted their card entry. Submit your complete mailing address and the name of the friend that you shared with. I will confirm their entry and then send you a bonus surprise prize 1-3 business days after I draw April's winner.


Happy Stamping!
Beth

P.S. Ever wonder how I draw for the Second Sunday Sketches winner? I use an app called Tiny Decisions. I input all of the names of the participants onto the wheel and spin it. The name that the wheel stops on is the winner.