Showing posts with label blending. Show all posts

Friday, June 24, 2022

Sneak Peek: Scary Cute Sponged & Embossed Halloween Card

Are you ready for another sneak peek from the 2022 July-December Mini Catalog? Today's card features the Scary Cute Stamp Set and Scary Silhouette Dies as well as sponging with the blending brushes and embossing with the Simply Scored Scoring Tool.

Scary Cute Scary Silhouette Dies Halloween Card Sponging Blending Brushes Embossing


Did you know that you can create embossed patterns with the Simply Scored Scoring Tool? That's right! You can! I used the Simply Scored Scoring Tool to create an embossed grid on a piece of Smoky Slate cardstock. I placed the Smoky Slate cardstock in the upper left corner of the Simply Scored and scored every 1/4" across the cardstock. Then I rotated the cardstock 90 degrees and scored every 1/4" across the cardstock. This created an embossed grid pattern.

Scary Cute Scary Silhouette Dies Halloween Card Sponging Blending Brushes Embossing


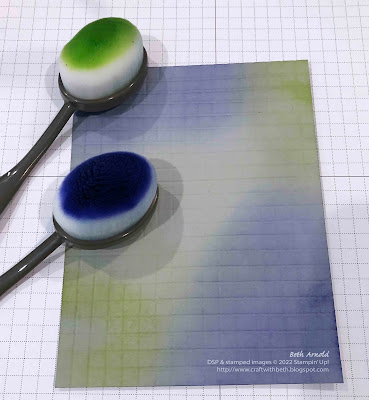
Next I sponged Starry Sky and Parakeet Party around the edges of the Smoky Slate cardstock to highlight the embossed grid pattern.

I also sponged the Parakeet Party ink all over the Basic White cardstock mat with the stamped Frankenstein's monsters cardstock mat and Orchid Oasis ink around the edges to give it a creepy Halloween glow to the center.

On the inside of the Card Base I stamped the moon image in the upper right corner and the group of trick-or-treaters in the lower left corner with Momento Tuxedo Black in. It looks like the moon was not stamped correctly, however, this is the texture of the stamp. I also got a "seagull" or an extra line of ink around the right side of the trick-or-treaters.

Scary Cute Scary Silhouette Dies Halloween Card Sponging Blending Brushes Embossing


This extra line of ink is from pressing the stamp into the ink pad too hard and from rocking the stamp's edges into the stamp pad. My best friend's mom calls these extra lines of ink "seagulls".

Instead of editing the photo to remove the "seagull," I am leaving it in for two reasons.

  • One reason is that even demonstrators and stampers that have been stamping for a long time make stamping mistakes.
  • The second reason is that the "seagull" acts as a motion or action line, giving the impression that the trick-or-treaters are running to get more candy. It is a great way to make a stamping mistake into a design element. That is the story, and I am sticking with! Lol!


Below are the measurements and supplies to recreate this sponged and emboss Scary Cute Halloween card.

Measurements

  • Card Base: 4-1/4" x 11"; scored at 5-1/2" (Thick Basic White Cardstock)
  • 1st Mat: 4-1/4" x 5-1/2" (Smoky Slate Cardstock)
  • 2nd Mat: 3-3/4" x 5" (Orchid Oasis Cardstock)
  • 3rd Mat: 3-5/8" x 4-7/8" (Basic White Cardstock)
  • Greeting: 2-1/4" x 1-1/4" (Orchid Oasis Cardstock)
  • Greeting Banner: 1/4" x 2-1/2" (Basic White Cardstock)


Supplies

#159850 Scary Cute Stamp Set (also available as a bundle - #159852 Scary Cute Bundle)
#159276 Basic White Cardstock
#159229 Thick Basic White Cardstock
#159267 Orchid Oasis Cardstock
#131202 Smoky Slate Cardstock
#132708 Memento Tuxedo Black Ink Pad
#159214 Orchid Oasis Ink Pad
#159208 Parakeet Party Ink Pad
#104430 Dimensionals
#110755 Multipurpose Liquid Glue
#102300 Bone Folder
#103579 Paper Snips
#130148 Grid Paper
#152392 Paper Trimmer
#149653 Stampin' Cut & Emboss Machine
#118487 Clear Block A
#117147 Clear Block B
#118486 Clear Block C
#153611 Blending Brushes
#159851 Scary Silhouette Dies


I know I will be making more of these cards for my favorite tricker-or-treaters! The Scary Cute stamp set will be in the July-December Mini Catalog which is debuting on July 1st - only a week away. I hope you enjoyed today's Scary Cute Halloween card and add the Scary Cute Bundle to your wish list!  Then shop my online store HERE starting July 1st.

If you have any questions about today's project, please, don't hesitate to ask me. I am happy to help you with your stamping questions!

Thanks for stopping by! Have a great day!
Beth

Wednesday, November 1, 2017

Stampin' Blends are here!

I am so excited I can barely contain myself! Stampin' Up! debuted their new alcohol based markers Stampin' Blends today!


Stampin' Blends are a fantastic new line of alcohol based markers to help you add color, shading, depth, and blending to your stamped images.

 Craft with Beth: Stampin' Blends Marker Collection

There will be 12 different colors that coordinate with existing Stampin' Up! colors.

Craft with Beth: Stampin' Blends Alcohol Markers Debut Colors Chart

Each of the 12 colors will have 2 shades - one lighter shade and one darker shade.
 
Craft with Beth: Stampin' Blends Alcohol Markers

In addition, there will be a bronze, an ivory, and a colorlifter marker. In total, there will be 26 markers.

Craft with Beth: Stampin' Blends Alcohol Markers Debut Colors Chart

Stampin' Blends are dual-tipped with a brush on one end and a fine point on the other end.

Craft with Beth: Stampin' Blends Alcohol Markers

They are more square than round and will lay flat on the table instead of rolling. The caps will nest. So, no worries about losing a cap easily.

Craft with Beth: Stampin' Blends Alcohol Markers

The Color Lifter Marker can take some of the saturation away and almost "erase" small mistakes. It reminds me of the sun collages with the special light reactive paper or a slight bleach effect.

Craft with Beth: Stampin' Blends Alcohol Markers

Notice how the two shades of Rich Razzleberry remain distinct even when the darker shade is applied directly on top of the lighter shade.

The bronze and ivory Stampin' Blends are designed to be used to create skin tones. You can combine the two colors together, use them singularly, or with the color lifter. 

Why are alcohol based Stampin' Blends so special?
  • The alcohol base allows for more shading and blending when coloring stamped images. It creates a smoother gradient between the shades to make highlights and shadows without clouding the colors
  • Alcohol based markers also do not react with your paper, avoiding tears and felting you often see with a blender pen.
  • Alcohol based markers on permanent on most surfaces.
  • Alcohol markers have dye-based pigments that have a more vibrant color saturation.
  • Coloring books for adults have become more and more popular over the last few years. Many stamps have also changed to include more opportunities for coloring and shading. Waterbased markers are amazing. I use them quite a bit in my stamping and will continue to do so, for sure. However, they can be limiting when it comes to finer shading and blending. So, the need for a more specialized marker is apparent. If you enjoy coloring with shading and blending, these are definitely markers to have in your craft room.

Here are tips to remember when using and storing your Stampin' Blends markers.
  • Store your Stampin' Blenders markers horizontally so that the ink saturates both ends
  • Place the cap on as soon as you are finished using the marker to avoid evaporation. Push the cap completely down. You should hear a click.
  • Alcohol markers dry quickly, so work in small areas on your stamped image at a time
  • If coloring heat embossed images, avoid coloring over the embossed lines. If you do, wipe quickly with a paper towel or soft cloth.
  • Place the cap on tightly and securely to avoid evaporation
  • Alcohol markers like many other markers are UV light sensitive, so be sure to keep them and your projects out of direct sunlight to avoid fading
  • Use Stampin' Blends Markers with ink pads that will not run or smear such as Tuxedo Black Momento Ink. Tuxedo Black Momento Ink is a quick-drying, combination water and dye based ink pad that is water and light resistant. It is also archival quality. Wait a few moments before coloring to allow the ink to dry.
  • Use thicker paper such as Thick Whisper White cardstock and Watercolor Paper to avoid the markers bleeding through the paper but experiment with vellum, glossy cardstock, and other colors of cardstock to achieve the look you want
  • Stampin' Blends are not refillable
  • Protect your work surface with grid paper or other protective mats

Most of all, have fun. Stamp a bunch of images such as flowers, trees, animals, etc and try out different color combinations and shading angles.

Craft with Beth: Stampin' Blends Alcohol Markers Debut Colors Chart Template

I created a sample chart template to see all of your Stampin' Blends colors at a glance and practice blending. Print out the template with Thick Whisper White cardstock (make sure your printer can accept this weight of paper before printing).

To help you practice using your Stampin' Blends there is a card kit and stamp set called Color Me Happy. It features several of the new Stampin' Blends markers to create 16 gorgeous cards.

Craft with Beth: Color Me Happy Stampin' Blends Project Kit Graphic Stampin Up

Click here to download the Stampin' Blends brochure.

I will have all of the Stampin' Blends markers and the kit samples available to view and try on Saturday, November 4th during my Annual Birthday Sale.

Craft with Beth: Stampin' Blends alcohol markers debut today! stampin' up

Thanks for stopping by!
Beth