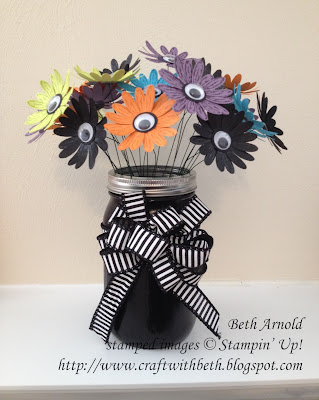
I used traditional as well as newer Halloween colors - Basic Black, Pumpkin Pie, Tempting Turquoise, Perfect Plum, and Lemon Lime Twist - for the daisies. There are 5 daisies in each color for a total of 25 daisies.
The daisies are stamped with the same color ink as the corresponding cardstock except for the Basic Black cardstock. I used Versamark and clear embossing powder on the Basic Black cardstock daisies. Not only did the clear embossing powder give a shine to the Basic Black cardstock, but the tone on tone look was not lost.
To attach the daisy to the stems, I used 22 gauge floral wire stems cut to 10" long, dimensionals, and 1/2" circles of cardstock.
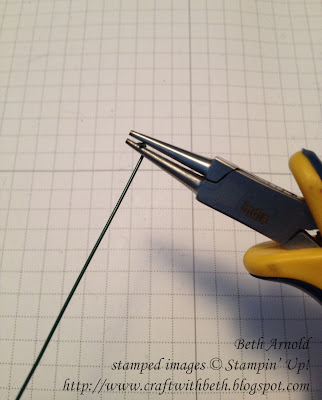
First create a loop by holding one end of the floral wire stem with round nosed pliers and rotate towards you.
Continue rotating the round nosed pliers toward you to close the wire into a circle.
Bend the wire close to the loop at a 90 degree angle. This will form the base which the daisy will sit on.
You need something to connect the wire to the daisy. You could use a low temperature glue gun, E6000 glue, or a dimensional and a circle of cardstock. The easiest, quickest, yet still very effective way to connect the wire to the cardstock is with a dimensional.
First cut a cover for the wire. That way the wire is hidden underneath the daisy and no adhesive is exposed. Cut a 3/4" x 8-1/2" strip of Basic Black cardstock.
Punch a 1/16" hole in the center of the strip.
Position a 1/2" circle punch over the center of 1/16" inch hole and punch.
This circle will cover the wire and the adhesive (from the dimensional). Punching the 1/16" hole first is easier than trying to get 1/2" centered underneath the 1/16" hand held circle punch.
Thread the circle up the floral wire stem so that it is right up to the wire loop.
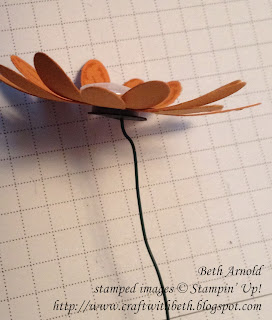
Place a dimensional on top of the wire loop. Press the dimensional firmly in place. Building the connection between the floral wire stem and the daisy is like a sandwich. The dimensional is on the top. The wire loop is in the middle. The circle cover is on the bottom.
Remove the dimensional backing and adhere to the back center of the daisy. Press the dimensional firmly in place.
This is how your daisy will look once the wire is adhered.
Repeat for each of the daisies and place them in a container. I painted a mason jar with acrylic paint for glassware.
For added decoration I tied a loopy bow with 6 loops on each side using 7/8" Striped Ribbon. Then I wrapped a separate piece of the ribbon around the jar and secured it with Tear and Tape. I secured the bow to the center of the ribbon around the jar using the floral wire used to make the bow.
Currently, this watchful bouquet gives a whimsical touch to the fireplace mantle in my family room. I am thoroughly enjoying stamping and playing with the Daisy Delight Bundle. I have some seasonal ideas for Thanksgiving to post soon as well as for Winter.
I hope you give this bouquet a try. What holiday or theme would you use the Daisy Delight Bundle for? I would love to see what you create!
Thanks for stopping by!
Beth
I’ve Got My Eyes on You Halloween
Daisy Bouquet Project Supply List
|
|
Stamps
|
#145361 Daisy Delight
Bundle
|
Paper
|
#101889
Perfect Plum
#102067
Tempting Turquoise
#105117
Pumpkin Pie
#121045 Basic
Black
#144245
Lemon Lime Twist
|
Ink
|
#102283 Versamark
#126963 Perfect Plum
#126952 Tempting Turquoise
#126945 Pumpkin Pie
#144086 Lemon Lime Twist
|
Embellishments
|
#104430 Dimensionals
#144624 7/8” Striped Ribbon
15mm Wiggle
Eyes
|
Tools
|
#103083
Embossing Buddy
#129053 Heat
Tool
#134363 1/16”
Handheld Circle Punch
#119869
1/2" Circle Punch
22 Gauge Floral
Stem Wire (27 – 25 for daisies & 2 for the bow)
Round Nosed
Pliers
Wire Cutters
Mason Jar
Black Acrylic
Paint for Glassware
Paint Brush
|


