Monday, April 6, 2020

Ornate Garden Embossed Vellum Overlay Thank You Card

I have been busy making tons of projects using the Ornate Garden Product Suite! The Ornate Garden Product Suite is so cheerful and happy! It is a bright spot in my day, for sure!

Craft with Beth: Stampin' Up! card Ornate Garden Ornate Thank You Ornate Styles Stampin' Blends Vellum Overlay Heat Embossing Stitched Rectangle Dies

My demonstrator team Purrfect Stampers and I have been have twice weekly stamping sessions on Zoom. We check in with each with what is happening in our lives and with our families, chat about and share our stamping projects, and set team challenges. Each stamping session we agree on a project to work on. This week's challenge was to create a project using vellum.

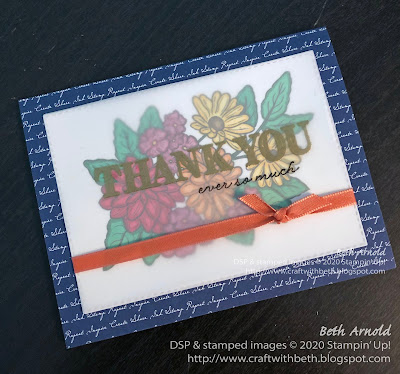
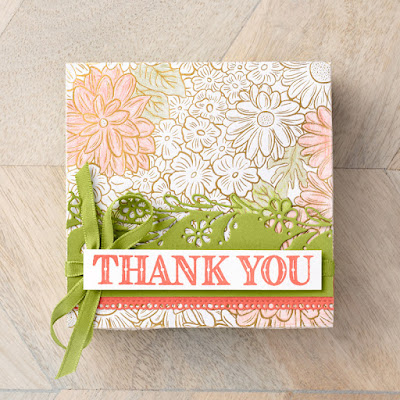
I created a thank you card using the Ornate Garden product suite and heat embossing with vellum. I die cut a piece of vellum using the 2nd largest stitched rectangle die.

Then I stamped the "thank you" greeting from Ornate Styles stamp set with Versamark Watermark ink in the upper center of the vellum die cut stitched rectangle. Added gold embossing powder all over the Versamark Watermark ink and heat set it with the Heat Tool.

Craft with Beth: Stampin' Up! card Ornate Garden Ornate Thank You Ornate Styles Stampin' Blends Vellum Overlay Heat Embossing Stitched Rectangle Dies

Underneath the embossed thank you, I stamped the "ever so much" greeting with Stazon Jet Black ink.

Because vellum is plastic and has a slippery surface, it needs an ink that can stick on to the plastic, not smudge, and be permanent. Stazon ink is a solvent, alcohol-based ink, is permenant, and can "stick" on to the plastic vellum. Without being to scientific, vellum plastic is made from alcohol and Stazon is made from alcohol, so the two like to bond to each other. Vellum and Stazon ink are a great match.

Craft with Beth: Stampin' Up! card Ornate Garden Ornate Thank You Ornate Styles Stampin' Blends Vellum Overlay Heat Embossing Stitched Rectangle Dies

I set the vellum aside to dry for a few moments while I die cut a second stitched rectangle out. This time from Whisper White cardstock. I stamped the large floral bouquet image from the Ornate Styles stamp set in the center of the Whisper White stitched rectangle die cut using Memento Tuxedo Black ink.

I used Memento Tuxedo Black ink here because I didn't want the Stampin' Blends to smear the ink. Memento Tuxedo Black ink is water-based. Stampin' Blends are alcohol-based. Water and alcohol repel each other, so the Memento Tuxedo Black ink will stay nice and crisp when you color with Stampin' Blends. The Memento Tuxedo Black Ink Pad and Stampin' Blends are a great match. I used two different black ink pads because each type of ink has a different application.

Then I used my Stampin' Blends to color in the floral bouquet. I used
  • #144598 Cherry Cobbler Stampin' Blend Combo Pack (flower petals)
  • #144599 Pumpkin Pie Stampin' Blend Combo Pack (flower petals)
  • #144603 Daffodil Delight Stampin' Blend Combo Pack (flower petals and flower centers)
  • #147282 Call Me Clover Stampin' Blend Combo Pack (leaves)
  • #147932 Blackberry Bliss Stampin' Blend Combo Pack (flower petals)
  • #147273 Soft Suede Stampin' Blend Combo Pack (flower centers)

I traced the Memento Jet Black ink lines with the darker shade of the Stampin' Blend and then filled in each flower and petal with the lighter shade of Stampin' Blend. This is a quick and easy way to create highlights and shadows without it being overly complicated. I really like the results too!

Craft with Beth: Stampin' Up! card Ornate Garden Ornate Thank You Ornate Styles Stampin' Blends Vellum Overlay Heat Embossing Stitched Rectangle Dies

Next I adhered the vellum piece on top of the Whisper White cardstock with the floral bouquet stamped image.

Adhering vellum can be tricky because the adhesive can show through the vellum and be seen. I used snail tape adhesive only on the back of the vellum where the gold embossed "thank you" greeting is. So, the gold embossed "thank you" greeting blocks the snail adhesive from showing through to the front of the card.

I also adhered the Terracotta Tile Ribbon across the front of the vellum and around to the back of the Whisper White cardstock to keep the two layers together. There is a glue dot(r) underneath the knot to add more stability too.

Craft with Beth: Stampin' Up! card Ornate Garden Ornate Thank You Ornate Styles Stampin' Blends Vellum Overlay Heat Embossing Stitched Rectangle Dies

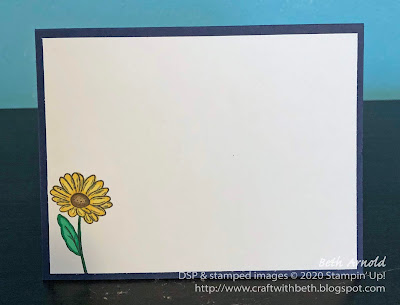
I stamped the daisy image in the lower left corner of the inside of the card, leaving ample room to write a personal message. You can see I used the outlining method of coloring with Stampin' Blends here again. It is very pretty!

Below are the measurements to recreate this card.

Ornate Garden Embossed Vellum Thank You Card Measurements

Paper
Dimensions
Card Base
Night of Navy Cardstock
5-1/2” x 8-1/2”; scored at 4-1/4”
Front Panel
Neutral Designer Series Paper (Night of Navy Script Pattern)
5-1/2” x 4-1/4”
Stitched Rectangle #1
Whisper White Cardstock
5” x 4-1/4”; die cut with the 2nd largest stitched rectangle die
Stitched Rectangle #2
Vellum
5” x 4-1/4”; die cut with the 2nd largest stitched rectangle die
Inside Mat
Whisper White Cardstock
4” x 5-1/4”

How have you used vellum in your projects? I would love to what you create with vellum! Post a project photo on my Facebook page today!

I hope you enjoyed today's Ornate Garden embossed vellum overlay thank you card! If you would like to purchase the supplies I used to create this card, please use the supply list below. I would love to be your Stampin' Up! demonstrator!

Thanks for stopping by!
Beth


Ornate Garden Embossed Vellum Thank You Card Supply List
Stamps
#152572 Ornate Style (Cling-Mount)
#149471 Ornate Thanks (Photopolymer)
Paper
#100730 Whisper White Cardstock
#101856 Vellum
#100867 Night of Navy Cardstock
#149614 Neutrals Designer Series Paper
Ink
#101406 Stazon Jet Black Ink Pad
#132708 Memento Tuxedo Black Ink Pad
#102283 Versamark Watermark Ink Pad
#144598 Cherry Cobbler Stampin’ Blends Combo Pack
#144603 Daffodil Delight Stampin’ Blends Combo Pack
#144599 Pumpkin Pie Stampin’ Blends Combo Pack
#147282 Call Me Clover Stampin’ Blends Combo Pack
#147932 Blackberry Bliss Stampin’ Blends Combo Pack
#147273 Soft Suede Stampin’ Blends Combo Pack
Embellishments
#109129 Gold Embossing Powder
#152479 Ornate Garden Ribbon Combo Pack
Tools
#152392 Stampin’ Trimmer
#102300 Bone Folder
#103579 Paper Snips
Corresponding Clear Acrylic Blocks
Die Cutting Machine
#129053 Heat Tool
#103083 Embossing Buddy
#148551 Rectangle Stitched Dies

Wednesday, April 1, 2020

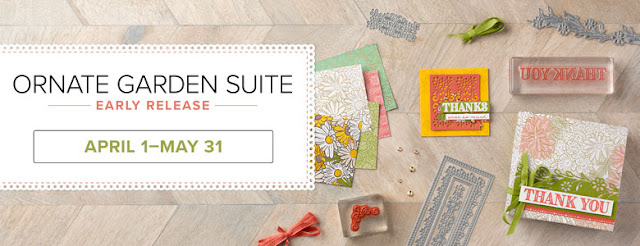
Early Release Ornate Garden Product Suite is now available to order!

Craft with Beth: Stampin' Up! Ornate Garden Product Suite Early Release Banner Graphic

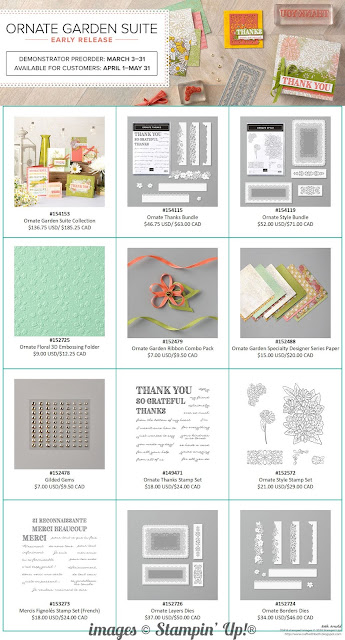
Starting today, you can order the Ornate Garden Product Suite. It will be in the 2020-2021 Annual Catalog, but Stampin' Up! is releasing this intricate, gorgeous floral product suite EARLY! Oh, my goodness! You know, I don't normally get overly excited about early release products because I like to take my time deciding and planning my purchases and projects.

Craft with Beth: Stampin' Up! Ornate Garden Product Suite Early Release product samples graphic

However, the Ornate Garden Product Suite was an exception! I ordered it the day that demonstrators could preorder, which was March 3rd. I placed my order for the entire Ornate Garden Product Suite plus an extra pack of the Gilded Gems! I plan on using the extra pack for the June Second Sunday Sketches prize!

Craft with Beth: Stampin' Up! Ornate Garden Product Suite Early Release gilded gems graphic

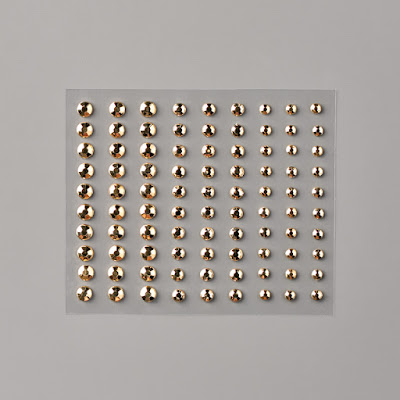
The Gilded Gems (Item #152478) are similar in shape and size as the Basic Rhinestone Jewels, except they are coated with a shiny, opaque golden finish. They are a stunning addition to any project!

Craft with Beth: Stampin' Up! Ornate Garden Product Suite Early Release product Graphic

The Ornate Garden Suite is a MEGA Suite with two stamp and die bundles, Specialty Designer Series Paper, an embossing folder, and embellishments. The stamp set and die bundle is the Ornate Thanks Bundle (Item #154115). It comes with the Ornate Thanks Stamp Set and the Ornate Borders Dies.

Craft with Beth: Stampin' Up! Ornate Garden Product Suite Early Release product Graphic Ornate thanks bundle item #154115

The Ornate Thanks stamp set is a photopolymer stamp set with interchangeable greetings. Use the three large thank you sentiments with the smaller scripted sentiments to form phrases, such as "Thank you from the bottom of my heart" and "Thanks for all your help". The multitude of sentiment choices lends itself well to a thank you card for any occasion! I love the fonts too!

Craft with Beth: Stampin' Up! Ornate Garden Product Suite Early Release product Graphic Ornate thanks stamp set item #149471

The Ornate Border Dies are dies that cut the edges of papers instead of die cutting a separate shape. There is also a die to cut out the other side of the edge dies to separate the die cut from the edges of your paper. How sweet do those scallops and lace trim look!? I love the delicate look of the daisy edge dies too.

Craft with Beth: Stampin' Up! Ornate Garden Product Suite Early Release product Graphic Ornate borders die set item #152724

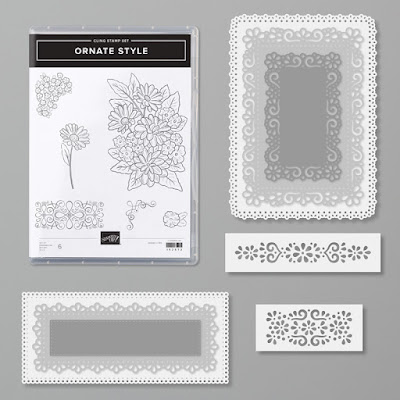
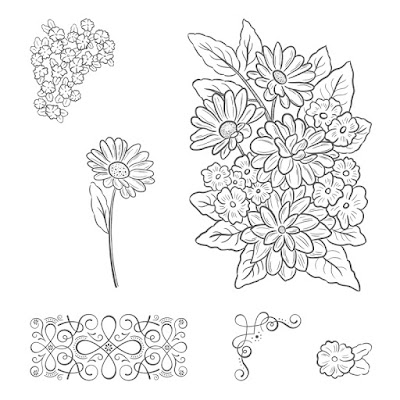
The second stamp set and die bundle is the Ornate Style Bundle (Item #154119). It comes with the Ornate Style stamp set and the Ornate Layers Dies. The Ornate Style stamp set is a cling-mount rubber stamp set that features a large floral bouquet as well as smaller flowers and decorative swirl stamps. The Ornate Style stamp set is made of red rubber for a crisp, clean stamped image time after time.

Craft with Beth: Stampin' Up! Ornate Garden Product Suite Early Release product Graphic Style bundle item #154119


The large floral bouquet or any of the flower images in this stamp set are perfect for coloring techniques and tools such as shading with the Stampin' Blends, using an Aquapainter with ink refills, watercolor pencils and blender pens, heat embossing, and more! The variety of stamped image sizes make it perfect for beginner and avid stamper!

Craft with Beth: Stampin' Up! Ornate Garden Product Suite Early Release product Graphic Ornate Style stamp set item #152572

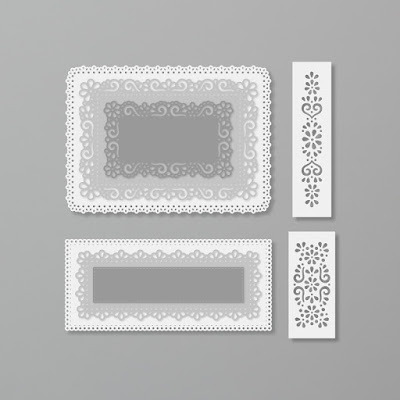
The coordinating die set is called Ornate Layers Dies and comes with 6 decorative border frame dies and 2 dies that cut into the paper leaving the negative space. The decorative border frames can be layered on top of each other to frame a sentiment or a stamped image.


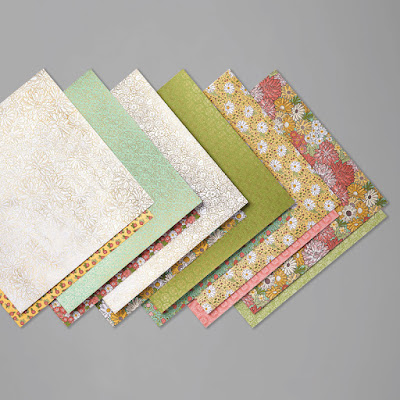
There are even more products to explore! The Ornate Garden Specialty Designer Series Paper is filled 12 double sided papers with floral and scroll patterns as well as gold foil designs! Swoon!

Craft with Beth: Stampin' Up! Ornate Garden Product Suite Early Release product Graphic Ornate Garden Specialty Designer Series Paper DSP item #152488

 This photo does not do this drool-worthy designer series paper justice!

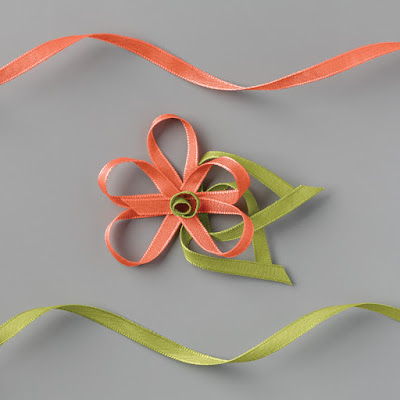
The Ornate Garden Product Suite also features the Ornate Garden Ribbon Combo Pack, which comes with 2 spools of ribbon in Terracotta Tile and in Old Olive. This ribbon is a dream to make bows with! It is not too narrow or too wide.

Craft with Beth: Stampin' Up! Ornate Garden Product Suite Early Release product Graphic Ornate Garden Ribbon Combo Pack item #152479

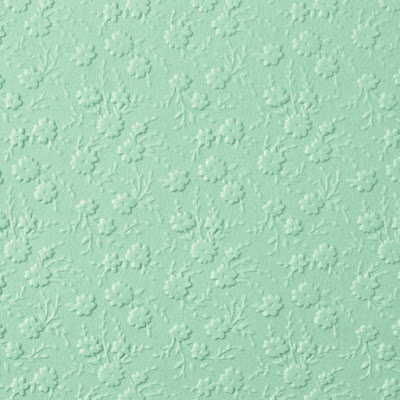
Last, but not least, the Ornate Garden Product Suite includes the Ornate Floral 3D Embossing Folder. At first, this was difficult to see in the flyer, but once I got it home, I could truly see the gorgeous detail! These little flowers and vine-like leaves are so precious! I like both the embossed side and the de-bossed side. This is a great embossing folder to add a hint of floral without overpowering your projects.

Craft with Beth: Stampin' Up! Ornate Garden Product Suite Early Release product Graphic Ornate Floral 3D Embossing Folder item #152725

It is a 3D Embossing Folder, so you will need the blue 3D Embossing Folder Plate (Item #149658). Your die cutting sandwich will be, starting from the bottom and working up to the top (for the Big Shot):
  1. Die Cutting Machine Platform
  2. Ornate Floral 3D Embossing Folder with the cardstock inside
  3. Blue 3D Embossing Folder Plate

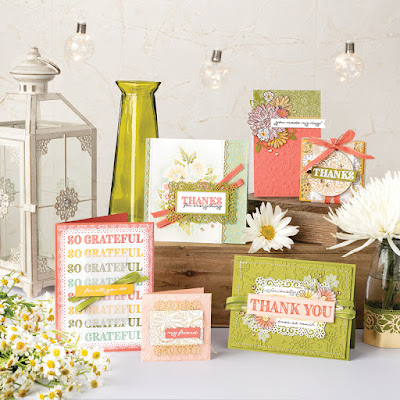
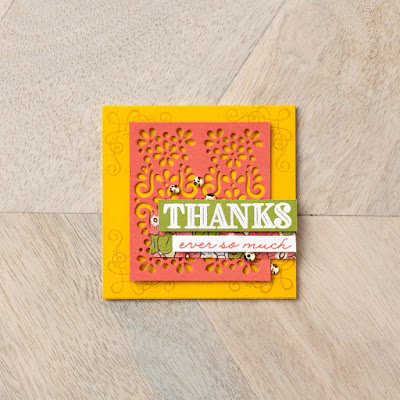
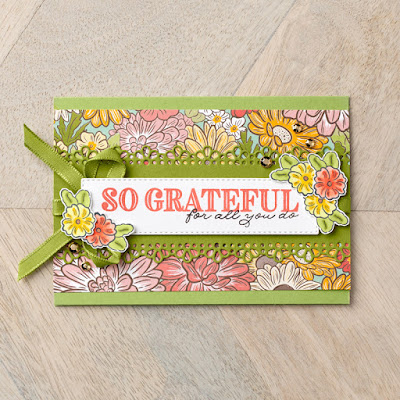
I think you are starting to see why I fell in love with the Ornate Garden Product Suite! There are so many ways to layer all of the products together. Here are just a few samples highlighting different techniques and products within the Ornate Garden Suite.

Craft with Beth: Stampin' Up! Ornate Garden Product Suite Early Release product samples graphic

Craft with Beth: Stampin' Up! Ornate Garden Product Suite Early Release product samples graphic

Craft with Beth: Stampin' Up! Ornate Garden Product Suite Early Release product samples graphic

Craft with Beth: Stampin' Up! Ornate Garden Product Suite Early Release product samples graphic

To download the product flyer, click HERE.

To view the Ornate Garden Product Suite in my online store, click HERE.

I hope you fall in love with the Ornate Garden Product Suite too!

Thanks for stopping by!
Beth

The Winner of the 11th Second Sunday Sketches is...

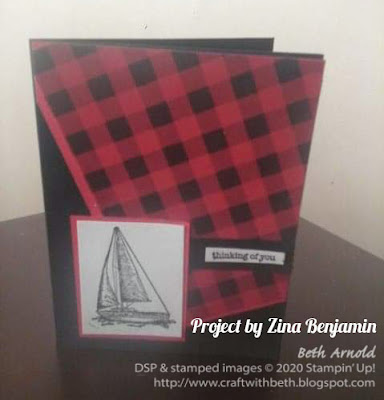
Zina Benjamin! Congratulations, Zina! She is the winner of the 11th Second Sunday Sketches card sketch challenge! Your prize, the Peaceful Poppy Elements and 3 handmade cards, will be in the mail on Thursday, April 2nd.

Craft with Beth: Stampin' Up! Second Sunday Sketches 011 card sketch challenge with measurements Sailing Home Stamp Set Buffalo Plaid Stamp Zina Benjamin

The sailboat image from the Sailing Home stamp set adds a masculine touch to Zina's thinking of you card. The buffalo plaid background stamp adds a warm textural element. I love it!

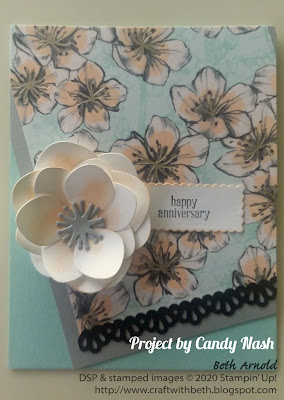
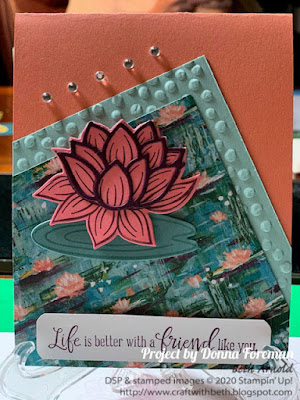
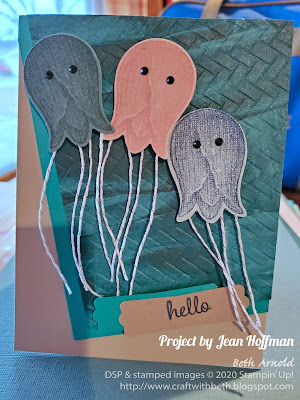
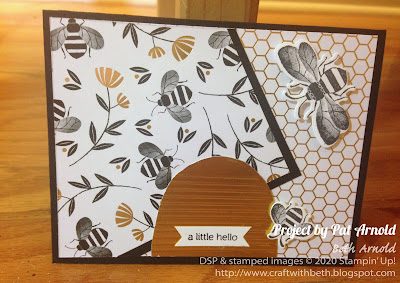
Check out the other entries for the 11th Second Sunday Sketches card challenge. Did you see the jelly fish card? Can you believe it was made using the Tulip Builder Punch?! How creative! You all continue to amaze me with your talents! Which Second Sunday Sketches card entry is your favorite?

Craft with Beth: Stampin' Up! Second Sunday Sketches 011 card sketch challenge with measurements Sailing Home Stamp Set Buffalo Plaid Stamp Candy Nash Parisian Blossoms Specialty Designer Series Paper DSP Forever Blossoms Bundle Cherry Blossom Dies Magnolia Memory Dies

Craft with Beth: Stampin' Up! Second Sunday Sketches 011 card sketch challenge with measurements Donna Foreman Lily Pad Stamp Set Dies Lovely Lily Pad

Craft with Beth: Stampin' Up! Second Sunday Sketches 011 card sketch challenge with measurements Jean Hoffman Tulip Builder Builder Jelly Fish Punch Art Coastal Weave 3D Embossing Folder

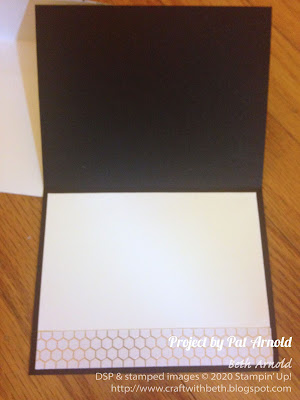
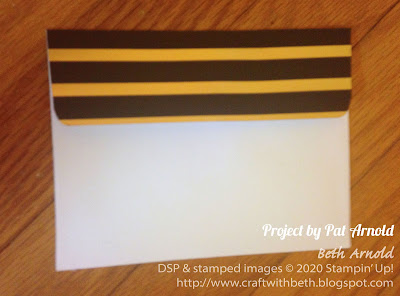
Craft with Beth: Stampin' Up! Second Sunday Sketches 011 card sketch challenge with measurements Pat Arnold Honey Bee Specialty Designer Series Paper Detailed Bee Dies

Craft with Beth: Stampin' Up! Second Sunday Sketches 011 card sketch challenge with measurements Pat Arnold Honey Bee Specialty Designer Series Paper Detailed Bee Dies

Craft with Beth: Stampin' Up! Second Sunday Sketches 011 card sketch challenge with measurements Pat Arnold Honey Bee Specialty Designer Series Paper Detailed Bee Dies

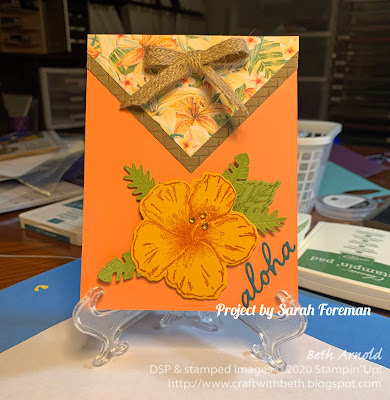
Craft with Beth: Stampin' Up! Second Sunday Sketches 011 card sketch challenge with measurements Sarah Foreman Timeless Tropical Stamp Set Tropical Oasis Designer Series Paper Burlap Trim In the Tropics Dies

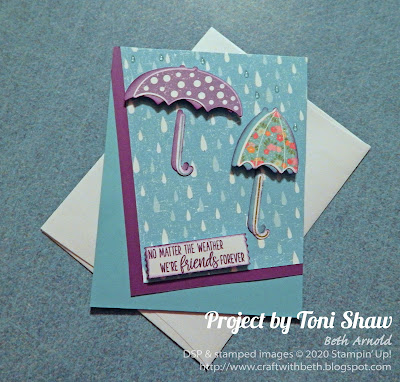
Craft with Beth: Stampin' Up! Second Sunday Sketches 011 card sketch challenge with measurements Toni Shaw Under My Umbrella Stamp Set Umbrella Builder Punch Friendship

Missed this Second Sunday Sketches?

Not to worry. The next Second Sunday Sketches card challenge starts on April 12th. The prize will be a spool of the Mint Macaron 1/8" Sheer Linen Ribbon (Item #151321) and 3 handmade cards from me.

Craft with Beth: Stampin' Up! Mint Macaron 1/8" Sheer Linen Ribbon Item #151321 Second Sunday Sketches Prize Graphic 2020 April 03

Share Second Sunday Sketches with a Friend

Come back on April 12th for the next Second Sunday Sketches! Be sure to join in on the fun and share with a friend! Starting in March 2020, if you enter the Second Sunday Sketches challenge, you can get a bonus surprise prize by sharing this challenge with a friend (for US residents only)! Here's how to get a bonus surprise prize. Limit two bonus surprise prizes per person per month.
  1. Enter into April's Second Sunday Sketches challenge
  2. Share April's Second Sunday Sketches challenge with a friend
  3. Have your friend submit their April's challenge card entry
  4. Email me that your friend has submitted their card entry. Submit your complete mailing address and the name of the friend that you shared with. I will confirm their entry and then send you a bonus surprise prize on May 2nd or the next business day.

Happy Stamping!
Beth

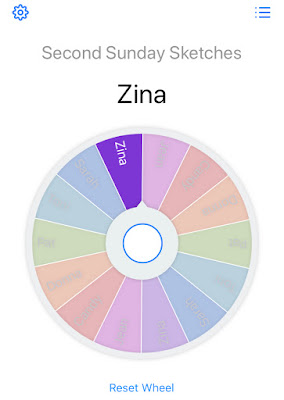
P.P.S. Ever wonder how I draw for the Second Sunday Sketches winner? I use an app called Tiny Decisions. I input all of the names of the participants onto the wheel and spin it. The name that the wheel stops on is the winner.

Craft with Beth: Stampin' Up! Second Sunday Sketches Prize Wheel Graphic Card Sketch Challenge with Measurements Winner Announcement