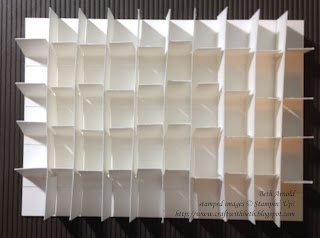
I was inspired to make this sponge dauber organizer by amazing fellow Stampin' Up demonstrator Sam Hammond. Sam created a fabulous sponge dauber organizer using cardstock and a full wood-mount stamp clear case.
I loved her design, but made a few modifications. I frequently drop fully inked stamps or sponges accidentally onto my projects. To reduce these occurrences, I added a bottom and secured one set of dividers to the bottom. This would not only make the organizer more stable but also absorb some of the ink. I also made a tray to hold the organizer. This closed all of the sides and holds the daubers more securely. You can lift the entire tray of daubers without toppling it onto your work surface.
Here's what I did.
Cut nine 5" by 3/4" strips of Thick Whisper White cardstock. With the 5" side along the top of your score board, score every inch. Notch your score lines. Set them aside.
Cut four 7" by 1" strips of Thick Whisper White cardstock. With the 1" side along the top of your score board, score at 3/4". This score line will form the tab that will later be secured to the bottom piece. Rotate your cardstock so that the 7" is along the top of the score board and score at 11/16" intervals. Notch your 11/16" score lines up to the 1/4" score line. Side them aside.
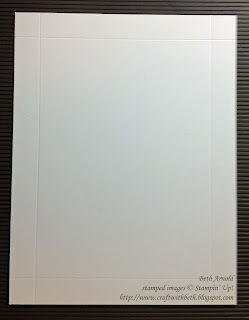
Cut a 6-9/16" by 8-9/16" piece of Thick Whisper White cardstock. This will be your tray. With the 6-9/16" side along the top of your score board, score at 3/4". Rotate your cardstock 9o degrees and score again at 3/4". Repeat for the 2 remaining sides. You should now have a score line around the entire piece.
Cut and notch the top two and bottom two inside tabs as shown in the photograph below. Add Fast Fuse tape or Tear and Tape Adhesive to the tabs.
Fold up the sides of the tray and secure in place.
Set the tray aside.
Next cut a 5" by 7" piece of Thick Whisper White cardstock. This will be the bottom of the organizer. With the 5" side along the top of the score board, score every inch.
Put a thin line of liquid glue along the back of each 7" by 1" strip only on the 1/4" score line side. Adhere each strip on the bottom, matching the 1/4" score line on the strip to each 1" score line on the bottom. Make sure that all the strips face the same way.
Once the glue is dry, fold up each tab. Slide each 5" by 3/4" strip into the notches of the 7" by 1" strips to form the organizer grid.
Place the completed grid inside the tray.
Then place the tray into the full wood-mount stamp case.
Lastly, fill your organizer with sponge daubers.
Here is the case closed.
I hope you give this sponge dauber organizer a try. I would love to see what you make!
Thanks for stopping by!
Beth


No comments:
Post a Comment