
I die cut 2 medium layers, 1 small layer, and 1 tiny layer from Pear Pizzazz cardstock. Then I sponged each layer with Pear Pizzazz and Always Artichoke ink to create depth.

I worked on the inside of the layers first. I sponged the ends of the leaves with Pear Pizzazz ink using a sponge dauber. A sponge dauber gave me more control in a smaller area and less texture than a yellow sponge.
Then I sponged a heavy layer of Always Artichoke ink around the edges.
Finally, I daubed Whisper White Craft ink in the center of the tiny and the small layers.
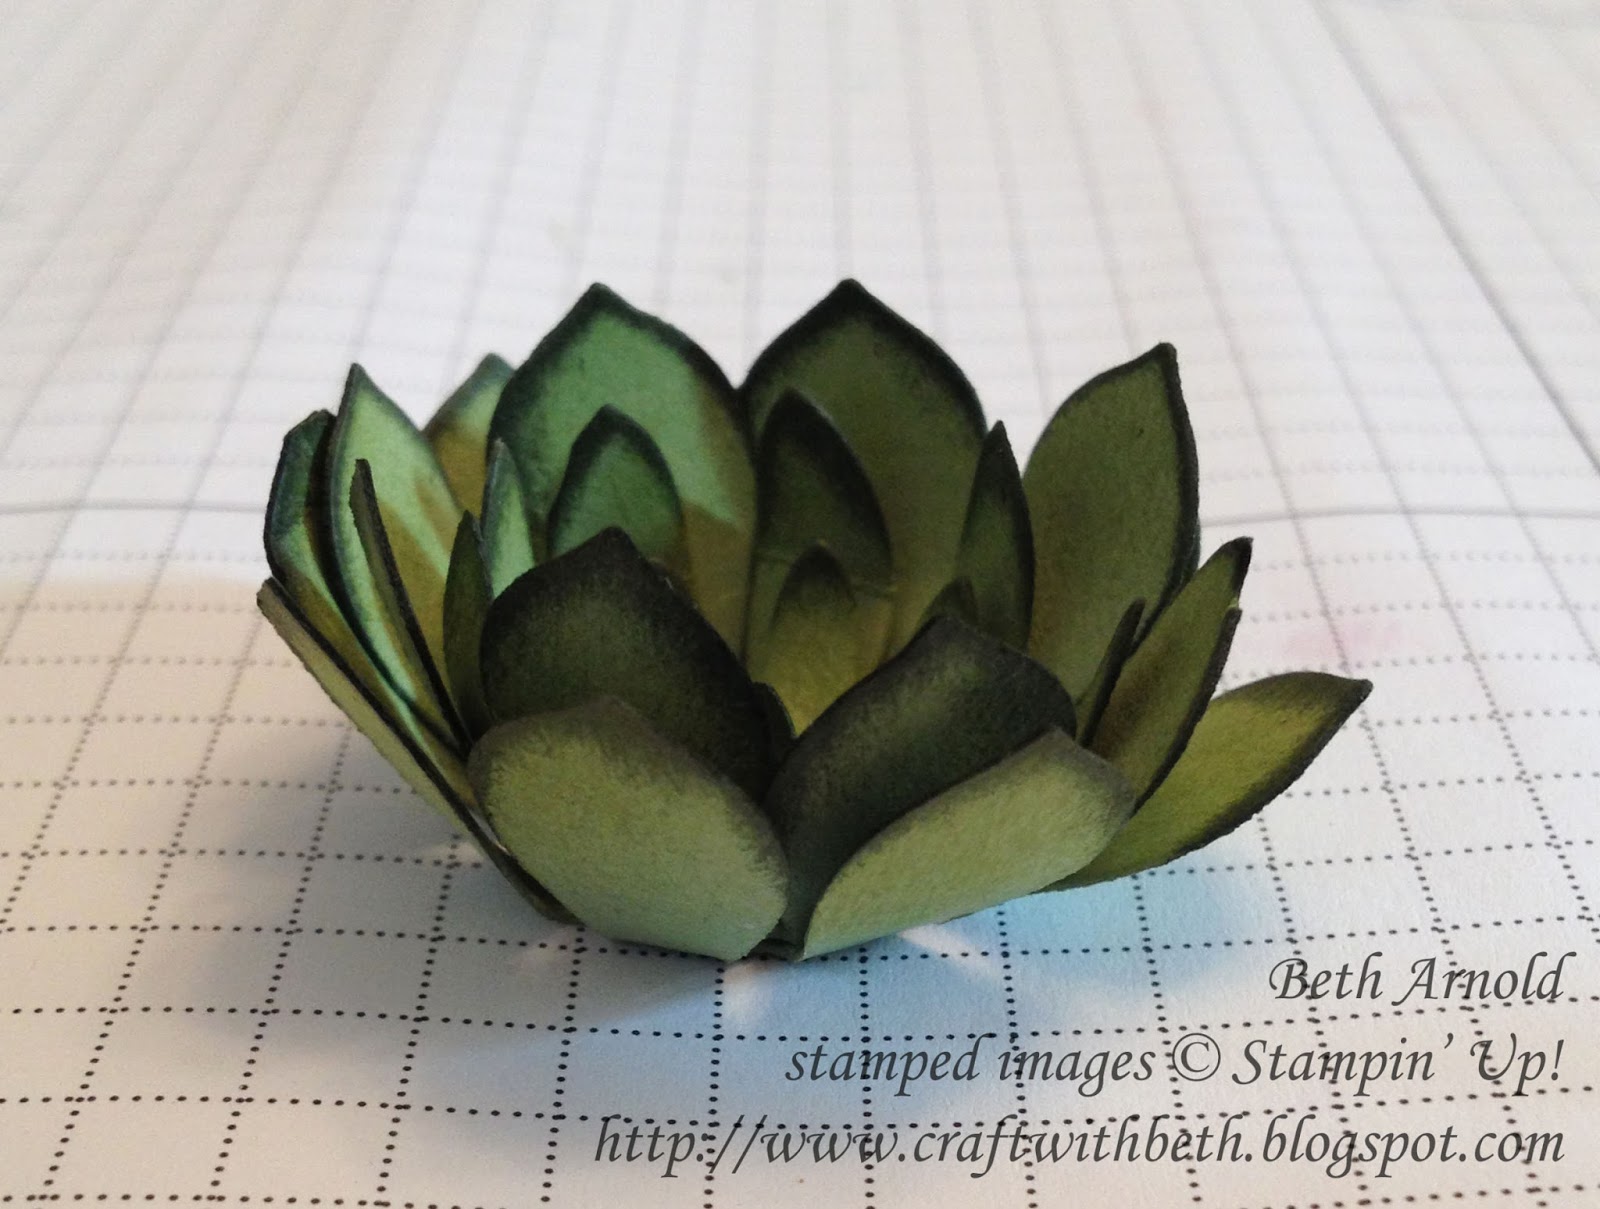
Once all of the layers were dry, I repeated the Pear Pizzazz and Always Artichoke sponging on the outside of the layers since both sides of the succulent would be visible in the jar.
I let the layers dry for a few moments before carefully, burnishing the leaves with the bone folder and adhering the layers together. I next held the succulent in my palm and slightly crumbled the layers, so that they would hold their shape even more.

Lastly, I placed the succulent inside the jar. I bought this jar already filled with the faux dirt on clearance at a local craft store, but you could also fill a small jar with potting soil (or other dirt that has been sterilized).
Have you tried creating your own succulents? I would love to see what you make!
Thanks for stopping by!
Beth
Sweet, Solitary Succulent
Home Décor Supply List
|
|
Stamps
|
|
Paper
|
#131201 Pear Pizzazz
|
Ink
|
#131180 Pear Pizzazz
#126972 Always Artichoke
#101731 Whisper White Craft
|
Embellishments
|
|
Tools
|
#142757 Succulent Framelits
#133773 Sponge Daubers
#143263 Big Shot
Small Glass Jar with Faux
Dirt
|
No comments:
Post a Comment