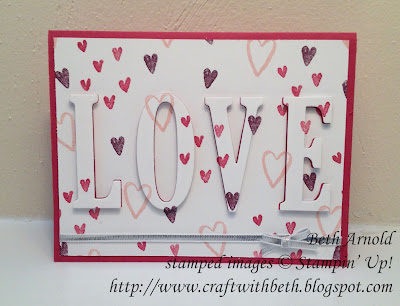
I created this eclipse Valentine's Day card for my Stamp of the Month class that I held last week. When I finished creating my cards for class back in the beginning of this year, I showed my husband the cards that I had made. He liked this card so much, I decided to share it here.
The background for the eclipse is not any Designer Series Paper listed in the catalog, but a collage of heart stamps from the Heart Happiness stamp set!
Today's card features a second way to DIY a Designer Series Paper background. After I chose my stamps, I started with the largest image to ensure that I have enough room to stamp all of the images.
I started with the largest image, the group of 6 hearts stamp, and stamped it randomly all over a 4" x 5-1/4" piece of Whisper White cardstock with Red Rose ink.
The next biggest image was the outline heart. I stamped the outline heart with Powder Pink ink to fill in some of the remaining space.
The smallest image was the smaller, single heart image. I stamped the smaller heart image with Fresh Fig ink to fill in the rest of the remaining space.
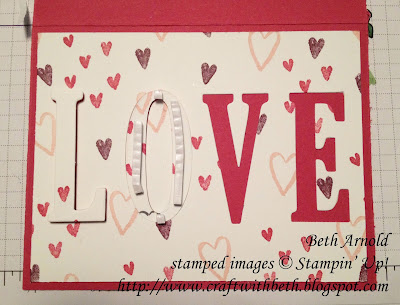
Then I positioned the L, O, V, and E framelits from the Large Letters Framelits in the center of the newly created Designer Series Paper and ran it through the Big Shot Machine. Save all of your letters and the center of the O.
Then I wrapped the silver ribbon around the front of the DYI Designer Series Paper and secured it on the back. Then I attached a silver ribbon bow to right side of the ribbon with a glue dot.
Next I adhered it to the front of the card base.
Attach Foam Adhesive Strips to the backs of each of the letters and press into their original place. It will look somewhat off center because the letters are raised. You can off set the raised letters from the Rose Red background even more by adhering each letter slightly below and to the left (or right) of their original place.
To place the center of the O in the center, first place the O in its original place WITHOUT adhering. Then put a small amount of liquid glue or tape adhesive on the back of the center of the O.
Carefully, lower the center of the O into the middle of the letter O and press down.
Remove the letter O and adhere to it original place. Tada! A perfectly centered center of the O!
Continue adhering the letters in their original places until all letters are adhered.
I wanted the recipient of this card to feel surrounded by loving thoughts, so I stamped two 6-heart images side by side with a "Love You" greeting on the inside of the card.
I hope you enjoyed this card as much as my husband and customers did! Have you tried the eclipse technique? What words and stamps did you use? I would love to see what you create!
Thanks for stopping by!
Beth
Showing posts with label Large Letter Framelits. Show all posts
Showing posts with label Large Letter Framelits. Show all posts
Tuesday, January 23, 2018
Tuesday, October 31, 2017
Say Eek! if You Love Rosettes
I love a rosette! And, I love a rosette banner even more! This frightful little rosette banner is hanging underneath the mantle in my family room. Rosettes are super easy and quick to make using the Simply Scored Board.
The rosettes measure 5" in diameter. So, I cut 2 pieces of Spooky Night Designer Series Paper for each rosette that measured 2-1/2" x 12". I scored each piece of Designer Series Paper every 1/2".
For the embellishment I die cut the largest stitched oval, the second largest oval, and the largest scalloped oval in Very Vanilla, Basic Black, and Cajun Craze cardstock, respectively. I also die cut the word eek plus an exclamation mark from the Large Letters Framelits with Basic Black cardstock.
I attached a small piece of Shimmery Black Ribbon to the back of each rosette. The string to hang each of the rosettes is also Shimmery Black Ribbon. Can I just say I am madly in love with all of the ribbons this year?! I am already on my second spool of Shimmery Black Ribbon, and I plan on ordering more!
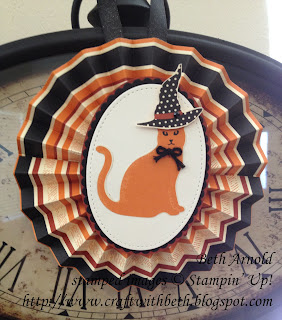
I was having so much fun making rosettes, I couldn't help myself and made this witchy Cat Punch rosette. I added a longer ribbon on the back to drape around a wine bottle or hang as an ornament.
Thanks for stopping by!
Beth
Subscribe to:
Comments (Atom)


