Showing posts with label Banner. Show all posts

Sunday, June 19, 2016

Paper Pumpkin: June 2016 Banner Surprise

My mom called me late afternoon yesterday to tell me she received her June 2016 Paper Pumpkin Kit. She was so excited that she ripped open the box and the kit contents! My mom was thrilled with this month's kit: Banner Surprise. We love banners!!


This month's kit is a card and a banner all in one! The banners are wrapped around the card and act as the primary embellishment. How clever and cute! I can't wait to give these cards to my family and friends!

The banner is made with clear plastic triangular pouches instead of cardstock. My mom and I both agree that this is awesome! There are so many alternative possibilities! We can see this banner for birthdays, graduation, anniversaries, Fourth of July, babies, and more!

Craft with Beth: Paper Pumpkin June 2016 Banner Surprise Alternative Project Fourth of July Banner 4th

Since the Fourth of July is near, I thought this kit would make a great patriotic banner. Here is a Fourth of July Banner that I came up with as an alternative project.

Craft with Beth: Paper Pumpkin June 2016 Banner Surprise Alternative Project Fourth of July Banner 4th
 
I used the negative space of the letter stickers to create a stencil. I sponged HAPPY in Real Red and Night of Navy ink. I then stamped the lined circle image that came with the kit around each circle in Versamark and embossed them with silver embossing powder.

Craft with Beth: Paper Pumpkin June 2016 Banner Surprise Alternative Project Fourth of July Banner 4th

On each end, I stamped the starburst image from Perpetual Birthday Calendar in Real Red and in Night of Navy. I filled each pouch with red, blue, and silver sequins.

This is a great banner to kick off our nation's birthday!

I would love to see what other ideas you have for June's Paper Pumpkin Kit.

Thanks for stopping by!
Beth


Fourth of July Banner Paper Pumpkin June 2016 Kit Alternative Project Supply List
Stamps
Paper Pumpkin June 2016
Perpetual Birthday Calendar
Paper
Paper Pumpkin June 2016 Kit Contents
Ink
Versamark ink pad
Real Red ink Pad
Night of Navy ink pad
Embellishments
Silver Embossing Powder
Brights Sequins
Metallic Sequins
Tools
Stampin’ Trimmer
Bone Folder
Clear Acrylic Blocks B and D
Grid Paper
Stampin’ Mist Cleaner
Stampin’ Scrub
Stampin’ Pierce Mat
Foam Adhesive Strips
Paper Snips
Heat Tool
Embossing Buddy
Click here to start shopping!

Tuesday, May 24, 2016

Woodland Baby Banner

My mom and I made a woodland banner awhile ago to welcome my younger brother's newborn son. The nursery theme was woodland and moose.

Craft with Beth: Woodland Baby Banner

My younger brother and his wife kept the baby's name a secret until he was born. They were very cryptic! So, we stamped baby instead of his name.

The banner is strung with sisal twine from the hardware store. The pennants are crest-shaped. Each pennant is 4-1/4" wide by 5" long. The crest shape is formed by cutting 45 degree angles on the bottom of the pennant with the paper trimmer.

Craft with Beth: Woodland Baby Banner

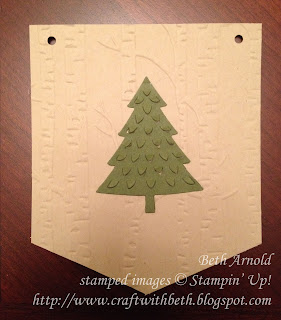
The first pennant features the Perfect Pines dies and the Woodland TIEF. I was so sad when the Woodland TIEF retired. It is great not just for embossing but for water coloring and sponging techniques. However, Stampin' Up! has announced that it will be back in the 2016-2017 Annual Catalog! You will see more examples using this TIEF in a Technique Tuesday Class!

Craft with Beth: Woodland Baby Banner

Each letter pennant is stamped with the Hardwood stamp in Soft Suede. The letter stamps are from the retired Sophisticated Serifs stamp set and are also stamped in Soft Suede. You can substitute Larger than Life or Layered Letters.

Craft with Beth: Woodland Baby Banner

My mom and I made this little moose using the Owl Builder Punch and circle punches. We free-handed the antlers.

I made more pennants today to update the name. I will try to get a few photographs of the updated banner.

What kinds of banners do you like? What kinds of banners have you made? I would love to see what you create!

Thanks for stopping by!
Beth

Sunday, May 1, 2016

Happy Graduation, Cousin Patrick!

My youngest cousin is graduating from high school this June. To celebrate, my aunt Tracy designed this banner to hang up at his graduation party. She did such an amazing job creating this banner that I wanted to share it with you!

Tracy made this banner to match her son's school colors. Pacific Point and Whisper White coordinated fantastically with her son's school colors. 

Craft with Beth: Patrick's Graduation Banner

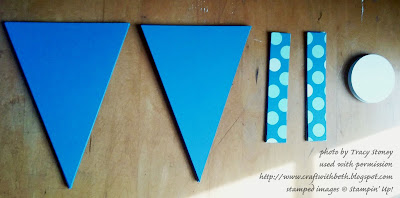
Tracy started by determining the size of her banner pennants. She has the Layered Alphabet stamp set, the Yay Birthday stamp set, and the 2-1/2" circle punch. To fit the 2-1/2" circle punch, Tracy determined that the top edge of the banner's width should be 5" and that the length of the banner should be 7.5". She found this size by punching out a 2-1/2" circle and cutting out a few test banners to get the spacing she desired.

I created a template using a word processing program by inputting various widths and lengths of isosceles triangles until we had the perfect size. You can download the template here. I printed the template directly onto cardstock. Check your printer to see if it can also print directly onto cardstock. If it cannot, print on regular computer paper, cut out the template, and trace onto cardstock.

Tracy wanted the banner to say Congratulations 2016 with a pennant on each end and one between congratulations and 2016. This is a total of 22 banner pennants - 19 banner pennants for the letters and the numbers plus three banner pennants for spacing. She cut out all of her banner pennants from Pacific Point Cardstock. Next, she punched nineteen 2-1/2" circle from Whisper White Cardstock. For the top of each pennant Tracy cut twenty-two 1" x 5" strip of Schoolhouse DSP.

Craft with Beth: Patrick's Graduation Banner

Once the pieces were ready, it was time to start stamping! Tracy stamped the 2-1/2" circles with one letter or one number each to spell her sentiment.

Craft with Beth: Patrick's Graduation Banner

Craft with Beth: Patrick's Graduation Banner

While the letters and numbers dried completely, she adhered the Schoolhouse DSP strips to the top edge of each pennant. Once the glue had dried, she flipped the pennant over and trimmed the excess DSP. Cutting the DSP after makes a nice, clean edge without the hassle of trying to cut the perfect angle on your Paper Trimmer!

You can make this banner to coordinate with your school colors too! Or, make this banner for a retirement, job promotion, or even a baby shower! Switch the DSP to match your celebration. You could also emboss the pennants with a TIEF (Texturized Impressions Embossing Folder). How would decorate and embellish a banner? I would love to see what you make!

Thanks for stopping by!
Beth


Graduation Banner Project Supply List
Stamps
Birthday Yay
Layered Letters
Paper
Schoolhouse DSP
Pacific Point Cardstock
Whisper White Cardstock
Ink
Pacific Point Ink Pad
Embellishments
Whisper White Baker’s Twine
Tools
Stampin’ Trimmer
Bone Folder
Clear Acrylic Blocks B & C
Grid Paper
Stampin’ Mist Cleaner
Stampin’ Scrub
Stampin’ Pierce Mat
Multipurpose Liquid Glue
Glue Stick
Paper Snips
Click here to start shopping!
 

Saturday, April 23, 2016

Mini Birthday Banners

You know my mom and I love banners! So, it should be no surprise that we made mini birthday banners for many of our family member's upcoming birthdays!

Craft with Beth: Mini Birthday Banners 01
 
We thought the colors and patterns in the It's My Party DSP Stack was perfect for both the ladies and the guys in our family. There are neutral colors mixed with greens, yellows, and pinks, making it a fantastic balance for everyone.

Craft with Beth: Mini Birthday Banners 03

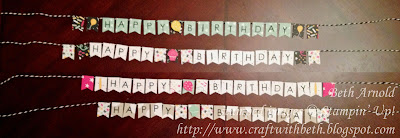
 First we determined which patterns from the It's My Party DSP Stack would work as the background to the letters. Then we punched the banner pennants and stamped one letter on each banner pennant to spell Happy Birthday.

The Back to Basics Alphabet is the perfect size and font for the banner punch. It is not too big or too small. The font is clear and not too fussy. I can see making banners for graduation, retirement, and inside cards for a pop up banner!

Craft with Beth: Mini Birthday Banners 02

Next we added coordinating patterned banners between Happy and Birthday and on each end for more embellishment. Finally, we glued the banner pennants to a length of Basic Black Baker's Twine, placing glue only on the top of the back of each pennant.

Craft with Beth: Mini Birthday Banners 04

On the banner photographed above, we added a Melon Mambo cupcake to the center banner pennant. So adorable!

Craft with Beth: Mini Birthday Banners 05
 
My husband still has his banner up even though his birthday was in the middle of March! He said that his banner was a fun surprise to show him how much I cared. He won't let me take it down. He got very sentimental! He is too sweet!

Out of all of the products retiring this year, my mom, my aunts, and I are the most sad about the banner punch, Back to Basics Alphabet stamp set, and the It's My Party Suite. Luckily, we all have these banner making goodies!

If you like our banners and would like to make your own, I suggest ordering soon so you don't miss out! I would love to see what you create!

Thanks for stopping by!
Beth


Mini Birthday Banners Project Supply List
Stamps
Back to Basics Alphabet
Party Wishes
Paper
It’s My Party DSP Stack
Ink
Archival Basic Black Ink Pad
Melon Mambo Ink Pad
Daffodil Delight Ink Pad
Mint Macaron Ink Pad
Embellishments
Basic Black Baker’s Twine
Tools
Clear Acrylic Block A
Grid Paper
Stampin’ Mist Cleaner
Stampin’ Scrub
Multipurpose Liquid Glue
Two-way Glue Pen
Banner Punch
Party Pack Punch Set
Paper Snips
Click here to start shopping!