Tracy made this banner to match her son's school colors. Pacific Point and Whisper White coordinated fantastically with her son's school colors.
Tracy started by determining the size of her banner pennants. She has the Layered Alphabet stamp set, the Yay Birthday stamp set, and the 2-1/2" circle punch. To fit the 2-1/2" circle punch, Tracy determined that the top edge of the banner's width should be 5" and that the length of the banner should be 7.5". She found this size by punching out a 2-1/2" circle and cutting out a few test banners to get the spacing she desired.
I created a template using a word processing program by inputting various widths and lengths of isosceles triangles until we had the perfect size. You can download the template here. I printed the template directly onto cardstock. Check your printer to see if it can also print directly onto cardstock. If it cannot, print on regular computer paper, cut out the template, and trace onto cardstock.
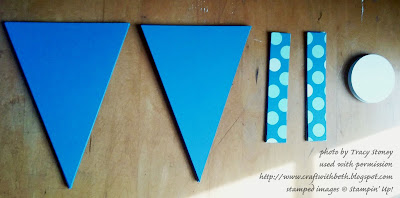
Tracy wanted the banner to say Congratulations 2016 with a pennant on each end and one between congratulations and 2016. This is a total of 22 banner pennants - 19 banner pennants for the letters and the numbers plus three banner pennants for spacing. She cut out all of her banner pennants from Pacific Point Cardstock. Next, she punched nineteen 2-1/2" circle from Whisper White Cardstock. For the top of each pennant Tracy cut twenty-two 1" x 5" strip of Schoolhouse DSP.
Once the pieces were ready, it was time to start stamping! Tracy stamped the 2-1/2" circles with one letter or one number each to spell her sentiment.
While the letters and numbers dried completely, she adhered the Schoolhouse DSP strips to the top edge of each pennant. Once the glue had dried, she flipped the pennant over and trimmed the excess DSP. Cutting the DSP after makes a nice, clean edge without the hassle of trying to cut the perfect angle on your Paper Trimmer!
You can make this banner to coordinate with your school colors too! Or, make this banner for a retirement, job promotion, or even a baby shower! Switch the DSP to match your celebration. You could also emboss the pennants with a TIEF (Texturized Impressions Embossing Folder). How would decorate and embellish a banner? I would love to see what you make!
Thanks for stopping by!
Beth
Graduation Banner Project
Supply List
|
|
Stamps
|
Birthday Yay
Layered
Letters
|
Paper
|
Schoolhouse
DSP
Pacific
Point Cardstock
Whisper
White Cardstock
|
Ink
|
Pacific
Point Ink Pad
|
Embellishments
|
Whisper
White Baker’s Twine
|
Tools
|
Stampin’
Trimmer
Bone Folder
Clear
Acrylic Blocks B & C
Grid Paper
Stampin’
Mist Cleaner
Stampin’
Scrub
Stampin’
Pierce Mat
Multipurpose
Liquid Glue
Glue Stick
Paper Snips
|
Click here to start
shopping!
|
|


No comments:
Post a Comment