Tuesday, May 3, 2016

Happy Mother's Day!

I was inspired by Karen Barber's Birthday card to make this Mother's Day card. I love the way Karen made the flowers look like they were growing in front of a wooden fence! This is too sweet!

Craft with Beth: Mother's Day Card 2016 Wild About Flowers

I kept the overall layout and the floral fence theme but changed the colors, the sentiment, the DSP, and the ribbon.

I used Blackberry Bliss, Very Vanilla, Daffodil Delight, Mossy Meadow, and Sahara Sand. The sentiment comes from the April 2016 Paper Pumpkin Kit. Because the DSP Karen used is retired, I substituted the gingham pattern from the Farmer's Market DSP. It appears to be the same pattern but with different colors.

Craft with Beth: Mother's Day 2016 Card Color Scheme

I also removed the lacy butterfly from the Butterfly Basics stamp set. It was placed on the ribbon toward the right side. I may end up adding the butterfly. I haven't decided. What do you think?

Craft with Beth: Mother's Day Card 2016 Wild About Flowers
 
To secure the Daffodil Delight cotton ribbon, I used glue dots. I placed a glue dot on each end, one under the faux bow knot, and one towards the right side. That way, the ribbon stayed flat after the faux bow was tied.

Craft with Beth: Mother's Day Card 2016 Wild About Flowers

I stamped the envelope and the inside of the card with a single stem and two Daffodil Delight flowers.

Mother’s Day Card Measurements

Color
Dimensions
Card Base
Blackberry Bliss
4-1/4” x 11”
1st Mat
Daffodil Delight
3-3/4” x 5-1/4”
2nd Mat
Very Vanilla
3-3/4” x 4”
DSP Strip
Farmer’s Market DSP
3-3/4” x 1”
Inside Mat
Very Vanilla
3-3/4” x 5-1/4”

There were no measurements listed for this card. Some of the measurements were easy to decipher. However, the DSP strip at the bottom was a little tricky. If I were to make this card again, I would increase the DSP strip to 3-3/4" x 1-1/2" and decrease the 2nd Mat to 3-3/4" x 3-1/2".

I hope my mom likes this card and knows how special and loved she is!

Thanks for stopping by!
Beth


Mother’s Day Card Project Supply List
Stamps
Paper Pumpkin April 2016
Wild About Flowers
Hardwood
Paper
Farmer’s Marker DSP
Very Vanilla Cardstock
Daffodil Delight Cardstock
Blackberry Bliss Cardstock
Ink
Mossy Meadow Ink Pad
Blackberry Bliss Ink Pad
Daffodil Delight Ink Pad
Sahara Sand Ink Pad
Embellishments
Daffodil Delight Cotton Ribbon
Tools
Stampin’ Trimmer
Bone Folder
Clear Acrylic Blocks C, D, E, & H
Grid Paper
Stampin’ Mist Cleaner
Stampin’ Scrub
Stampin’ Pierce Mat
Glue Dots
SNAIL Adhesive
Paper Snips
Click here to start shopping!

Sunday, May 1, 2016

Happy Graduation, Cousin Patrick!

My youngest cousin is graduating from high school this June. To celebrate, my aunt Tracy designed this banner to hang up at his graduation party. She did such an amazing job creating this banner that I wanted to share it with you!

Tracy made this banner to match her son's school colors. Pacific Point and Whisper White coordinated fantastically with her son's school colors. 

Craft with Beth: Patrick's Graduation Banner

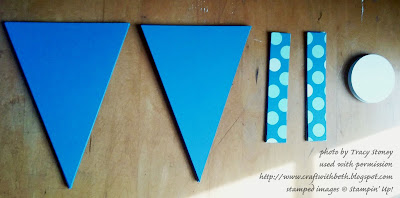
Tracy started by determining the size of her banner pennants. She has the Layered Alphabet stamp set, the Yay Birthday stamp set, and the 2-1/2" circle punch. To fit the 2-1/2" circle punch, Tracy determined that the top edge of the banner's width should be 5" and that the length of the banner should be 7.5". She found this size by punching out a 2-1/2" circle and cutting out a few test banners to get the spacing she desired.

I created a template using a word processing program by inputting various widths and lengths of isosceles triangles until we had the perfect size. You can download the template here. I printed the template directly onto cardstock. Check your printer to see if it can also print directly onto cardstock. If it cannot, print on regular computer paper, cut out the template, and trace onto cardstock.

Tracy wanted the banner to say Congratulations 2016 with a pennant on each end and one between congratulations and 2016. This is a total of 22 banner pennants - 19 banner pennants for the letters and the numbers plus three banner pennants for spacing. She cut out all of her banner pennants from Pacific Point Cardstock. Next, she punched nineteen 2-1/2" circle from Whisper White Cardstock. For the top of each pennant Tracy cut twenty-two 1" x 5" strip of Schoolhouse DSP.

Craft with Beth: Patrick's Graduation Banner

Once the pieces were ready, it was time to start stamping! Tracy stamped the 2-1/2" circles with one letter or one number each to spell her sentiment.

Craft with Beth: Patrick's Graduation Banner

Craft with Beth: Patrick's Graduation Banner

While the letters and numbers dried completely, she adhered the Schoolhouse DSP strips to the top edge of each pennant. Once the glue had dried, she flipped the pennant over and trimmed the excess DSP. Cutting the DSP after makes a nice, clean edge without the hassle of trying to cut the perfect angle on your Paper Trimmer!

You can make this banner to coordinate with your school colors too! Or, make this banner for a retirement, job promotion, or even a baby shower! Switch the DSP to match your celebration. You could also emboss the pennants with a TIEF (Texturized Impressions Embossing Folder). How would decorate and embellish a banner? I would love to see what you make!

Thanks for stopping by!
Beth


Graduation Banner Project Supply List
Stamps
Birthday Yay
Layered Letters
Paper
Schoolhouse DSP
Pacific Point Cardstock
Whisper White Cardstock
Ink
Pacific Point Ink Pad
Embellishments
Whisper White Baker’s Twine
Tools
Stampin’ Trimmer
Bone Folder
Clear Acrylic Blocks B & C
Grid Paper
Stampin’ Mist Cleaner
Stampin’ Scrub
Stampin’ Pierce Mat
Multipurpose Liquid Glue
Glue Stick
Paper Snips
Click here to start shopping!
 

Thursday, April 28, 2016

Flower Frenzy Corsage Update

We finished the Flower Frenzy Corsages for the senior citizen prom. They look gorgeous! I love the two-toned effect some of the corsages have! I am so excited for the ladies to receive and wear the flowers!

Craft with Beth: Flower Frenzy Corsages

These corsages were quick and easy to put together. Give them a try today. I would love to see what you create!

2016 Retiring List Title Graphic


The Retiring List has been updated with the latest inventory status. The Cups and Kettles Thinlits Dies, individual markers, Greetings Thinlits Dies, Word Window Punch, Crumb Cake ribbon, and Crystal Effects are now sold out.

If you missed Crystal Effects, I have three bottles available for purchase in my Cash and Carry Cart. I also have glue sticks and two-way glue pens.

I am sad that so many of my favorite products are retiring this year, especially the Zoo Babies stamp set, the banner punch, and the Bigz Dies!

But, I know you will love the new products coming out in June! I wish you could have seen me looking through the new Annual Catalog at On Stage. I spent all evening pouring over each page. I am amazed at the talent and creativity Stampin' Up! designers have!

I am working on samples to share!

Thanks for stopping by!
Beth

Monday, April 25, 2016

On Stage 2016: Sneak Peek and Make & Takes

I had an amazing time at On Stage 2016! As a demonstrator I was able to see and create with many of the new products in the 2016-2017 Annual Catalog! I am so excited to share some sneak peeks with you!

The 2016-2017 Annual Catalog starts on June 1st, 2016. If you have ordered from me this year, I have placed an order to automatically send a 2016-2017 Annual Catalog directly to you. It should ship around May 16th. If you don't receive your catalog by May 30th, please contact me to get your 2016-2017 Annual Catalog.

We previewed many stamp and punch sets during the convention! I am truly excited for the catalog release on June 1st! I know you are going to love all of the new products! I have already started my wish list!

Here are the samples we made using some of the new stamp sets.


I love this product suite! It's called Affectionately Yours. It includes a gorgeous floral stamp set, two embossing folders, washi tape, and stunning DSP! I am really looking forward to putting a class together with the Affectionately Yours product suite. I ordered all of the product suite products during the premiere purchase order! I have seven ideas already!


This heart tri-fold card comes from an all inclusive kit called Oh, Happy Day! The kit comes with all of the embellishments, card bases, and stamps to create 20 different, gorgeous cards! I ordered this kit too!


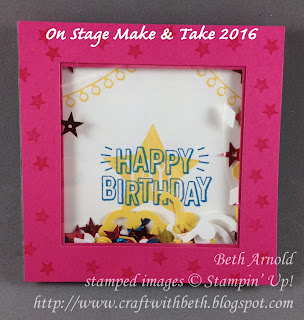
Check out this little card of awesomeness! That's right! It is a shaker card! Stampin' Up! is bringing back adhesive foam in strips! No more trying to make your own cardboard templates or fussing with dimensionals! Hooray! We made this confetti birthday shaker card using the new adhesive foam strips, the new confetti punch, and the new stamp set! I have tons of ideas for shaker cards using this new stamp set as well as a few others! You bet I ordered the adhesive foam strips, the confetti punch, and the stamp set!

Here is the news you have been waiting for! Here are the 2016-2018 In Colors!

On Stage 2016: 2016-2018 In Color Reference Sheet

We made this handy chart showing the cardstock, ink pad, and markers in each of the five new In Colors. The new colors are called Dapper Denim, Flirty Flamingo, Emerald Envy, Peekaboo Peach, and Sweet Sugarplum. They remind me of happy, beachy, summertime colors. They also remind me of tropical flowers and fruity cocktails! I am excited to start using these new colors! I think Flirty Flamingo and Dapper Denim are my favorites right now, but I know all of them will become my favorites! I ordered the ink pads, the cardstock sampler pack, the markers, and the ink refills.

Which new In Color is your favorite?


Yes, I totally ordered all of the products demonstrators could order from the On Stage premiere purchase! This is just a sampling!

I am working on scheduling some classes for the Affectionately Yours product suite and for the shaker cards. Please contact me today to let me know what dates are convenient for you.

Thanks for stopping by!
Beth

Sunday, April 24, 2016

April's Monthly Meeting

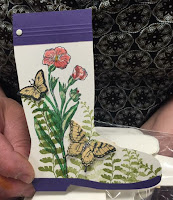
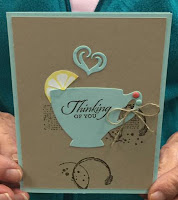
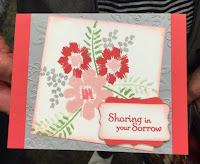
Thursday was our monthly demonstrator's meeting with my amazing upline Colleen Magness. This month's card swap theme was sympathy, get well, and thinking of you. These types of cards can be hard to design. It is hard to know what to say and how much to say even for the closest of family and friends.

Here are the swaps our group made.


Craft with Beth: April 2016 Card Swap 03Craft with Beth: April 2016 Card Swap 04


Craft with Beth: April 2016 Card Swap 05Craft with Beth: April 2016 Card Swap 06


Craft with Beth: April 2016 Card Swap 09Craft with Beth: April 2016 Card Swap 10


Craft with Beth: April 2016 Card Swap 11Craft with Beth: April 2016 Card Swap 12


What sympathy, get well, and thinking of you cards have you made?  What stamp sets and colors appeal most to you for these occasions? I would love to see what you create!

Thanks for stopping by!
Beth

Saturday, April 23, 2016

Mini Birthday Banners

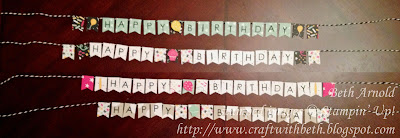
You know my mom and I love banners! So, it should be no surprise that we made mini birthday banners for many of our family member's upcoming birthdays!

Craft with Beth: Mini Birthday Banners 01
 
We thought the colors and patterns in the It's My Party DSP Stack was perfect for both the ladies and the guys in our family. There are neutral colors mixed with greens, yellows, and pinks, making it a fantastic balance for everyone.

Craft with Beth: Mini Birthday Banners 03

 First we determined which patterns from the It's My Party DSP Stack would work as the background to the letters. Then we punched the banner pennants and stamped one letter on each banner pennant to spell Happy Birthday.

The Back to Basics Alphabet is the perfect size and font for the banner punch. It is not too big or too small. The font is clear and not too fussy. I can see making banners for graduation, retirement, and inside cards for a pop up banner!

Craft with Beth: Mini Birthday Banners 02

Next we added coordinating patterned banners between Happy and Birthday and on each end for more embellishment. Finally, we glued the banner pennants to a length of Basic Black Baker's Twine, placing glue only on the top of the back of each pennant.

Craft with Beth: Mini Birthday Banners 04

On the banner photographed above, we added a Melon Mambo cupcake to the center banner pennant. So adorable!

Craft with Beth: Mini Birthday Banners 05
 
My husband still has his banner up even though his birthday was in the middle of March! He said that his banner was a fun surprise to show him how much I cared. He won't let me take it down. He got very sentimental! He is too sweet!

Out of all of the products retiring this year, my mom, my aunts, and I are the most sad about the banner punch, Back to Basics Alphabet stamp set, and the It's My Party Suite. Luckily, we all have these banner making goodies!

If you like our banners and would like to make your own, I suggest ordering soon so you don't miss out! I would love to see what you create!

Thanks for stopping by!
Beth


Mini Birthday Banners Project Supply List
Stamps
Back to Basics Alphabet
Party Wishes
Paper
It’s My Party DSP Stack
Ink
Archival Basic Black Ink Pad
Melon Mambo Ink Pad
Daffodil Delight Ink Pad
Mint Macaron Ink Pad
Embellishments
Basic Black Baker’s Twine
Tools
Clear Acrylic Block A
Grid Paper
Stampin’ Mist Cleaner
Stampin’ Scrub
Multipurpose Liquid Glue
Two-way Glue Pen
Banner Punch
Party Pack Punch Set
Paper Snips
Click here to start shopping!
 

Thursday, April 21, 2016

Tie Dye Ribbon Gift Box

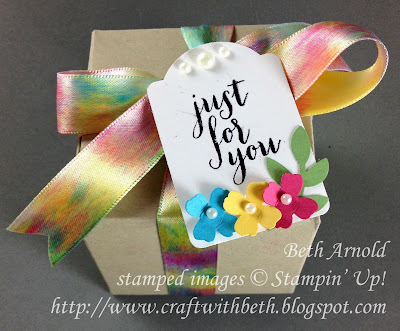
I've created this sweet gift box to continue practicing my gift packaging goal. I cut a 8" square piece of Crumb Cake cardstock and used the gift box punch board to make a medium sizedbox.


The tag is punched from the Tag Punch that is retiring. The flowers are from the Itty Bitty Accents Flower Punch. The leaves are from the Bird Builder Punch. I am sad to see that a lot of punches are retiring this year!

The sentiment is from the March 2016 Paper Pumpkin Kit.


The ribbon is a 24" piece of Whisper White 5/8" Satin Ribbon sponged randomly with Tempting Turquoise, Daffodil Delight, and Melon Mambo. I started by daubing Melon Mambo along the length of the ribbon every inch or so. I next filled in the what was still white with Daffodil Delight. Then I sponged Tempting Turquoise over the top of the Melon Mambo and Daffodil Delight.

Next time, I may add white embossing to the sides of the box or even the Decorative Dots TIEF. I would love to see how you would decorate your gift boxes!

Thanks for stopping by!
Beth