Tuesday, February 6, 2018

Sweetheart Valentine Treat Holder Two Ways

I have seen this style of treat holder all over Pinterest and Facebook over the last few years. I do not know what the exact name of this style of treat holder is. The base is a rectangle with an interlocking tab closure. Here is my version done in two ways.

Craft with Beth: Sweetheart Punch Valentines Day Valentine St Saint Stampin Up Treat Holder 3D Classic Label Punch Sweet and Sassy Framelits Painted with Love DSP partial die cutting

Both ways to create this treat holder use partial cutting - whether it be with a punch or with a framelit. Partial cutting is a way to only cut the areas or sections of the shape. In this case, the partial cutting creates closure tabs on either end of the treat holder base.

The first way to create this treat holder is with the retired Sweetheart Punch. The Sweetheart Punch was recently back on the Clearance Rack. It was very popular and sold out before I could publish this post.

Start by cutting a 1-9/16" by 5-1/4" piece of Fresh Fig cardstock. With the 5-1/4" edge along the top of the Simply Scored Scoring Tool, score at 3/4" and at 2-1/8". Then rotate the cardstock 180 degrees. Score again at 3/4" and at 2-1/8". Alternatively, score at 3/4", 2-1/8", 3-1/8", and 4-1/2".

Craft with Beth: Sweetheart Punch Valentines Day Valentine St Saint Stampin Up Treat Holder 3D Classic Label Punch Sweet and Sassy Framelits Painted with Love DSP partial die cutting

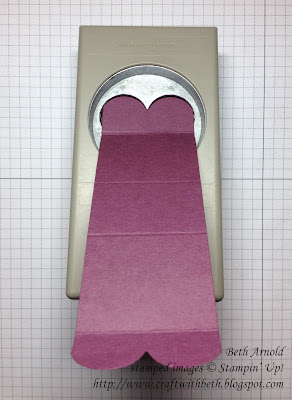
The tab closures are made by punching only the top of the heart. To do this, insert one of the 1-9/16" edges into the Sweetheart Punch from the bottom to the top of the punch instead of from the side and punch. Punching the heart this way keeps the heart shape attached to the treat holder base.

Craft with Beth: Sweetheart Punch Valentines Day Valentine St Saint Stampin Up Treat Holder 3D Classic Label Punch Sweet and Sassy Framelits Painted with Love DSP partial die cutting

Then rotate the treat holder base 180 degrees and punch the other 1-9/16" edge.

Craft with Beth: Sweetheart Punch Valentines Day Valentine St Saint Stampin Up Treat Holder 3D Classic Label Punch Sweet and Sassy Framelits Painted with Love DSP partial die cutting

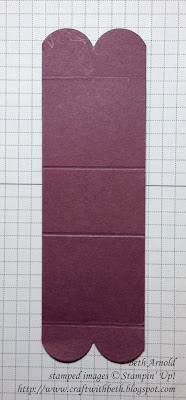
The treat holder base should now look like this.

Craft with Beth: Sweetheart Punch Valentines Day Valentine St Saint Stampin Up Treat Holder 3D Classic Label Punch Sweet and Sassy Framelits Painted with Love DSP partial die cutting

Next, cut along one of the 3/4" score lines about half way across the treat holder base from the right side. Then cut along the other 3/4" score about half way across the treat holder base from the left side.

Craft with Beth: Sweetheart Punch Valentines Day Valentine St Saint Stampin Up Treat Holder 3D Classic Label Punch Sweet and Sassy Framelits Painted with Love DSP partial die cutting

Cut two 1-7/16" by 1-1/4" pieces of Whisper White cardstock, two 1-3/8" by 1-1/8" pieces of Painted with Love Designer Series Paper, one 1/2" Whisper White circle, one 1" square piece of Melon Mambo cardstock, and one 2-1/2" by 3/4" piece of Whisper White cardstock.

Adhere the Painted with Love Designer Series Paper rectangles to the Whisper White rectangles. Adhere one to the front of the treat holder base and one to the back of the treat holder base.

Stamp Happy Valentine's Day on the 2-1/2" by 3/4" piece of Whisper White cardstock with Fresh Fig ink and punch out with the Classic Label Punch. Adhere the greeting to the right side of the heart tab as shown in the photograph below.

Die cut the top of the party hat from the Celebration Thinlits from the Melon Mambo cardstock.

Stamp the small heart image from Heart Happiness with Melon Mambo ink on the 1/2" circle. Adhere to the Melon Mambo party hat top. Add a dimensional to the back and adhere to the front of the treat holder base in the center of the Painted with Love Designer Series Paper rectangle.

Craft with Beth: Sweetheart Punch Valentines Day Valentine St Saint Stampin Up Treat Holder 3D Classic Label Punch Sweet and Sassy Framelits Painted with Love DSP partial die cutting

Wrap a Hearshey chocolate nugget with a 1" by 3" piece of Painted with Love Designer Series Paper and glue the ends together. Liquid glue works better here than a dry adhesive. Add a glue dot to the back of the nugget.

Craft with Beth: Sweetheart Punch Valentines Day Valentine St Saint Stampin Up Treat Holder 3D Classic Label Punch Sweet and Sassy Framelits Painted with Love DSP partial die cutting

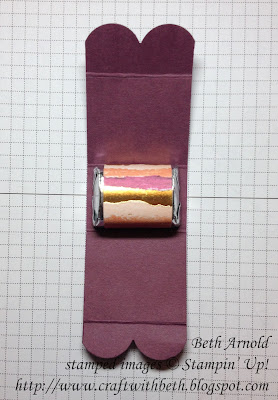
Turn the treat holder base over and attach the chocolate candy nugget to the center. Fold up the sides and slide the tabs together to close the treat holder.

Craft with Beth: Sweetheart Punch Valentines Day Valentine St Saint Stampin Up Treat Holder 3D Classic Label Punch Sweet and Sassy Framelits Painted with Love DSP partial die cutting

The Sweetheart Punch's shape is similar to the dies in the Sweet and Sassy Framelits collection. If you missed the Sweetheart Punch or already have the Sweet and Sassy Framelits, you can still recreate this treat holder.

Craft with Beth: Sweetheart Punch Valentines Day Valentine St Saint Stampin Up Treat Holder 3D Classic Label Punch Sweet and Sassy Framelits Painted with Love DSP partial die cutting

The second way to recreate this treat holder uses the Big Shot Machine and the Sweet and Sassy Framelits to cut away part of the heart shape. This method is called partial die cutting. Partial die cutting is a way of positioning the acrylic plates so that only a section of the framelit or thinlit is cut. Think of partial die cutting as fussy cutting for the Big Shot Machine.

Craft with Beth: Sweetheart Punch Valentines Day Valentine St Saint Stampin Up Treat Holder 3D Classic Label Punch Sweet and Sassy Framelits Painted with Love DSP partial die cutting

To partial die cut a framelit or thinlit, place the die on top of the cardstock you wish to cut. Then position the top acrylic plate on top of the area you wish to cut and leave the area you do not wish to cut uncovered by the top acrylic place. Here the edge of the top acrylic plate to lined up with the 3/4" score line.

Craft with Beth: Sweetheart Punch Valentines Day Valentine St Saint Stampin Up Treat Holder 3D Classic Label Punch Sweet and Sassy Framelits Painted with Love DSP partial die cutting

Then run it through the Big Shot Machine. Repeat for the other end.

Craft with Beth: Sweetheart Punch Valentines Day Valentine St Saint Stampin Up Treat Holder 3D Classic Label Punch Sweet and Sassy Framelits Painted with Love DSP partial die cutting

The treat holder base should now look like this. The two tops of the hearts are cut and the bottom point is not.

Craft with Beth: Sweetheart Punch Valentines Day Valentine St Saint Stampin Up Treat Holder 3D Classic Label Punch Sweet and Sassy Framelits Painted with Love DSP partial die cutting

Trim the extra cardstock from the sides of the hearts. Cut the tabs and decorate in the same manner as the first version of this treat holder.

Whether you use a punch or a framelit, this is a sweet treat for your Valentine! I bet this treat holder would look great decorated as a butterfly too! I hope you give this treat holder a try. How would you decorate your treat holder? I would love to see what you make!

Thanks for stopping by!
Beth


 Valentine’s Day Treat Holder Two Ways Supply List
Stamps
#145769 Heart Happiness (Photopolymer)
#128748 Teeny Tiny Wishes (Wood-Mount)
#127802 Teeny Tiny Wishes (Clear-Mount)
Paper
#100730 Whisper White Cardstock
#115320 Melon Mambo Cardstock
#144242 Fresh Fig Cardstock
#145580 Painted with Love Designer Series Paper
Ink
#144082 Fresh Fig Ink Pad
#126948 Melon Mambo Ink Pad
Embellishments
#104430 Stampin’ Dimensionals
Tools
#126199 Stampin’ Pierce Mat
#143263 Big Shot Machine
#141707 Sweet and Sassy Framelits
#143703 Celebration Thinlits
#141491 Classic Label Punch
#133786 Sweetheart Punch (retired)
#119869 1/2" Circle Punch
#122334 Simply Scored Scoring Tool


Tuesday, January 30, 2018

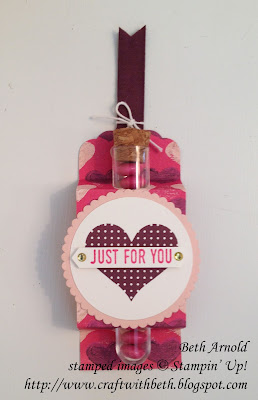
Just for You Valentine Treat Tube

The inspiration for this treat tube comes from Mary Lee Carroll. She created a precious treat tube holder last year which she modified from Jennifer.

Craft with Beth: treat tube Valentine's Day St Saint Valentine 3D treat holder gift packaging Heart Happiness Stampin Up Classic Label Punch Sure Do Love You stamp Layering Circles Framelits Painted with Love DSP Designer Series Paper Scalloped Tag Topper Punch scoreboard
 
I am using Mary Lee's measurements. I have updated the Designer Series Paper, changed the color palette, and added my own embellishments.

Start with a 2" x 6" piece of Painted with Love Designer Series Paper. Punch one end of the Designer Series Paper with the Scalloped Tag Topper Punch.

Then starting with the other end and with the 6" side along the top of the Simply Scored Scoring Tool,  score at 3/4", 1-1/2", 4", and 4-3/4". This will become the treat holder base.

Thread a 5" piece of Fresh Fig 1/2" Finely Woven Ribbon through the hole at the top of the tag, fold it in half and secure with glue dots. Then tie a bow of Whisper White Baker's Twine around the neck of the Fresh Fig Ribbon.

Craft with Beth: treat tube Valentine's Day St Saint Valentine 3D treat holder gift packaging Heart Happiness Stampin Up Classic Label Punch Sure Do Love You stamp Layering Circles Framelits Painted with Love DSP Designer Series Paper Scalloped Tag Topper Punch scoreboard

Burnish the score lines. Fold the treat holder base as follows. Start with end away from the punch - the 3/4" score line - and valley fold. Then mountain fold the 1-1/2" score line. Mountain fold the 4" score line. Lastly, valley fold the 4-3/4" score line.

Die cut the scalloped circle from Powder Pink cardstock. Die cut the circle from Whisper White cardstock using the Layering Circles Framelits. using the Layering Circles Framelits.

Stamp the polka-dotted heart image from Heart Happiness in the center of the Whisper White circle using Fresh Fig ink.

Adhere the Whisper White circle to the Powder Pink scalloped circle.

Stamp the just for you sentiment image from Sure Do Love You on a scrap of Whisper White cardstock with Melon Mambo ink and punch out with the Classic Label Punch. Add dimensionals to the back of the label. Then add a gold enamel circle to both ends of the label. Adhere the label to the center of the Whisper White circle and then to the center panel of the treat holder base (between the 1-1/2" score line and the 4" score line).

Craft with Beth: treat tube Valentine's Day St Saint Valentine 3D treat holder gift packaging Heart Happiness Stampin Up Classic Label Punch Sure Do Love You stamp Layering Circles Framelits Painted with Love DSP Designer Series Paper Scalloped Tag Topper Punch scoreboard

Fill the treat tube with M&M's or other candy. Add three glue dots to the center of the treat tube. Carefully, slide the treat tube from the top of the treat holder base to the bottom of the treat holder base. Once the treat tube is in place, press the treat tube against the Designer Series Paper base to secure the treat tube in place.

Treat tubes were one of the products that I was surprised and saddened to see on the Holiday retiring list. Treat tubes are incredibly versatile! They work for a multitude of occasions, all ages, all genders, and can fit all kinds of treats whether it be candy or sunflower seeds. I purchased quite a few boxes before they were gone. Although the treat tubes by themselves are retired, treat tubes are still available in the 2017 September Paper Pumpkin Kit and Refill. I recommend purchasing the kit or the refill while supplies! September's kit was fa-boo-lous!

I love using the Scalloped Tag Topper Punch for making treat holders. It is the perfect width for small treats, fantastic for creating closures, and for attaching embellishments too. What have you created with the Scalloped Tag Topper Punch? I would love to see what you make!

Thanks for stopping by!
Beth

Monday, January 29, 2018

The Purrfect Valentine Treat Holder

I drew my inspiration for this next treat holder from BJ Peters. She created a Halloween Cat Punch treat holder that was so adorable, I had to create one myself!

Craft with Beth: Cat Punch Valentine's Day St Saint Treat Holder Stampin Up Painted with Love DSP Simply Scored Scoring Tool Scoreboard Hershey Kiss Treat Holder

I used the Painted with Love Designer Series Paper pack as the base of my treat holder. The cat is adorned with a Calypso Coral Ombre Ribbon bow and a gold enamel heart.

 Craft with Beth: Cat Punch Valentine's Day St Saint Treat Holder Stampin Up Painted with Love DSP Simply Scored Scoring Tool Scoreboard Hershey Kiss Treat Holder

Start by punching two cats out of Painted with Love Designer Series Paper. I chose the small heart pattern, but all of the patterns in this paper pack would be gorgeous! Make sure to punch one cat with your chosen pattern facing you and one cat with your chosen pattern facing AWAY from you. That way your chosen pattern is facing outwards on both sides of the treat holder.

Craft with Beth: Cat Punch Valentine's Day St Saint Treat Holder Stampin Up Painted with Love DSP Simply Scored Scoring Tool Scoreboard Hershey Kiss Treat Holder

Essentially, you are creating a mirror image with the Cat Punch.

Craft with Beth: Cat Punch Valentine's Day St Saint Treat Holder Stampin Up Painted with Love DSP Simply Scored Scoring Tool Scoreboard Hershey Kiss Treat Holder

Then cut a 2-1/2" x 3/4" piece of Painted with Love Designer Series Paper. With the 2-1/2" side along the top of the Simply Scored Scoring Tool at 3/4" and at 1-3/4". Burnish all of the score lines. This piece will connect the two cats and form the base of the treat holder.

Craft with Beth: Cat Punch Valentine's Day St Saint Treat Holder Stampin Up Painted with Love DSP Simply Scored Scoring Tool Scoreboard Hershey Kiss Treat Holder

Line up the bottom edge of one cat with the bottom edge of the 3/4" score line and adhere in place.

Craft with Beth: Cat Punch Valentine's Day St Saint Treat Holder Stampin Up Painted with Love DSP Simply Scored Scoring Tool Scoreboard Hershey Kiss Treat Holder

From the side, the treat holder is starting to take on the shape of the letter U.


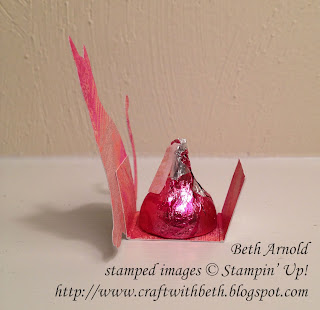
Add a glue dot to the bottom of a Hershey Kiss and adhere to the center of the treat holder base.

Craft with Beth: Cat Punch Valentine's Day St Saint Treat Holder Stampin Up Painted with Love DSP Simply Scored Scoring Tool Scoreboard Hershey Kiss Treat Holder

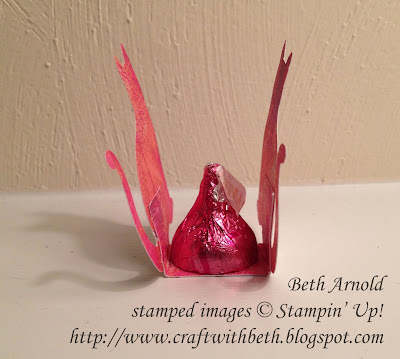
Line with the second cat's ears with the first cat's ears, pinch together while adhering the bottom of the second cat to the other side of the treat holder base.

Craft with Beth: Cat Punch Valentine's Day St Saint Treat Holder Stampin Up Painted with Love DSP Simply Scored Scoring Tool Scoreboard Hershey Kiss Treat Holder

Adhere the two cat heads together. Tie and attach the Calypso Coral Ombre Ribbon bow to the cat. Then adhere a gold heart enamel shape to the center of the bow.

Craft with Beth: Cat Punch Valentine's Day St Saint Treat Holder Stampin Up Painted with Love DSP Simply Scored Scoring Tool Scoreboard Hershey Kiss Treat Holder

This treat holder is so quick and easy and uses very little supplies. I made four variations using the Painted with Love Designer Series Paper.

Craft with Beth: Cat Punch Valentine's Day St Saint Treat Holder Stampin Up Painted with Love DSP Simply Scored Scoring Tool Scoreboard Hershey Kiss Treat Holder

You can create a plethora of treat holders in no time. I think I got a little carried away!

Craft with Beth: Cat Punch Valentine's Day St Saint Treat Holder Stampin Up Painted with Love DSP Simply Scored Scoring Tool Scoreboard Hershey Kiss Treat Holder

These cuties are ready for delivery! I hope you give these Valentine treat holders a try. How would you decorate your Cat Punch treat holder? I would love to see what you make!

Thanks for stopping by!
Beth


Cat Punch Valentine Treat Holder Supply List
Stamps

Paper
#145580 Painted with Love Designer Series Paper
Ink

Embellishments
#144235 Calypso Coral Ombre Ribbon
#134583 1/8” Gold Ribbon
#141679 Subtles Enamel Shapes
#141678 Metallic Enamel Shapes
#141680 Brights Enamel Shapes
Tools
#144666 Cat Punch
#103683 Glue Dots®
#122334 Simply Scored Scoring Tool


Friday, January 26, 2018

Paper Pumpkin: January 2018 Heartfelt Notes

I look forward to receiving and creating with Paper Pumpkin Kits all month long! It truly is like getting a birthday present in the mail every month. I love not knowing what will be in the kit, too!

Craft with Beth: Paper Pumpkin Kit January 2018 Heartfelt Love Notes Stampin' Up Alternative Projects Kit Contents Kit Project

This month's kit is called Heartfelt Love Notes and contains the supplies to create 16 diagonal fold note cards.

Craft with Beth: Paper Pumpkin Kit January 2018 Heartfelt Love Notes Stampin' Up Alternative Projects Kit Contents Kit Project

The note cards open to reveal a Flirty Flamingo heart shape inside. It is super cute! The foil heart pattern on the outside with the pink inside reminds me of the famous designer red bottom high heeled shoes! Very stylish!

The color palette is really sophisticated! I love the copper with the Rich Razzleberry and the Flirty Flamingo! 

Craft with Beth: Paper Pumpkin Kit January 2018 Heartfelt Love Notes Stampin' Up Alternative Projects Kit Contents Kit Project Color Palette

Not only are these note cards perfect for holding a Valentine note for your sweetie, but they can also hold a gift card, flatter candy bars, a mini sized bag of M&M's, and like I did, a nutritional bar.

Craft with Beth: Paper Pumpkin Kit January 2018 Heartfelt Love Notes Stampin' Up Alternative Projects Kit Contents Kit Project

I added a nutritional bar to give to my trainers who have been helping me on my fitness journey. They have been so helpful I wanted to give them a Valentine treat even they would approve of! Plus, the "You make my heart happy" stamp is perfect for cardiovascular fitness!

Craft with Beth: Paper Pumpkin Kit January 2018 Heartfelt Love Notes Stampin' Up Alternative Projects Kit Contents Kit Project

I also thought the diagonal cut on the note cards reminded me of the hot chocolate and marshmallow holders. I don't necessarily associate hot chocolate and marshmallows with Valentine's Day, but I liked the idea of attaching treats to the card. So, I punched a 1/8" hole underneath the pre-punched hole on the right side of the note card, threaded the ribbon through, and attached a treat tube filled with M&M's.

The treat tubes by themselves are now retired, however they are still available in the September 2017 Something Good to Eat Paper Pumpkin Kit (#143593) and in the Refill.

Check out the official Paper Pumpkin video for kit assembly instructions.


Of course, you don't have to put your kit together according to the directions. Check out my alternative projects using this month's kit.

Craft with Beth: Paper Pumpkin Kit January 2018 Heartfelt Love Notes Stampin' Up Alternative Projects Kit Contents Kit Project

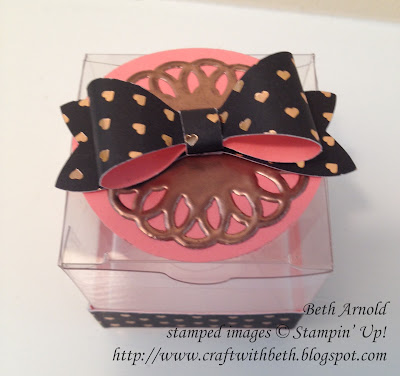
My first alternative project is a mini-treat box topped with a bow and a copper foil doily. I love the lacy-ness of the foil doilies. However, the foil doilies only come in silver and in gold, so I changed it by covering the top of the doily directly with the Versamark ink pad and copper embossing powder. It is gorgeous and so easy! The bow is made with the Bow Builder Punch and the copper heart notecard. The Flirty Flamingo cardstock is 2" in diameter and is punched with the 2" Circle Punch.

Craft with Beth: Paper Pumpkin Kit January 2018 Heartfelt Love Notes Stampin' Up Alternative Projects Kit Contents Kit Project

My second alternative project is a matchbox treat holder. I used the left over pieces from the mini-treat box to make the top and side copper foil heart panels.


I used the copper foil heart paper scraps leftover from the mini-treat box to decorate this matchbox. The box is large enough to hold a fair amount of Hershey Kisses(r) and was made the same way as the Thanksgiving Matchbox.

Refill kits (#147519) are now available while supplies last! Click here to order your refill kit.

Craft with Beth: Paper Pumpkin Kit January 2018 Heartfelt Love Notes Stampin' Up Alternative Projects Kit Contents Kit Project

What do you think of this month's Paper Pumpkin Kit Heartfelt Love Notes? What alternative projects did you create? I would love to see what you create!

Craft with Beth: Start Your Paper Pumpkin Kit Subscription Today Stampin Up Graphic

Not a Paper Pumpkin subscriber? Click here to start your subscription today!

Thanks for stopping by!
Beth