Showing posts with label Christmas. Show all posts

Tuesday, December 6, 2022

Happy December! Penguin Place Double Gate Fold Christmas Card

Happy December! I just sent out my December newsletter to my mailing list. This month I shared how to make a double gate fold Christmas card with the Penguin Place stamp set and the Penguin Builder Punch.

Christmas card with a penguin on the front. a belly band is wrapped horizontally around the card. The greeting says season's greetings. The penguin has four presents in front. Penguin Place, Penguin Builder Punch, Christmas, card, fun fold, double gate fold card


I also shared a few tips to make stamping and assembling this card a snap!

I designed and planned this card using the Penguin Place stamp set several months ago, and unfortunately, in the last few days it sold out and is no longer available for purchase. I debated on changing this month's project. However, most of you already have both the Penguin Place stamp set and the Penguin Builder Punch, and the skills in this card are easily translatable to another stamp set, and designer series paper can be substituted for the stamped winter tree and snow scene. So, I did not substitute another stamp set.

The new host code for December is 9CVPJ27N. Please, use the host code on orders under $150 USD. For orders over $150 USD, please, don't use the host code.

My December newsletter is available all month to new subscribers. If you sign up for my email list during December, you will also receive a copy of my December newsletter with the instructions, supply list, and measurements for this cute penguin Christmas card.

Sign up for my mailing list today HERE or in the bright blue box in the upper right corner of my blog. I can't wait to welcome you as a subscriber!

Beth

Tuesday, November 29, 2022

Only 4 Weeks Left!

12 weeks of Christmas logo graphic

You've already missed the first 8 weeks of my 12 Weeks of Christmas email series & you’ve missed some fantastic holiday projects. But you can still get the last 4 weeks if you sign up for my mailing list now HERE.

I look forward to welcoming you to my email list!

Beth

Monday, November 28, 2022

Turn a Tag into a Treat Holder with Partial Die Cutting

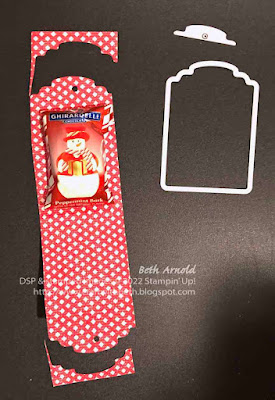
Today's Ghirardelli peppermint snowman treat holder was an experiment. Could I use something from the 2022-2023 Annual Catalog to replicate one of my favorite quick and easy treat holders?

peppermint snowman chocolate candy Ghirardelli wrapped in a sleeve of red and white striped patterned paper. the greeting on the front says noel and is in the shape of a light blue circle with stitching around the inside circumference of the circle. Framed and Festive, treat holder, 3D, Christmas, snowman, winter, gift packaging

I was sad to see the Scalloped Tag Topper Punch retired. I have made countless different treat holders and boxes with the decorative punch over the years.

The Scalloped Tag Topper Punch was one of my go to stamping tools! When the 2022-2023 Annual Catalog debuted, I noticed a possible replacement - #159165 Designer Tags Dies on page 170.

#159165 Designer Tags Dies graphic

This die set comes with 4 different tag dies, 1 decorative tag background die, 3 dies to cut shapes - a rose, a butterfly, and a floral sprig - and a tiny circle die.

I am excited about all of the tag shapes and decorative additions. However, the tiny circle die is what really surprised me. I thought, you know, it looks like a circle hole punch shape. That's helpful, I guess. I could just use a handheld circle punch though. 


#159165 Designer Tags Dies graphic metal dies

What's the big deal? The tiny little dot in the above graphics is not just a tiny circle die. It is a circle die that cuts the hole at the top of the tag, yes, but the actual die is in the shape of the top of the tag with the circle in the middle! Great, right!? The die's shape can be butted up to the top of the tag die for precise alignment!

No more guessing where the center of the tag is. The die lines up for you. That is why that tiny little circle in the above graphic is so great. So clever! Spread the word!

Ok. So, how did I turn a tag into a treat holder? The secret is to partially die cut only the ends of the designer series paper and not the bottom. To do this, cut the designer series paper slightly narrower than the width of the die. Fold the designer series paper in half.

Framed and Festive, treat holder, 3D, Christmas, snowman, winter, gift packaging


Slide the open end of the designer series paper from the back of the die to the front. Keep the folded end on top of the die, so the fold won't get cut. If the side view of the treat holder, I didn't crease the fold line, so you could see where the fold area goes more easily.

Line up the open end of the designer series paper with the top of the tag die. Place the circle die on top of the designer series paper at the top of the tag. Place a piece of low tact tape on the dies and run it through the Stampin' Cut and Emboss Machine.

Framed and Festive, treat holder, 3D, Christmas, snowman, winter, gift packaging


Tada! Your "tag" is now twice as long as the die and ready to add your treats to.

Framed and Festive, treat holder, 3D, Christmas, snowman, winter, gift packaging


Add the chocolate snowman with a bit of Stampin' Seal or a glue dot to the inside of the treat holder. Add the stamped and die cut stitched circle on dimensionals with some pearl basic jewels. Close up the treat holder and thread the ribbon half way through the top holes. Then tie the ribbon into a bow.

Once you make one treat holder. You will be making multiples in minutes!

Framed and Festive, treat holder, 3D, Christmas, snowman, winter, gift packaging

Below are the measurements and the supply list for my Ghirardelli peppermint snowman treat holder. If you need supplies to recreate this treat holder, please, shop my online store HERE.

Measurements

  • Treat Holder Base: 1-3/4" x 6"; scored at 3" (Sweetest Christmas Designer Series Paper (DSP))
  • Greeting: 2" x 2" (Pool Party Cardstock) - use the 3rd smallest stitched circle die
  • Ribbon: 8" long (Real Red and Garden Green 3/8" Ribbon Combo Pack)


Supplies

Stamps
#160888 Framed and Festive Stamp Set

Paper
#122924 Pool Party Cardstock
#159559 Sweetest Christmas Designer Series Paper (DSP)

Ink
#147114 Early Espresso Ink Pad

Embellishments
#159577 Real Red and Garden Green 3/8" Ribbon Combo Pack
#144219 Pearl Basic Jewels
#104430 Dimensionals

Tools
#159165 Designer Tags Dies
#159183 Stylish Shapes Dies
#110755 Multipurpose Liquid Glue
#102300 Bone Folder
#103579 Paper Snips
#130148 Grid Paper
#152392 Paper Trimmer
#149653 Stampin' Cut & Emboss Machine
#126200 Stampin' Scrub
#153648 Stampin' Mist Cleaner
#118486 Clear Block C


I made 12 treat holders with 1 sheet of 12" x 12" designer series paper and 1 piece of 8-1/2" x 11" cardstock. If you cut your 8-1/2" x 11" piece of cardstock into 2" x 11" strips, you can die cut 20 circles from one sheet of 8-1/2" x 11" cardstock, making this treat holder design very economical and a great way to use up designer series paper.

peppermint snowman chocolate candy Ghirardelli wrapped in a sleeve of red and white striped patterned paper. the greeting on the front says noel and is in the shape of a light blue circle with stitching around the inside circumference of the circle. Framed and Festive, treat holder, 3D, Christmas, snowman, winter, gift packaging

I hope you enjoyed today's snowman treat holder featuring the Designer Tags Dies and give it a try. How will you decorate your Designer Tags treat holder? Post your treat holder project photo and be sure to tag me with #craftwithbeth. I can't wait to see what treat holders you create using the Designer Tags Dies!

If you need supplies to make this project, please, shop my online store HERE.

If you have any questions about today's project, please, don't hesitate to ask me. I am happy to help you with you stamping questions!

Thanks for stopping by!
Beth

Friday, November 25, 2022

Highlight a Greeting Stamp with this Fun Fold Christmas Card

 Today's flap fun fold card highlights not only the Sweetest Christmas Designer Series Paper, but this flap fun fold is fantastic for using larger greeting stamps like some of the stamps in the Framed and Festive stamp set.

Framed and Festive flap fold Christmas card with Sweetest Christmas Designer Series Paper DSP on the card front

The larger greeting stamps in Framed and Festive really stand out and shine on this fun fold! The jingle bell trinket and linen thread are the perfect holiday embellishment to enhance the greeting stamp.


opening the flap fold Christmas card with Sweetest Christmas Designer Series Paper DSP on the front and Framed and Festive stamp set
 
This card opens with the flap on the right, revealing a larger designer series paper panel on the left side of the card front. The flap is adhered inside of the card base with Tear and Tape Adhesive before the inside mat is added.

opening the flap fold Christmas card with Sweetest Christmas Designer Series Paper DSP on the front and Framed and Festive stamp set


On the inside of the card, I stamped another larger greeting from Framed and Festive - "May this season be filled with peace and joy" with Real Red ink. I did not add any more designer series paper to the inside of the card because you can see some of the inside of the card when the card is closed. 


However, you could add some more stamping or a vertical piece of designer series paper along the left or the right edge of the inside mat. A few festive pearls or rhinestones would also look nice in the upper right or lower right corner too. There are lots of ways to customize this flap fold card!

Below are the measurements and the supply list for my Framed and Festive flap card. If you need supplies to recreate this card, please, shop my online store HERE.

Measurements

  • Card Base: 6-3/4" x 5-1/2"; scored at 2-5/8" (Garden Green Cardstock)
  • Flap: 3-1/2" x 3-1/2"; scored at 3/4" (Garden Green Cardstock)
  • Left DSP Panel: 5-1/4" x 2-3/8" (Sweetest Christmas Designer Series Paper (DSP))
  • Flap DSP Panel: 3-1/4" x 2-1/2" (Sweetest Christmas Designer Series Paper)
  • Greeting Circle: 2-1/2" x 2-1/2" (Basic White Cardstock)
  • Greeting Circle Mat: 3" x 3" (Garden Green Cardstock)
  • Inside Mat: 4" x 5-1/4" (Basic White Cardstock)


Supplies

Stamps
#160888 Framed and Festive

Paper
#102584 Garden Green Cardstock
#159276 Basic White Cardstock
#159559 Sweetest Christmas Designer Series Paper (DSP)

Ink
#147084 Real Red Ink Pad

Embellishments
#104199 Linen Thread
#159980 Flat Jingle Bell Trinkets
#104430 Dimensionals

Tools
#151770 Layering Circle Dies
#159183 Stylish Shapes Dies
#110755 Multipurpose Liquid Glue
#102300 Bone Folder
#103579 Paper Snips
#130148 Grid Paper
#152392 Paper Trimmer
#149653 Stampin' Cut & Emboss Machine
#126200 Stampin' Scrub
#153648 Stampin' Mist Cleaner
#118485 Clear Block D


I hope you enjoyed today's flap fold Christmas card and give it a try. I would love to see what you create! Post your flap card on social media. Be sure to tag me with #craftwithbeth.

If you need supplies to make this card, please, shop my online store HERE. ### insert link to shop here  ###

If you have any questions about today's project, please, don't hesitate to ask me. I am happy to help you with your stamping questions!

Thanks for stopping by!
Beth

Thursday, November 24, 2022

Make Boughs of Holly Designer Series Paper the feature on this Christmas card

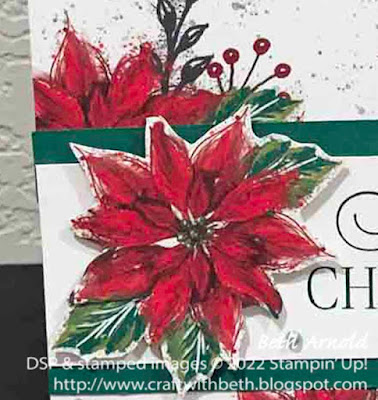
Each Tuesday I send out my stamping newsletter to my email list. On November 22nd, I will be sharing this festive poinsettia Christmas card featuring the Brightest Glow stamp set and the Boughs of Holly Designer Series Paper.


Brightest Glow, poinsettia, Christmas, card, Boughs of Holly Designer Series Paper, sneak peek of newsletter project


This sweet and simple Christmas card is only available to my email list subscribers. If you are already on my email list, you will automatically receive the project supply list, measurements, and instructions for this card.

If you are not on my email list and would like to receive the project supply list, measurements, and instructions for this Christmas card, please, sign up for my email list by November 28th, 2022.

Sign up for my mailing list today HERE or in the bright blue sign up box in the upper right corner of my blog. I can't wait to welcome you as a subscriber!

Beth

Monday, November 21, 2022

Deck the Halls this Christmas Season with the Framed and Festive Stamp Set

I love how some of the stamps in Framed and Festive stamp set are from Christmas carols! Today's Christmas card project uses the 'tis the season to be jolly and falala, which are both part of Deck the Halls.

Framed and Festive stamp set Christmas card with falala stamped in the background. The greeting on the circle die cut says 'tis the season to be jolly. behind the circle are sprigs of holly, leaves, and berries. There is a horizontal rectangle of birch tree patterned paper with a border of brown cardstock. Framed and Festive, Christmas, card, Boughs of Holly Designer Series Paper, Stylish Shapes Dies

I used 'tis the season to be jolly as my main focal greeting and stamped it on a stitched circle from the Stylish Shapes Dies with Cherry Cobbler ink. I then fussy cut holly leaves, berry sprigs, and leaves from the Boughs of Holly Designer Series Paper to highlight the greeting further.
 
I stamped falala with Versamark clear watermark ink to create a subtle background pattern across the card front. I didn't want the connection between the two greetings to be so obvious that it was too busy looking.

close up of the ribbon embellishment. Framed and Festive, Christmas, card, Boughs of Holly Designer Series Paper, Stylish Shapes Dies


The White 3/8" Glittered Organdy Ribbon embellishment was created by folding the ribbon into an S-shape on the back of the circle die cut. I chose the white organdy ribbon because it is sheer and does not detract from the fussy cut leaves and berries. The ribbon also adds an extra bit of sparkle almost reminiscent of snowflakes, enhancing the wintry feel of this card.

Inside of the card I stamped Merry Christmas with Cherry Cobbler ink and added a narrow strip of the birch patterned paper horizontally along the bottom of the Inside Mat, leaving plenty of room to write a special message to your loved ones!

inside of the card says Merry Christmas. there is a horizontal, narrow piece of the birch patterned paper across the bottom of the inside of the card. Framed and Festive, Christmas, card, Boughs of Holly Designer Series Paper, Stylish Shapes Dies

Below are the measurements and the supply list for my Framed and Festive Christmas card. If you need supplies to recreate this card, please, shop my online store HERE.

Measurements

  • Card Base: 8-1/2" x 5-1/2"; scored at 4-1/4" x 11" (Crumb Cake Cardstock)
  • 1st Mat: 2-1/4" x 5-1/2" (Early Espresso Cardstock)
  • 2nd Mat: 2" x 5-1/2" (Boughs of Holly Designer Series Paper (DSP))
  • Circle: 3" x 3" (Basic White Cardstock)
  • Leaves & Berry Sprigs: Fussy cut from the Boughs of Holly Designer Series Paper (Boughs of Holly Designer Series Paper)
  • Inside Mat: 4" x 5-1/4" (Basic White Cardstock)
  • Inside DSP Strip: 1/2" x 5-1/4" (Boughs of Holly Designer Series Paper)


Supplies

Stamps
#160888 Framed and Festive Stamp Set

Ink
#102283 Versamark Clear Watermark Ink Pad
#147083 Cherry Cobbler Ink Pad

Paper
#120953 Crumb Cake Cardstock
#119686 Early Espresso Cardstock
#159276 Basic White Cardstock
#159600 Boughs of Holly Designer Series Paper (DSP)

Embellishments
#159963 Festive Pearls
#156408 White 3/8" Glittered Organdy Ribbon
#104430 Dimensionals

Tools
#159183 Stylish Shapes Dies
#118486 Clear Block C
#118485 Clear Block D
#118489 Clear Block G
#110755 Multipurpose Liquid Glue
#102300 Bone Folder
#103579 Paper Snips
#130148 Grid Paper
#152392 Paper Trimmer
#149653 Stampin' Cut & Emboss Machine
#126200 Stampin' Scrub
#153648 Stampin' Mist Cleaner

I hope you enjoyed today's jolly Christmas card! The Framed and Festive stamp set comes with 8 total Christmas greeting stamps. We used 2 of the greeting stamps in today's Christmas card. You can also switch today's greeting with your favorite. Which greetings are your favorite from Framed and Festive?

Please, keep in mind that the Framed and Festive stamp set is a limited time only part of the Fitted Florets Early Release promotion. The Framed and Festive stamp set is only available during the Early Release sales period November 1st, 2022 - January 4th, 2023 or while supplies last, whichever comes first.

Please, place your order for the Framed and Festive stamp set timely to avoid missing out on this truly festive stamp set!

If you need supplies to make this project, please, shop my online store HERE.

If you have any questions about today's project, please, don't hesitate to ask me.

Thanks for stopping by!
Beth

Thursday, November 17, 2022

A Not So Ugly Christmas Sweater Card

Each Tuesday I send out my stamping newsletter to my email list. On November 22nd, I will be sharing a Christmas card using a simple inlay technique. I even add embossing powder and the heat tool to the mix!

Christmas card with an inlaid snowflake on a faux knitted background. The greeting says to you and yours this Christmas, Christmas, Knit Together, inlay, technique, Brightest Glow
 

This warm and cosy Christmas card is only available to my email list subscribers. If you are already on my email list, you will automatically receive the project supply list, measurements, and instructions for this card.

If you are not on my email list and would like to receive the project supply list, measurements, and instructions for this Christmas card, please, sign up for my email list by November 21st, 2022.

Sign up for my mailing list today HERE or in the bright blue sign up box in the upper right corner of my blog. I can't wait to welcome you as a subscriber!

Beth

Tuesday, November 1, 2022

Happy November! Elegant Present Christmas Card

Happy November! I just sent out my November newsletter to my mailing list. This month I shared how to make a Christmas card with a stack of Fitting Florets designer series paper presents.


Christmas card with mistletoe patterned paper with the words Merry Christmas in the center on a rectangle of white paper with a stack of presents to the left; Christmas, card, Brightest Glow, Fitting Florets DSP

I shared how I paper pieced the presents using a die. I also shared a tips, including what kitchen item I keep on my craft room desk at all times.


Fitting Florets Graphic Banner


The Fitting Florets Early Release is also available starting today, November 1st, 2022. This is a stunning stamp set and die set with beautiful floral swags and images. The early release product collection has limited time designer series paper, gold swirls embellishments, and a Christmas themed greeting stamp set Framed and Festive. Check out my blog post HERE or visit my online store HERE for more information too.

I have a new Host Code for November. It is 44QG6D4Q. Please, use the Host Code when placing orders for November 1st-30th, 2022 for orders under $150 USD before tax and shipping. If your order is more than $150 USD, please, do not use the Host Code.

My November newsletter is available all month to new subscribers. If you sign up for my email list during November, you will also receive a copy of my November newsletter with the instructions, supply list, and measurements for this paper pieced Christmas card. 

Sign up for my mailing list today HERE or in the bright blue box in the upper right corner of my blog. I can't wait to welcome you as a subscriber!

Beth

There is still time to get the last 8 weeks!

12 weeks of Christmas logo graphic

You've already missed the first 4 weeks of my 12 Weeks of Christmas email series & you’ve missed some fantastic holiday projects. But you can still get the last 8 weeks if you sign up for my mailing list now HERE.

I look forward to welcoming you to my email list!

Beth

Friday, October 28, 2022

Christmas Wreath Pocket Gift Card Holder

Being a demonstrator, to me, means being part of an incredible stamping community. Part of my stamping community is my demonstrator team. They are an amazing group of ladies that I am so happy to be a part of! We talk throughout the week with each other, craft together, have in-person & online get togethers, go shopping together, have luncheons, play games, have bingo nights, and more.

We also have team meetings once a month on Zoom where we share projects and do challenges. Not all of my team members are local, and we all have different work hours, so it make sense to have our regular team meetings online.

pocket gift card holder with a wreath die cut in the center and the words Merry Christmas in the center of the wreath, Cottage Wreath, Christmas, Gift Card Holder, Pocket Card, 3D, Boughs of Holly DSP


During our October team meeting I shared a pocket gift card holder. The shape of this holder may be familiar, and I have made this style of pocket card before. However, the measurements for this gift card holder are my own.

pocket gift card holder with a wreath die cut in the center and the words Merry Christmas in the center of the wreath and the insert to the right with a gift card attached, Cottage Wreath, Christmas, Gift Card Holder, Pocket Card, 3D, Boughs of Holly DSP


I demonstrated how to make the pocket and how to make the insert. On the back of the insert is a piece of Basic White cardstock stamped with leaves, leaving plenty of room to write a special Christmas message.

pocket gift card holder with a wreath die cut in the center and the words Merry Christmas in the center of the wreath and the insert to the right, Cottage Wreath, Christmas, Gift Card Holder, Pocket Card, 3D, Boughs of Holly DSP


I named our team Purrfect Stampers because my husband and I have two adorable, amazing cats. We love and spoil our cats with toys, treats, blankets, and more! They are very loved! The name comes from a play on the words purr like the sound a cat makes and perfect. It is not a claim just a play on words. All of my team members also love animals.

Starter Kit Plus demonstrator joining special square graphic


Have you ever thought of becoming a Stampin' Up! demonstrator? There are still a few more days to take advantage of Stampin' Up!'s joining special - Starter Kit Plus!

New team members will get even MORE FREE products in their customizable Starter Kit. Between October 4th-31st, 2022, those who sign up can get $155 USD worth of eligible products for only $99 USD (plus local tax) + free business supplies + free shipping + all the fun being a part of Stampin’ Up! 

Sign up HERE or contact me today for more information. 

For more promotion details, please, see my blog post HERE or Stampin' Up! HERE.

I would love to welcome you to the Purrfect Stampers Team!

Please, note that these are just some of the things that my demonstrator team does. It is not necessarily indicative of any other or all demonstrator teams. This post doesn't make any claims and is anecdotal only to share what the Purrfect Stampers Team does.

Thanks for stopping by!
Beth

Thursday, October 20, 2022

Scrappy Designer Series Paper Christmas Card

Each Tuesday I send out my stamping newsletter to my email list. On October 25th, I will be sharing a Christmas card featuring a scraps of designer series paper. I am a saver of my designer series paper scraps. The patterned papers are so beautiful that it is difficult to toss all of the scraps. Next week's newsletter card shows you how to use scraps that you can't bear to toss but don't know what to do with.

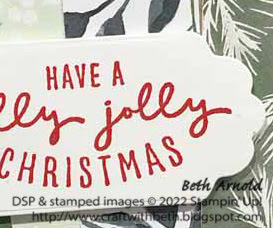
Christmas card with vertical strips of Christmas patterned paper, the center greeting says Have a holly jolly Christmas; Christmas Season, Christmas to Remember, Painted Christmas Designer Series Paper, Christmas, card


This Painted Christmas DSP Christmas card is only available to my email list subscribers. If you are already on my email list, you will automatically receive the project supply list, measurements, and instructions for this card.

If you are not on my email list and would like to receive the project supply list, measurements, and instructions for this Christmas card, please, sign up for my email list by October 24th, 2022.

Sign up for my emailing list today HERE or in the bright blue sign up box in the upper right corner of my blog. I can't wait to welcome you as a subscriber!

Beth

Thursday, October 6, 2022

Sneak Peek: Season of Hope and Light Christmas Card

Each Tuesday I send out my stamping newsletter to my email list. On October 11th, I will be sharing this Christmas banner card featuring the Brightest Glow stamp set and the Lights Aglow Specialty Designer Series Paper.

Brightest Christmas stamp set Christmas card Banner Pick a Punch Labels Aglow Dies


This Brightest Glow Christmas card is only available to my email list subscribers. If you are already on my email list, you will automatically receive the project supply list, measurements, and instructions for this card.

If you are not on my email list and would like to receive the project supply list, measurements, and instructions for this Christmas card, please, sign up for my email list by October 10th, 2022.

Sign up for my mailing list today HERE or in the bright blue sign up box in the upper right corner of my blog. I can't wait to welcome you as a subscriber!

Beth

Tuesday, October 4, 2022

Happy October! 3 Variations of 1 Aperture Card

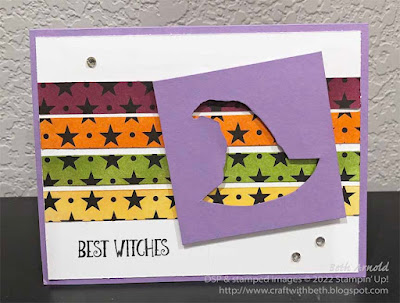
Happy October! I just sent out my October newsletter to my mailing list. This month I shared how to make an aperture card with dies and punches. 


Best Witches Halloween Aperture Card Witch Hat Builder Punch

You can create an aperture with most dies and punches. I even shared how to make an aperture with a builder punch.


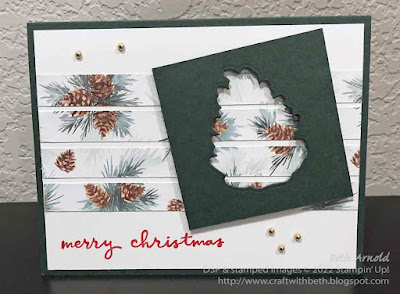
Christmas Season Pine Cone Aperture Christmas Card

I also shared some tips to make card assembly easier. 


Painted Poppies Friendship Aperture Card

My October newsletter is available all month to new subscribers. If you sign up for my email list during October, you will also receive a copy of my October newsletter with the instructions, supply list, and measurements for all 3 cards. 

Sign up for my mailing list today HERE or in the bright blue box to the right. I can't wait to welcome you as a subscriber!

Beth

24 Hours to Go!

12 weeks of Christmas logo graphic

My exclusive 12 Weeks of Christmas project email series starts tomorrow October 5th at 1pm EDT.  These projects are only available as an email subscriber. So, be sure to sign up today to receive all 12 weeks of projects! Sign up HERE today!

I look forward to welcoming you to my email list!

Beth

Wednesday, September 14, 2022

Don't miss another of my weekly stamping emails! Join my email list today!

My weekly stamping news email has been sent out! This week I shared a Christmas card featuring the Lights Aglow Product Suite. I included card measurements, a supply list, and detailed instructions.


Brightest Glow Christmas Card Labels Aglow Twinkling Lights Dies

If you aren't on my email list, sign up right now HERE or on bright blue form on the side of my blog to avoid missing out on next week's projects!

Thanks for stopping by!

Beth

Friday, September 9, 2022

NEW! The Christmas Gifting Kit is NOW Available!


Christmas Gifting Kit

The latest addition to the Kits Collection by Stampin’ Up! is a simple solution to gift cards and tags for the holidays! The Christmas Gifting Kit (#160342) has everything you need to create gorgeous gift tags to attach to presents and gift card holders that adds a handmade touch.

The Christmas Gifting Kit is available in two languages - English and French - in the North American market.
  • #160342 Christmas Gifting Kit (English) $21.00 USD
  • #160343 Surprise De Noël Kit (French) $21.00 USD
 
Christmas Gifting Kit Christmas Tags Gift Card Holders Completed Kit Photo


The Christmas Gifting Kit includes

  • Christmas Gifting Photopolymer Stamp Set
  • Acrylic Stamp Block
  • Shaded Spruce Classic Stampin’ Spot
  • Predesigned projects - 9 tags and 9 gift card holders—3 each of 3 designs
  • Step-by-step instructions
  • Precut pieces (No prep work! Get right to crafting)
  • Makes 9 sets: 3 each of 3 designs
  • Sized to fit standard gift cards
  • Enough adhesive to complete projects
  • A 9-7/8" x 6-1/2" x 2-3/4" (25.1 x 16.5 x 7 cm) printed designer box for storage or crafting on the go
  • The coordinating colors are Basic Black, Black Foil, Mint Macaron, Real Red, and Shaded Spruce


Christmas Gifting Kit Christmas Tags Gift Card Holders Kit Contents Photo


Christmas Gifting Stamp Set

The kit also includes an exclusive stamp set with multiple greetings in a variety of traditional and whimsical fonts.


Christmas Gifting Kit Christmas Tags Gift Card Holders Stamp Set Photo

You’ll love the ease of gift gifting this year with the Christmas Gifting Kit! This tag and gift card holder kit is a simple way to enhance the Christmas gifting experience for you and your loved ones. 
 
Create gorgeous gift tags with attached gift cards holders so you can give your friends and family gift cards to the places they love while adding a handmade touch. 
 
Christmas Gift Giving Kit Square Graphic gift card holder Christmas tags kit
 
Don’t let the holidays overwhelm you–get your all-inclusive kit and make quick multiples everyone will love! Kits are available while supplies last. 
 
Place your order for the Christmas Gifting Kit today in my online store HERE today!

Thanks for stopping by!
Beth

Tuesday, September 6, 2022

September's Newsletter is now available!

Happy September! I just sent my September newsletter to my email list. This month I share how to use the Baby Wipe Technique for fall and beyond cards and projects.


Hello Harvest Pleasant Pheasant Treat Cup 3D box Thanksgiving Baby Wipe Technique


Christmas Lights Baby Wipe Technique Card Snowflakes Lights Aglow Product Suite

Christmas Lights Baby Wipe Technique Card Christmas Tree Lights Aglow Product Suite Peace

I also share tips to care for your Simply Shammy and resize a die to fit your project. These are projects and tips that I only share with my email list. So, you have to be an email list subscriber to receive these project instructions and tips.


sign up for my email list here graphic


September's newsletter is available all September long when you sign up for my email list. If you are not an email list subscriber, you can subscribe today and receive September's newsletter.

I would love to welcome you to my email list! Sign up for my email list by entering your name and email in the sign up form at the top right corner of my blog.


Craft with Beth Card Tracker Chart Graphic
 

And, when you sign up for my email list I will also send you a card tracking chart (as a PDF) to help you keep track of which cards you send to whom. Track cards that you send for birthdays, Christmas, Valentine's Day, Thanksgiving, and more, so you never send the same card twice to the same person. 

I can't wait to see you on my email list! Sign up today in the upper right corner of my blog.

Thanks for stopping by!

Beth

Monday, July 25, 2022

Ringed with Nature Christmas Double Pocket Treat Holders

Today's protect is a double pocket treat holder featuring the Ringed with Nature stamp set and the Boughs of Holly Designer Series Paper. The double pocket treat holder was one of the first treat holders that I learned when I started as a Stampin' Up! Demonstrator. 


Ringed with Nature Christmas Double Pocket Treat Holder

This festive treat holder comes together quickly and easily with minimal supplies. It also uses an entire piece of 6" x 6" designer series paper. 


There are two pockets to contain  a variety of treats. Here I used Ghirardelli chocolate squares. One chocolate square fits in each pocket. 


Below are the measurements and supply list for this festive Christmas double pocket treat holder.

Measurements

  • Treat holder base: 6" x 6"; folded in half diagonally, scored at 2-3/4" & 5-5/8", and then at 1/2"
  • Circle: 2-1/4" x 2-1/4" (die cut the 1-7/8" circle)
  • Greeting: 1" x 3"
  • Ribbon: 6"- long piece

Supplies

  • #159883 Ringed with Nature Stamp Set
  • #159276 Basic White Cardstock
  • #159600 Boughs of Holly Designer Series Paper
  • #159559 Sweetest Christmas Designer Series Paper
  • #155778 Soft Succulent Ink Pad
  • #155576 Evening Evergreen Ink Pad
  • #147084 Real Red Ink Pad
  • #147089 Garden Green Ink Pad
  • #159555 3/8" Gold and Vanilla Satin Edged Ribbon
  • #141705 Layering Circles Dies
  • Paper Trimmer
  • Stampin' Cut & Emboss Machine
  • Bone Folder
  • Paper Snips
  • Dimensionals
  • Mini Dimensionals
  • Liquid Glue
  • Clear Block B
  • Clear Block C
  • #122334 Simply Scored Scoring Tool
  • 1/2" Circle Punch
  • Corner Rounder Punch

You can customize this sweet treat holder by switching the patterned papers and embellishments. I made another version using the Sweetest Christmas Designer Series Paper. I love how the candy cane pattern is perfect for Christmas treats! 


Check out how to make this double pocket teat holder in the video below or on YouTube HERE.


I hope you give the double pocket treat holder a try! If you need supplies to make this knitting mini card, please, shop my online store HERE

If you have any questions about today's project, please, don't hesitate to ask me. I am happy to help you with your stamping questions!


Thanks for stopping by! Have a great day!
Beth

Wednesday, January 1, 2020

The Winner of the 8th Second Sunday Sketches is...

Toni Jean Shaw! Congratulations, Toni! Toni is the winner of the 8th Second Sunday Sketches card sketch challenge! Your prize, the Champagne Rhinestones and 3 handmade cards, will be in the mail on Thursday, January 2nd, 2020.

Craft with Beth: Stampin' Up! Second Sunday Sketches sketch challenge with measurements mittens card stamping celebrate let it snow specialty designer series paper dsp

Check out those cozy mittens! I love the way Toni overlapped them and added the extra details on the cuffs and the snowflakes!

Check out the other entries for the 8th Second Sunday Sketch card challenge. You always create such lovely cards! I love everyone's style and enjoy seeing how each of you interpreted the sketch!

Craft with Beth: Stampin' Up! Second Sunday Sketches sketch challenge with measurements Snow Front snowfront card Christmas

Craft with Beth: Stampin' Up! Second Sunday Sketches sketch challenge with measurements Snow Front snowfront card Christmas

Craft with Beth: Stampin' Up! Second Sunday Sketches sketch challenge with measurements card thinking of you Paper Pumpkin alternative project

Craft with Beth: Stampin' Up! Second Sunday Sketches sketch challenge with measurements card thinking of you Paper Pumpkin alternative project

Craft with Beth: Stampin' Up! Second Sunday Sketches sketch challenge with measurements card thinking of you Paper Pumpkin alternative project

Missed this Second Sunday Sketches? Not to worry. The next Second Sunday Sketches card challenge starts on January 12th. The prize will be a package of the  (Item #) and 3 handmade cards from me.

Craft with Beth: Stampin' Up! Second Sunday Sketches sketch challenge with measurements card prize graphic Petal Pink 1/4" Metallic-Edge Ribbon Item #151194 January 2020

Come back on January 12th for the next Second Sunday Sketches! Be sure to join in on the fun! I look forward to seeing your card entry for January!

Happy Stamping!
Beth

++++++++++++++++++
Shop Online 24/7 in my Online Store
Check out the Clearance Rack
Sign up for Classes, Events, and Retreat Days
Sign up for my newsletter and mailing list or request a catalog
Sign up for Paper Pumpkin
Join my Stampin' Team - the Purrfect Stampers!
Visit my YouTube Channel
Follow me Social Media! I post on Pinterest, Twitter and Facebook
Follow me on Instagram

Host Codes & Current Promotions:
December Host Code - N2ZJMRB2
When placing an order, please use host code N2ZJMRB2 for orders under $150 USD. Please don't use the host code if your order is more than $150. Use Host Code N2ZJMRB2 if you are attending the Stamp of the Month Class long distance to have your Stamp of the Month Bundle mailed directly to you.

Craft with Beth: Stampin' Up! 2019 Year-End Closeout Sale Banner Graphic

The 2019 Year-End Closeout Sale starts on December 3rd, 2019. There great deals on retiring 2019 Holiday Catalog Products are available until January 2nd, 2020 or while supplies last. So, don't delay! Shop my online store today! For additional information, a list of participating products, and more, click here for my blog post.

Craft with Beth: Stampin' Up! Christmastime is Here Product Medley Suite Graphic Banner

The Christmastime is Here Product Suite is coming November 1st and is available while supplies last. You can purchase the entire product suite or pick and choose your favorite products! Shop my online store today for all of the Christmastime is Here products while supplies last!

Craft with Beth: Stampin' Up! NEW Paper Trimmer Graphic Banner

The NEW Paper Trimmer is debuting November 1st, 2019! Woohoo! Check out my detailed review here! Order the NEW Paper Trimmer in my online store here!

 http://craftwithbeth.blogspot.com/2019/09/the-2019-holiday-catalog-is-here.html

From September 4th, 2019 through January 2nd, 2020 shop the 2019 Holiday Catalog! The 2019 Holiday Catalog is filled with Autumn, Halloween, Thanksgiving, Christmas, News Years, and a sprinkling of Valentine's Day stamps, Designer Series Paper, embellishments, and more to spark your creativity! Check out all of the new products today!

Craft with Beth: Stampin' Up! Storage by Stampin' Up! organization stamp craft room Banner Graphic

Stampin' Up! is launching a NEW line of storage solutions called Storage by Stampin' Up! for ink pads, Stampin' Write Markers, Stampin' Blends, and accessories! Each of the modular cubes, trays, and bins are stackable and can be configured in hundreds of ways! Check out the new storage solution on my online store. Check out the product flyer here and the configuration idea flyer here.

Craft with Beth: Stampin' Up! Paper Pumpkin January 2020 I'll Bee Yours Project Kit Promotion Graphic Banner

Get a sneak peek of January's Paper Pumpkin Kit! January's kit theme is I'll Bee Yours. Paper Pumpkin’s first kit of 2020 is all about L-O-V-E. Whether you want handmade favors for Valentine’s Day, a bridal shower, or a remarkably romantic wedding, this month’s kit has everything you need to help you celebrate your favorite friendships and love stories. It will make 20 Mini Treat Bags and 10 mini cards with coordinating envelopes. January's kit will make it easy to create and package gifts for your loved ones! January's kit also coordinates with the Heart Punch Pack (item 151292) in the January-June Mini Catalog, providing even more versatility! The coordinating colors are Crushed Curry, Highland Heather, Mint Macaron, and Rococo Rose. Sign up for Paper Pumpkin by January 10th to receive January's Kit! Click here for more information about January's Paper Pumpkin kit!

Craft with Beth: Stampin' Up! 2019-2020 Annual Catalog Graphic Banner

June 4th, 2019 - June 2nd, 2020 - Shop from the 2019-2020 Annual Catalog for all of your stamping needs! This catalog is bursting with must have stamp sets, dies, embossing folders, ribbons, rhinestones, and more! I love the entire catalog! I think you will too! Check out all of the new products today!

http://www.stampinup.com/ecweb/category/110090/experience-creativity-projects?dbwsdemoid=2123316

Are you new to stamping? The Beginner Brochure may be the right place to start! The Beginner Brochure features a collection of stamp sets, kits, and bundles that are specifically designed to help you build your stamping skills! Check out our Beginner Brochure today! View the Beginner Brochure products in my online store. Download the Beginner Brochure here.

P.S. If you are a Magnolia Lane Product Suite Fan, there is a companion stamp set Magnolia Blooms (Item #152729) in the Beginner Brochure!

Craft with Beth: Stampin' Up! Join my team banner graphic

Do you love Stampin' Up! products? Do you love sharing the joy of stamping with others? Have you considered joining Stampin' Up! as a demonstrator even for the discount? I would love to have you be a part of my Purrfect Stampers Demonstrator Team! You can build your own Starter Kit (valued at $125 USD) for $99 +tax! Join Stampin' Up! and build your own Starter Kit today!