When I saw Libby Fen's punch art turkey card using the Penguin Builder Punch, I just had to create a project using her punch art design! Libby's turkey punch art is so perfect, festive, and adorable! It is great for your Thanksgiving guests of all ages! Today's project is a custom napkin ring for your Thanksgiving table.
I made a napkin ring for the Thanksgiving table featuring Libby's punch art turkey. The napkin ring base is Sahara Sanda cardstock stamped with the leaves from Painted Pheasant. Attached to the front is the turkey punch art. I love the addition of the amber gems to the ends of the turkey's "feathers"! How clever and beautiful!
First, I stamped the leaves image with Crumb Cake ink on a 2" x 7-3/4" piece of Sahara Sand cardstock. Then I added a piece of Tear and Tape Adhesive vertically to the left edge of the cardstock.
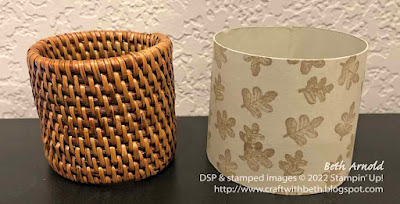
Next I curled the cardstock with a bone folder to help the cardstock become a cylinder shape.
I used a napkin ring that I had to help shape the cardstock napkin ring. This is not necessary, but it was helpful for me to form the napkin ring cyclinder shape. Remove the Tear and Tape Adhesive and adhere the cardstock ends together to complete the napkin ring base.
If you are using a store bought napkin ring as a form, you can now remove it from the cardstock napkin ring base.
Build the turkey punch art. Punch the body of the turkey using the Penguin Builder Punch and Crumb Cake cardstock. Punch the eyes from the Whale Builder Punch and Basic Black cardstock. Punch the wattle from the Whale Builder Punch spout and Real Red cardstock. Punch the beak from the Song Bird Punch and Daffodil Delight cardstock. Adhere the eyes, wattle, and beak to the turkey's body.
Add 3 dimensionals vertically down the center of the back of the turkey's body. Attach a maple leaf die cut from the Leaf Label and Amber Gems Combo Pack to the back of the turkey's body. Add amber gems to each of the ends of the feathers.
Then add 4 dimensionals vertically down the center of the back of the maple leaf. In the photo below, you will see 3 dimensionals on the leaf. Add 1 more dimensional right on top of the dimensional at the bottom of the turkey body. This will form a double layer of dimensionals to evenly support and level the punch art on the napkin ring.
Adding dimensionals down the center of the punch art enables the cardstock to move and bend when being used without tearing or being too fragile.
Below are the measurements and the supply list for my Thanksgiving napkin ring. If you need supplies to recreate this project, please, shop my online store HERE.
Measurements
- Napkin Ring Base: 2" x 7-3/4" (Sahara Sand Cardstock)
- Turkey: 2" x 2-1/4" (Crumb Cake Cardstock)
- Turkey Beak: 1" x 2" (Daffodil Delight Cardstock)
- Turkey Wattle: 1" x 2" (Real Red Cardstock)
- Turkey Eyes: 1" x 2" (Basic Black Cardstock)
- Feathers: use a leaf from the Leaf Label and Amber Gems Combo Pack
Supplies
Stamps
#159846 Painted Pheasant
Ink
#147116 Crumb Cake Ink Pad
Paper
#121043 Sahara Sand Cardstock
#120953 Crumb Cake Cardstock
#119683 Daffodil Delight Cardstock
#102482 Real Red Cardstock
#121045 Basic Black Cardstock
Embellishments
#159969 Leaf Label and Amber Gems Combo Pack
#104430 Dimensionals
Tools
#152699 Whale Builder Punch
#158726 Song Bird Punch
#156452 Penguin Builder Punch
#154031 Tear and Tape Adhesive
#117147 Clear Block B
#110755 Multipurpose Liquid Glue
#102300 Bone Folder
#103579 Paper Snips
#130148 Grid Paper
#152392 Paper Trimmer
#126200 Stampin' Scrub
#153648 Stampin' Mist Cleaner
Napin Ring (optional)
For today's project I used a cloth napkin. However, A paper napkin would be just as festive too! There are so many beautiful, seasonal paper napkins available too.
Not a fan of napkin rings? Check back here on my blog on Wednesday, I will show you how to turn this turkey punch art into something sweet!
I hope you enjoyed today's fun Penguin Builder Punch Thanksgiving napkin ring. If you need supplies to make this project, please, shop my online store HERE.
If you have any questions about today's project, please, don't hesitate to ask me.
Thanks for stopping by!
Beth


No comments:
Post a Comment