Sunday, December 11, 2022

Second Sunday Sketches #44 Starts Today

Craft with Beth Second Sunday Sketches graphic title graphic banner card sketch challenge with measurements

It is time for another Second Sunday Sketches challenge! If you are new to Second Sunday Sketches, please review the rules here or below. Each second Sunday of the month, I will post a card sketch. A sketch is graphic or drawing of how the elements of a card are arranged.

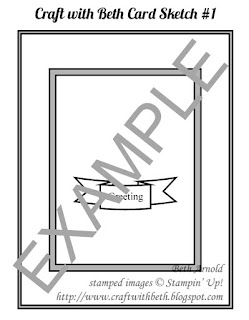
Craft with Beth: Stampin' Up! Second Sunday Sketches sketch card sketch challenge sample graphic


You will then use the sketch as a guide to create your own card. Your card must be a new creation and reflect the challenge guidelines. Your card must include the major elements of the card sketch, such as the number of layers and the general position of the embellishments and/or die cuts. You can rotate the sketch for a top-folding card or for a side-folding card.

You choose the occasion and the color palette as well as the stamp set(s) and the embellishments. I do ask that you use Stampin' Up! products (current or retired).

The measurements will also be included in the blog post for each Second Sunday Sketches sketch challenge. You can use the measurements as given or increase them or decrease them. For example, if a greeting is stamped on a 1" circle on the sketch, but the greeting you choose is 1-3/4", then increase the size of the circle to 1-3/4". You can also change the shape. Instead of a circle, you can use an oval, a square, a daisy punch, a monogram, etc.

The challenge will run from the second Sunday of the month until the last day of that month. 


Card Sketch

Below is December's card sketch.

Second Sunday Sketches card sketch challenge graphic #44 with measurements

Challenge Dates

December's challenge will run from December 11th, 2022 until December 31st, 2022 at 5pm EST.

If you would like to participate in the Second Sunday Sketches sketch challenge, please create a card using the sketch above and email me a photo of your card by December 31st, 2022 at 5pm EST with the subject line Second Sunday Sketches Entry.


Prize Drawing

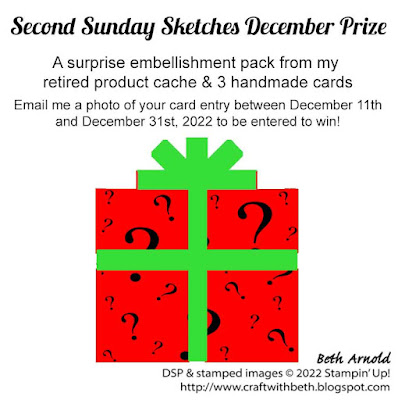
The day after the last day of the month (January 1st), I will place all of the names of the participants in a proverbial hat and randomly draw a winner. The winner will receive a prize (US Residents only)! The prize each month will change and will be announced at the start of each challenge. December's Second Sunday Sketches sketch challenge prize is a surprise embellishment pack from my retired product cache and three hand-made cards from me.

December 2022 Second Sunday Sketches #44 card challenge sketch challenge prize graphic
  

Winner Announcement

If you are the winner, I will notify you by email. Please respond to my email with your complete mailing address, and I will mail you your prize! If the winner does not respond to my email within 7 days, I will draw another winner.

I will also post all of the entries on my blog (with your names attached to the photos) and the name of the winner.


Some Ideas on How to Make this Card Sketch Your Own

There are many ways to change this card to make it your own! You can rotate the card layout 90 degrees, change the circle to another shape like a Christmas tree or a bird, die cut the Christmas lights using the #159541 Twinkling Lights Dies, use embossing folders to add more texture to a mat layer, and more!


Share Second Sunday Sketches with a Friend

Be sure to join in on the fun and share with a friend! If you enter the Second Sunday Sketches challenge, you can get a bonus surprise prize by sharing this challenge with a friend (for US residents only)! Here's how to get a bonus surprise prize. Limit two bonus surprise prizes per person per month.
  1. Enter into this month's Second Sunday Sketches challenge
  2. Share this month's Second Sunday Sketches challenge with a friend (that hasn't participated before)
  3. Have your friend submit their this month's challenge card entry
  4. Email me that your friend has submitted their card entry. Submit your complete mailing address and the name of the friend that you shared with. I will confirm their entry and then send you a bonus surprise prize.


I am looking forward to seeing your personal take on the 44th Second Sunday Sketches sketch challenge! If you have any questions about this card sketch challenge, please let me know! I am happy to assist!

Happy Stamping!
Beth

Tuesday, December 6, 2022

Happy December! Penguin Place Double Gate Fold Christmas Card

Happy December! I just sent out my December newsletter to my mailing list. This month I shared how to make a double gate fold Christmas card with the Penguin Place stamp set and the Penguin Builder Punch.

Christmas card with a penguin on the front. a belly band is wrapped horizontally around the card. The greeting says season's greetings. The penguin has four presents in front. Penguin Place, Penguin Builder Punch, Christmas, card, fun fold, double gate fold card


I also shared a few tips to make stamping and assembling this card a snap!

I designed and planned this card using the Penguin Place stamp set several months ago, and unfortunately, in the last few days it sold out and is no longer available for purchase. I debated on changing this month's project. However, most of you already have both the Penguin Place stamp set and the Penguin Builder Punch, and the skills in this card are easily translatable to another stamp set, and designer series paper can be substituted for the stamped winter tree and snow scene. So, I did not substitute another stamp set.

The new host code for December is 9CVPJ27N. Please, use the host code on orders under $150 USD. For orders over $150 USD, please, don't use the host code.

My December newsletter is available all month to new subscribers. If you sign up for my email list during December, you will also receive a copy of my December newsletter with the instructions, supply list, and measurements for this cute penguin Christmas card.

Sign up for my mailing list today HERE or in the bright blue box in the upper right corner of my blog. I can't wait to welcome you as a subscriber!

Beth

Thursday, December 1, 2022

The Winner of the Second Sunday Sketches #43 is...

Pat Arnold! Congratulations, Pat! Pat is the winner of the 43rd Second Sunday Sketches card sketch challenge! Your prize, a mystery embellishment pack and 3 handmade cards, will be in the mail on December 5th, 2022.

Second Sunday Sketches monthly card sketch challenge with measurements card entry Christmas card Boughs of Holly DSP


Pat's card is beautiful and festive! I love how she used the Boughs of Holly Designer Series Paper as one of the mat layers. This holly leaf and berry patterned paper with the green painted background is full of wintertime foliage - perfect for a Christmas card! I also like how Pat layered 3 banners - white, red, and green on top of each other to make the greeting stand out. The sequins give a little sparkle too! Wonderful work, Pat!

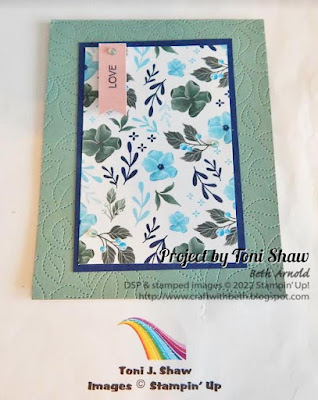
Check out the other entries for the 43rd Second Sunday Sketch card challenge. Toni's card is gorgeous! I really love the simplicity of the card! Her color palette echos the flowers on the Fitting Florets Designer Series Paper. I love how the stitched leaves are die cut into the card mat with the Stitched Greenery Die! Beautiful card, Toni!


Second Sunday Sketches monthly card sketch challenge with measurements card entry love friendship card Fitting Florests Designer Series Paper Stitched Greenery Dies


Want More Second Sunday Sketches? 

The next Second Sunday Sketches card challenge starts on December 11th. The prize will be a mystery embellishment package from my retired product cache and 3 handmade cards from me.

Second Sunday Sketches monthly card sketch challenge with measurements prize graphic for December 2022


Share Second Sunday Sketches with a Friend

Be sure to join in on the fun and share with a friend! If you enter the Second Sunday Sketches challenge, you can get a bonus surprise prize by sharing this challenge with a friend (for US residents only)! Here's how to get a bonus surprise prize. Limit two bonus surprise prizes per person per month.
  1. Enter into December's Second Sunday Sketches challenge
  2. Share December's Second Sunday Sketches challenge with a friend
  3. Have your friend submit their December's challenge card entry. Email me that your friend has submitted their card entry. Submit your complete mailing address and the name of the friend that you shared with. I will confirm their entry and then send you a bonus surprise prize 1-3 business days after I draw December's winner.


Happy Stamping!
Beth

P.S. Ever wonder how I draw for the Second Sunday Sketches winner? I use an app called Tiny Decisions. I input all of the names of the participants onto the wheel and spin it. The name that the wheel stops on is the winner.

The Last Chance Product List is Now Available!

last chance product list july-december 2022 mini catalog graphic banner
 

The July–December 2022 Mini Catalog will be retiring soon! Stock up on your favorite products before they’re gone for good! Save up to 60% on essential craft supplies. This selection of Last Chance Products is only available while supplies last.

Download the Last Chance Product List


Please, note that not all products are being offered with a discount and take your time reading through the Last Chance Product List. Some products may have one component retiring but not both. For example, the #159626 Kindest Gnome Bundle is retiring, the #159616 Kindest Gnome stamp set is retiring, but the #159625 Gnome Dies are carrying over.

The list is long and in tiny print. I recommend downloading the Excel version. Open the file. Change the orientation to landscape. Increase the font size to a more comfortable reading size. Then print the list.

Download the Carry Over Product List


Please, note that the majority of the products on the Carry Over Product List are carrying over into the 2023-2024 Annual Catalog. However, there were a few last minute additions to the Carry Over Product List that did not make it in time to be included in the printed annual catalog. So, these products are marked with an asterisk and are available in the online store.

Mark Your Catalogs

The retiring product list is long! To help me organize it in my mind better, I physically go through my July-December Mini Catalog and write an R for retiring or a CO for carrying over by each product in the catalog.

Make Your To Order List

As I go through and mark my catalog, I also make a note of anything that I would like to purchase before it retires. I write down the item number and product name on my To Order List.

You can click HERE to download and a print a copy of my To Order List and keep track of what you would like to order too!

Place Your Order Timely

Once you have your To Order List ready, go to my online shop and place your order. I recommend placing your order sooner rather than later to avoid missing out on your favorite retiring products.

At the time this blog post was written almost 10 products have already sold out and are no longer available for purchase. I am bummed out about the witch hat builder punch being sold out!

The quickest way to see if your favorite retiring product is still in stock is to check my online store. Search for your product by item number or be product name. If it is listed in the online store, it is in stock or if there is a message below the product photograph that says something like temporarily unavailable or will be back soon, it has not sold out. If your product is not listed in the online store at all, then that product is sold out and no longer available for purchase.

Promotion Details

  • This Last Chance Products promotion typically includes a Retiring List (products that will no longer be available once the catalog retires) and a Carryover List (products that will still be available once the catalog retires).
  • Discounts are not always available with the Retiring List. When they are, they will vary from one market to another depending on product performance.
  • All products are available while supplies last, and there are no purchase limits.
  • You can start creating your marketing plan right away! Share the list with your customers as soon as you’d like.
  • Discounted items can be added to a Starter Kit and redeemed as a 50% off item or with Stampin’ Rewards.
  • Only orders opened and closed during the promotion period apply.
  • Stamp Sets are not guaranteed during this promotion and are while supplies last.
  • Sales Period
    • Starts: 1 December 2022 at 12:00 AM (MT)
    • Ends: 4 January 2023 at 11:59 PM (MT)
  • Order Deadlines
    • Phone: 4 January 2023 at 6:59 PM (MT)
    • Online: 4 January 2023 at 11:59 PM (MT)


I hope this helps clarify the Last Chance Product List! If you have any questions about the 2022 July-December Mini Catalog Last Chance Product List, please, don't hesitate to reach out to me. I am happy to help you with your stamping questions!

Happy Shopping!
Beth

Mega Clearance Rack Refresh!

clearance rack graphic banner

WOW! WOW! WOW! That is all I can really say it seems! The Clearance Rack has been refreshed today with an enormous amount of retired favorites! Some of the tag topper punches are back! I was just saying the other day too how much I really enjoyed using them to make all kinds of treat holders too. The Stitched Star Dies are back! So many designer series paper packs, ribbons, and embellishments too have been added! I have not seen so many products added to the Clearance Rack in a long time!


Stitched Star Dies Graphic

So, yes, please, check out the Clearance Rack right now. Seriously. Right. Now. Before. Everything. Sells. Out. I just checked the Clearance Rack a few minutes before posting this blog post, and several of the items that were there this morning are now gone, including the mini jam jars. Click HERE to shop the Clearance Rack right now!

Happy Shopping!

Beth

Wednesday, November 30, 2022

Just a Little Reminder that You are Loved

I was looking at the peppermint snowman treat holder I made on Monday. Since the peppermint snowman chocolate candy is only available during the winter months of the year, I thought what other treats would fit in this treat holder size. A 2" Ghirardelli chocolate square fits perfectly in this treat holder size too!

This treat holder is a terrific way to add a little sweetness to a loved one's day and to show them that you are thinking of and love them!

Ghirardelli chocolate square treat holder wrapper made with the Designer Tags. The greeting says just a little reminder that you are loved. treat holder, 3D, gift packaging, Stylish Shapes Dies, Framed Florets Dies, Designer Tags Dies, flowers, floral, friendship, thinking of you


I layered the small and large flowers from the Fitting Florets stamp set with the leaf dies from the Framed Florets Dies to create a little embellishment behind the greeting banner.

Ghirardelli chocolate square treat holder wrapper made with the Designer Tags. how to add the flowers underneath of the greeting banner. treat holder, 3D, gift packaging, Stylish Shapes Dies, Framed Florets Dies, Designer Tags Dies, flowers, floral, friendship, thinking of you

To make the greeting banner, first stamp and die cut the banner from a piece of Basic White cardstock and the stitched banner die. Then adhere the banner die cut to a scrap of Daffodil Delight that is a little larger than the banner. Use paper snips to cut a banner shape from the Daffodil Delight cardstock slightly bigger than the Basic White banner die cut. You now have a Basic White cardstock banner outlined in Daffodil Delight cardstock.

Below are the measurements and the supply list for my Fitting Florets chocolate square treat holder. If you need supplies to recreate this treat holder, please, shop my online store HERE.


Measurements

  • Treat Holder Base: 1-3/4" x 6"; scored at 3" (Fitting Florets Designer Series Paper (DSP))
  • Greeting: 3-1/2" x 1" (Basic White Cardstock)
  • Greeting Mat 4" x 1-1/2" (Daffodil Delight Cardstock)
  • Ribbon: 10" long (Evening Evergreen 3/8" Open Weave Ribbon)


Supplies

Stamps
#161815 Fitting Florets Stamp Set
#162407 Fitting Florets Bundle (includes #161815 Fitting Florets Stamp Set & #160623 Framed Florets Dies at a 10% savings)

Paper
#119683 Daffodil Delight Cardstock
#155574 Evening Evergreen Cardstock
#159276 Basic White Cardstock
#161814 Fitting Florets Designer Series Paper (DSP)

Ink
#155576 Evening Evergreen Ink Pad
#132708 Memento Tuxedo Black Ink Pad
#155520 Polished Pink Stampin' Blends Combo Pack (both)
#155517 Evening Evergreen Stampin' Blends Combo Pack (dark)

Embellishments
#155573 Evening Evergreen 3/8" Open Weave Ribbon
#104430 Dimensionals

Tools
#160623 Framed Florets Dies
#159165 Designer Tags Dies
#159183 Stylish Shapes Dies
#110755 Multipurpose Liquid Glue
#102300 Bone Folder
#103579 Paper Snips
#130148 Grid Paper
#152392 Paper Trimmer
#149653 Stampin' Cut & Emboss Machine
#126200 Stampin' Scrub
#153648 Stampin' Mist Cleaner
#118490 Clear Block H

I hope you enjoyed today's Designer Tags Dies treat holder and give it a try. Post your treat holder project photo on social media and be sure to tag me with #craftwithbeth. I can't wait to see what you create!

If you need supplies to make this project, please, shop my online store HERE.

If you have any questions about today's project, please, don't hesitate to ask me.

Thanks for stopping by!
Beth

Tuesday, November 29, 2022

Only 4 Weeks Left!

12 weeks of Christmas logo graphic

You've already missed the first 8 weeks of my 12 Weeks of Christmas email series & you’ve missed some fantastic holiday projects. But you can still get the last 4 weeks if you sign up for my mailing list now HERE.

I look forward to welcoming you to my email list!

Beth

Monday, November 28, 2022

Turn a Tag into a Treat Holder with Partial Die Cutting

Today's Ghirardelli peppermint snowman treat holder was an experiment. Could I use something from the 2022-2023 Annual Catalog to replicate one of my favorite quick and easy treat holders?

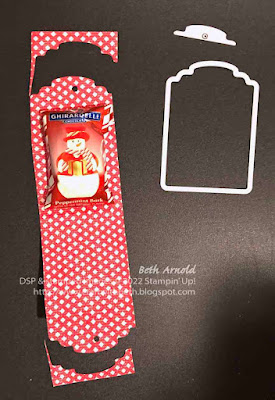
peppermint snowman chocolate candy Ghirardelli wrapped in a sleeve of red and white striped patterned paper. the greeting on the front says noel and is in the shape of a light blue circle with stitching around the inside circumference of the circle. Framed and Festive, treat holder, 3D, Christmas, snowman, winter, gift packaging

I was sad to see the Scalloped Tag Topper Punch retired. I have made countless different treat holders and boxes with the decorative punch over the years.

The Scalloped Tag Topper Punch was one of my go to stamping tools! When the 2022-2023 Annual Catalog debuted, I noticed a possible replacement - #159165 Designer Tags Dies on page 170.

#159165 Designer Tags Dies graphic

This die set comes with 4 different tag dies, 1 decorative tag background die, 3 dies to cut shapes - a rose, a butterfly, and a floral sprig - and a tiny circle die.

I am excited about all of the tag shapes and decorative additions. However, the tiny circle die is what really surprised me. I thought, you know, it looks like a circle hole punch shape. That's helpful, I guess. I could just use a handheld circle punch though. 


#159165 Designer Tags Dies graphic metal dies

What's the big deal? The tiny little dot in the above graphics is not just a tiny circle die. It is a circle die that cuts the hole at the top of the tag, yes, but the actual die is in the shape of the top of the tag with the circle in the middle! Great, right!? The die's shape can be butted up to the top of the tag die for precise alignment!

No more guessing where the center of the tag is. The die lines up for you. That is why that tiny little circle in the above graphic is so great. So clever! Spread the word!

Ok. So, how did I turn a tag into a treat holder? The secret is to partially die cut only the ends of the designer series paper and not the bottom. To do this, cut the designer series paper slightly narrower than the width of the die. Fold the designer series paper in half.

Framed and Festive, treat holder, 3D, Christmas, snowman, winter, gift packaging


Slide the open end of the designer series paper from the back of the die to the front. Keep the folded end on top of the die, so the fold won't get cut. If the side view of the treat holder, I didn't crease the fold line, so you could see where the fold area goes more easily.

Line up the open end of the designer series paper with the top of the tag die. Place the circle die on top of the designer series paper at the top of the tag. Place a piece of low tact tape on the dies and run it through the Stampin' Cut and Emboss Machine.

Framed and Festive, treat holder, 3D, Christmas, snowman, winter, gift packaging


Tada! Your "tag" is now twice as long as the die and ready to add your treats to.

Framed and Festive, treat holder, 3D, Christmas, snowman, winter, gift packaging


Add the chocolate snowman with a bit of Stampin' Seal or a glue dot to the inside of the treat holder. Add the stamped and die cut stitched circle on dimensionals with some pearl basic jewels. Close up the treat holder and thread the ribbon half way through the top holes. Then tie the ribbon into a bow.

Once you make one treat holder. You will be making multiples in minutes!

Framed and Festive, treat holder, 3D, Christmas, snowman, winter, gift packaging

Below are the measurements and the supply list for my Ghirardelli peppermint snowman treat holder. If you need supplies to recreate this treat holder, please, shop my online store HERE.

Measurements

  • Treat Holder Base: 1-3/4" x 6"; scored at 3" (Sweetest Christmas Designer Series Paper (DSP))
  • Greeting: 2" x 2" (Pool Party Cardstock) - use the 3rd smallest stitched circle die
  • Ribbon: 8" long (Real Red and Garden Green 3/8" Ribbon Combo Pack)


Supplies

Stamps
#160888 Framed and Festive Stamp Set

Paper
#122924 Pool Party Cardstock
#159559 Sweetest Christmas Designer Series Paper (DSP)

Ink
#147114 Early Espresso Ink Pad

Embellishments
#159577 Real Red and Garden Green 3/8" Ribbon Combo Pack
#144219 Pearl Basic Jewels
#104430 Dimensionals

Tools
#159165 Designer Tags Dies
#159183 Stylish Shapes Dies
#110755 Multipurpose Liquid Glue
#102300 Bone Folder
#103579 Paper Snips
#130148 Grid Paper
#152392 Paper Trimmer
#149653 Stampin' Cut & Emboss Machine
#126200 Stampin' Scrub
#153648 Stampin' Mist Cleaner
#118486 Clear Block C


I made 12 treat holders with 1 sheet of 12" x 12" designer series paper and 1 piece of 8-1/2" x 11" cardstock. If you cut your 8-1/2" x 11" piece of cardstock into 2" x 11" strips, you can die cut 20 circles from one sheet of 8-1/2" x 11" cardstock, making this treat holder design very economical and a great way to use up designer series paper.

peppermint snowman chocolate candy Ghirardelli wrapped in a sleeve of red and white striped patterned paper. the greeting on the front says noel and is in the shape of a light blue circle with stitching around the inside circumference of the circle. Framed and Festive, treat holder, 3D, Christmas, snowman, winter, gift packaging

I hope you enjoyed today's snowman treat holder featuring the Designer Tags Dies and give it a try. How will you decorate your Designer Tags treat holder? Post your treat holder project photo and be sure to tag me with #craftwithbeth. I can't wait to see what treat holders you create using the Designer Tags Dies!

If you need supplies to make this project, please, shop my online store HERE.

If you have any questions about today's project, please, don't hesitate to ask me. I am happy to help you with you stamping questions!

Thanks for stopping by!
Beth

Friday, November 25, 2022

Highlight a Greeting Stamp with this Fun Fold Christmas Card

 Today's flap fun fold card highlights not only the Sweetest Christmas Designer Series Paper, but this flap fun fold is fantastic for using larger greeting stamps like some of the stamps in the Framed and Festive stamp set.

Framed and Festive flap fold Christmas card with Sweetest Christmas Designer Series Paper DSP on the card front

The larger greeting stamps in Framed and Festive really stand out and shine on this fun fold! The jingle bell trinket and linen thread are the perfect holiday embellishment to enhance the greeting stamp.


opening the flap fold Christmas card with Sweetest Christmas Designer Series Paper DSP on the front and Framed and Festive stamp set
 
This card opens with the flap on the right, revealing a larger designer series paper panel on the left side of the card front. The flap is adhered inside of the card base with Tear and Tape Adhesive before the inside mat is added.

opening the flap fold Christmas card with Sweetest Christmas Designer Series Paper DSP on the front and Framed and Festive stamp set


On the inside of the card, I stamped another larger greeting from Framed and Festive - "May this season be filled with peace and joy" with Real Red ink. I did not add any more designer series paper to the inside of the card because you can see some of the inside of the card when the card is closed. 


However, you could add some more stamping or a vertical piece of designer series paper along the left or the right edge of the inside mat. A few festive pearls or rhinestones would also look nice in the upper right or lower right corner too. There are lots of ways to customize this flap fold card!

Below are the measurements and the supply list for my Framed and Festive flap card. If you need supplies to recreate this card, please, shop my online store HERE.

Measurements

  • Card Base: 6-3/4" x 5-1/2"; scored at 2-5/8" (Garden Green Cardstock)
  • Flap: 3-1/2" x 3-1/2"; scored at 3/4" (Garden Green Cardstock)
  • Left DSP Panel: 5-1/4" x 2-3/8" (Sweetest Christmas Designer Series Paper (DSP))
  • Flap DSP Panel: 3-1/4" x 2-1/2" (Sweetest Christmas Designer Series Paper)
  • Greeting Circle: 2-1/2" x 2-1/2" (Basic White Cardstock)
  • Greeting Circle Mat: 3" x 3" (Garden Green Cardstock)
  • Inside Mat: 4" x 5-1/4" (Basic White Cardstock)


Supplies

Stamps
#160888 Framed and Festive

Paper
#102584 Garden Green Cardstock
#159276 Basic White Cardstock
#159559 Sweetest Christmas Designer Series Paper (DSP)

Ink
#147084 Real Red Ink Pad

Embellishments
#104199 Linen Thread
#159980 Flat Jingle Bell Trinkets
#104430 Dimensionals

Tools
#151770 Layering Circle Dies
#159183 Stylish Shapes Dies
#110755 Multipurpose Liquid Glue
#102300 Bone Folder
#103579 Paper Snips
#130148 Grid Paper
#152392 Paper Trimmer
#149653 Stampin' Cut & Emboss Machine
#126200 Stampin' Scrub
#153648 Stampin' Mist Cleaner
#118485 Clear Block D


I hope you enjoyed today's flap fold Christmas card and give it a try. I would love to see what you create! Post your flap card on social media. Be sure to tag me with #craftwithbeth.

If you need supplies to make this card, please, shop my online store HERE. ### insert link to shop here  ###

If you have any questions about today's project, please, don't hesitate to ask me. I am happy to help you with your stamping questions!

Thanks for stopping by!
Beth

Thursday, November 24, 2022

Make Boughs of Holly Designer Series Paper the feature on this Christmas card

Each Tuesday I send out my stamping newsletter to my email list. On November 22nd, I will be sharing this festive poinsettia Christmas card featuring the Brightest Glow stamp set and the Boughs of Holly Designer Series Paper.


Brightest Glow, poinsettia, Christmas, card, Boughs of Holly Designer Series Paper, sneak peek of newsletter project


This sweet and simple Christmas card is only available to my email list subscribers. If you are already on my email list, you will automatically receive the project supply list, measurements, and instructions for this card.

If you are not on my email list and would like to receive the project supply list, measurements, and instructions for this Christmas card, please, sign up for my email list by November 28th, 2022.

Sign up for my mailing list today HERE or in the bright blue sign up box in the upper right corner of my blog. I can't wait to welcome you as a subscriber!

Beth

Monday, November 21, 2022

Deck the Halls this Christmas Season with the Framed and Festive Stamp Set

I love how some of the stamps in Framed and Festive stamp set are from Christmas carols! Today's Christmas card project uses the 'tis the season to be jolly and falala, which are both part of Deck the Halls.

Framed and Festive stamp set Christmas card with falala stamped in the background. The greeting on the circle die cut says 'tis the season to be jolly. behind the circle are sprigs of holly, leaves, and berries. There is a horizontal rectangle of birch tree patterned paper with a border of brown cardstock. Framed and Festive, Christmas, card, Boughs of Holly Designer Series Paper, Stylish Shapes Dies

I used 'tis the season to be jolly as my main focal greeting and stamped it on a stitched circle from the Stylish Shapes Dies with Cherry Cobbler ink. I then fussy cut holly leaves, berry sprigs, and leaves from the Boughs of Holly Designer Series Paper to highlight the greeting further.
 
I stamped falala with Versamark clear watermark ink to create a subtle background pattern across the card front. I didn't want the connection between the two greetings to be so obvious that it was too busy looking.

close up of the ribbon embellishment. Framed and Festive, Christmas, card, Boughs of Holly Designer Series Paper, Stylish Shapes Dies


The White 3/8" Glittered Organdy Ribbon embellishment was created by folding the ribbon into an S-shape on the back of the circle die cut. I chose the white organdy ribbon because it is sheer and does not detract from the fussy cut leaves and berries. The ribbon also adds an extra bit of sparkle almost reminiscent of snowflakes, enhancing the wintry feel of this card.

Inside of the card I stamped Merry Christmas with Cherry Cobbler ink and added a narrow strip of the birch patterned paper horizontally along the bottom of the Inside Mat, leaving plenty of room to write a special message to your loved ones!

inside of the card says Merry Christmas. there is a horizontal, narrow piece of the birch patterned paper across the bottom of the inside of the card. Framed and Festive, Christmas, card, Boughs of Holly Designer Series Paper, Stylish Shapes Dies

Below are the measurements and the supply list for my Framed and Festive Christmas card. If you need supplies to recreate this card, please, shop my online store HERE.

Measurements

  • Card Base: 8-1/2" x 5-1/2"; scored at 4-1/4" x 11" (Crumb Cake Cardstock)
  • 1st Mat: 2-1/4" x 5-1/2" (Early Espresso Cardstock)
  • 2nd Mat: 2" x 5-1/2" (Boughs of Holly Designer Series Paper (DSP))
  • Circle: 3" x 3" (Basic White Cardstock)
  • Leaves & Berry Sprigs: Fussy cut from the Boughs of Holly Designer Series Paper (Boughs of Holly Designer Series Paper)
  • Inside Mat: 4" x 5-1/4" (Basic White Cardstock)
  • Inside DSP Strip: 1/2" x 5-1/4" (Boughs of Holly Designer Series Paper)


Supplies

Stamps
#160888 Framed and Festive Stamp Set

Ink
#102283 Versamark Clear Watermark Ink Pad
#147083 Cherry Cobbler Ink Pad

Paper
#120953 Crumb Cake Cardstock
#119686 Early Espresso Cardstock
#159276 Basic White Cardstock
#159600 Boughs of Holly Designer Series Paper (DSP)

Embellishments
#159963 Festive Pearls
#156408 White 3/8" Glittered Organdy Ribbon
#104430 Dimensionals

Tools
#159183 Stylish Shapes Dies
#118486 Clear Block C
#118485 Clear Block D
#118489 Clear Block G
#110755 Multipurpose Liquid Glue
#102300 Bone Folder
#103579 Paper Snips
#130148 Grid Paper
#152392 Paper Trimmer
#149653 Stampin' Cut & Emboss Machine
#126200 Stampin' Scrub
#153648 Stampin' Mist Cleaner

I hope you enjoyed today's jolly Christmas card! The Framed and Festive stamp set comes with 8 total Christmas greeting stamps. We used 2 of the greeting stamps in today's Christmas card. You can also switch today's greeting with your favorite. Which greetings are your favorite from Framed and Festive?

Please, keep in mind that the Framed and Festive stamp set is a limited time only part of the Fitted Florets Early Release promotion. The Framed and Festive stamp set is only available during the Early Release sales period November 1st, 2022 - January 4th, 2023 or while supplies last, whichever comes first.

Please, place your order for the Framed and Festive stamp set timely to avoid missing out on this truly festive stamp set!

If you need supplies to make this project, please, shop my online store HERE.

If you have any questions about today's project, please, don't hesitate to ask me.

Thanks for stopping by!
Beth

Friday, November 18, 2022

2-in-1 Thanksgiving Pumpkin Treat Holder and Placecard

Is it a treat holder or a place card? Why not be both!? Delight your Thanksgiving guests with this a pumpkin chocolate kiss triangle treat holder!

Hello Harvest, Rustic Pumpkin Dies, Thanksgiving place card chocolate kiss treat holder, table setting, 3D, home decor

This style of treat holder is so easy, quick to make, and can be customizable to the materials that you have on hand.

The base is a piece of cardstock bent into the shape of a triangle. Then a die cut or punched shape is adhered to 2 sides of the triangle and then adhered together. Lastly, a chocolate kiss is placed in the center of the triangle.

Hello Harvest, Rustic Pumpkin Dies, Thanksgiving place card chocolate kiss treat holder, table setting, 3D, home decor


You may be familiar with this treat holder style with my plethora of cat punch treat holders for Valentine's Day and Halloween. Now that the cat punch is retired, I had to brainstorm other punches and dies that I could make the triangle treat holder with.

Don't worry. I didn't sell my cat punch after it retired. The cat punch is one punch that I plan on keeping for a long time regardless of its current or retired status. So, you may see some projects in the future with the cat punch.

With Thanksgiving coming soon, the pumpkin stamp and die from the #159634 Hello Harvest stamp set and the #159643 Rustic Pumpkin Dies was a great place to start!

Hello Harvest, Rustic Pumpkin Dies, Thanksgiving place card chocolate kiss treat holder, table setting, 3D, home decor


Once I made the treat holders, I added a name tag across the front of the pumpkin to add the name of a guest. I wrote the names for these samples with my computer. However, I recommend a Basic Black Stampin' Write Marker or a Basic Black Stampin' Blend to write the name of your guest before you attach the name tag to the pumpkin.

Hello Harvest, Rustic Pumpkin Dies, Thanksgiving place card chocolate kiss treat holder, table setting, 3D, home decor

These treat holder place cards are versatile. Use them during the dinner or after. The place cards can be put at each guest's place setting or on a side table for guests to pick up when they arrive or for when they leave.


Below are the measurements and the supply list for my pumpkin place card and treat holder. If you need supplies to recreate this project, please, shop my online store HERE.

Measurements

  • Triangle Base: 1" x 2-1/2"; scored at 3/4" and 1-3/4" (Pumpkin Pie Cardstock)
  • Pumpkins (cut 1 of each color of cardstock): 2-1/2" x 2-1/2" (Pumpkin Pie Cardstock and Basic White Cardstock)
  • Name Tag: 1/2" x 2" (Basic White Cardstock)


Supplies

Stamps
#159634 Hello Harvest
#159644 Hello Harvest Bundle

Ink
#147114 Early Espresso Ink Pad
#154897 Pumpkin Pie Stampin' Blends Combo Pack (both)
# Soft Suede Stampin' Blends Combo Pack (both)

Paper
#105117 Pumpkin Pie Cardstock
#159276 Basic White Cardstock

Embellishments
#104199 Linen Thread

Tools
#159643 Rustic Pumpkin Dies
#103683 Mini Glue Dots
#110755 Multipurpose Liquid Glue
#102300 Bone Folder
#103579 Paper Snips
#130148 Grid Paper
#152392 Paper Trimmer
#149653 Stampin' Cut & Emboss Machine
#126200 Stampin' Scrub
#153648 Stampin' Mist Cleaner
#118485 Clear Block D
Chocolate Kisses

I hope you enjoyed today's pumpkin place card and treat holder. I know your Thanksgiving guest are going to love receiving this sweet treat holder at your Thanksgiving dinner!

Hello Harvest, Rustic Pumpkin Dies, Thanksgiving place card chocolate kiss treat holder, table setting, 3D, home decor

Have you tried this triangle style treat holder? What stamps, punches, and dies did you use? Post a photo on social media and tag me with the hashtag #craftwithbeth, so I can find your projects. I would love to see what you create!

If you need supplies to make this project, please, shop my online store HERE.

If you have any questions about today's project, please, don't hesitate to ask me.

Thanks for stopping by!
Beth

Thursday, November 17, 2022

A Not So Ugly Christmas Sweater Card

Each Tuesday I send out my stamping newsletter to my email list. On November 22nd, I will be sharing a Christmas card using a simple inlay technique. I even add embossing powder and the heat tool to the mix!

Christmas card with an inlaid snowflake on a faux knitted background. The greeting says to you and yours this Christmas, Christmas, Knit Together, inlay, technique, Brightest Glow
 

This warm and cosy Christmas card is only available to my email list subscribers. If you are already on my email list, you will automatically receive the project supply list, measurements, and instructions for this card.

If you are not on my email list and would like to receive the project supply list, measurements, and instructions for this Christmas card, please, sign up for my email list by November 21st, 2022.

Sign up for my mailing list today HERE or in the bright blue sign up box in the upper right corner of my blog. I can't wait to welcome you as a subscriber!

Beth

Monday, November 14, 2022

Wishing You a Beautiful Birthday!

I am in LOVE with the Fitting Florets Designer Series Paper pack! The designs are beautiful but not too busy or fussy. The color palette is bright and cheerful. The Fitting Florets fits my style perfectly! Today's birthday card features the Fitting Florets Designer Series Paper in a big way - by covering the entire card front!

Fitting Florets Designer Series Paper DSP birthday card floral Stampin' Blends


To emphasize the floral theme, I stamped, colored, and die cut the grouping of 2 flowers image and raised it on dimensionals.

Fitting Florets Designer Series Paper DSP birthday card floral Stampin' Blends

I used the Stampin' Blends to color the flowers and the leaves. I added shading to the flower petals by first outlining the shadow areas with dark Polished Pink Stampin' Blend.

Then I added a secondary shadow area right next to the dark Polished Pink area with light Polished Pink Stampin' Blend. I overlapped the dark and light Polished Pink areas to help them blend together in a smooth transition.

Finally, I added light Flirty Flamingo Stampin' Blend to the center of each petal to create the area where the light was shining the brightest. I overlapped the light Flirty Flamingo with the light Polished Pink area to also make a smoother transition from one pink to the next pink.

When I use Stampin' Blends, I tend to use just the light and dark pair of the same color. However, I am starting to add more colors and shades. Recently, I used light So Saffron when blending with light and dark Flirty Flamingo with excellent results. It has been really fun trying new color combinations! What Stampin' Blend color combinations have you tried that you were surprised by?

I paired the flower image with the "Wishes for a beautiful birthday" greeting. I like how the greeting font is easy to read and how it is part cursive and part printing.

Fitting Florets Designer Series Paper DSP birthday card floral Stampin' Blends

On the inside of the card, I couldn't resist adding a bit more Fitting Florets Designer Series Paper to the bottom of a Basic White cardstock layer! I also stamped the "For a special person on a special day" greeting in Evening Evergreen ink.

Below are the measurements and the supply list for this Fitting Florets Designer Series Paper birthday card. If you need supplies to recreate this card, please, shop my online store HERE.

Measurements

  • Card Base: 4-1/4" x 11"; scored at 5-1/2" (Polished Pink Cardstock)
  • 1st Mat: 4-1/4" x 5-1/2" (Fitting Florets Designer Series Paper (DSP))
  • 2nd Mat: 2-1/4" x 4-1/4" (Soft Succulent Cardstock)
  • Greeting: 1-3/4" x 4-1/4" (Basic White Cardstock)
  • Flowers: 2-1/2" x 2-1/2" (Basic White Cardstock)
  • Inside Mat: 4" x 5-1/4" (Basic White Cardstock)
  • Inside DSP Strip: 1/2" x 5-1/4" (Fitting Florets DSP)


Supplies

Stamps
#161815 Framed Florets Stamp Set
#162407 Framed Florets Bundle

Ink
#147114 Early Espresso Ink Pad
#155576 Evening Evergreen Ink Pad
#155517 Evening Evergreen Stampin' Blends Combo Pack (both)
#155521 Soft Succulent Stampin' Blends Combo Pack (light)
#155520 Polished Pink Stampin' Blends Combo Pack (both)
#154884 Flirty Flamingo Stampin' Blends Combo Pack (light)

Paper
#155710 Polished Pink Cardstock
#155776 Soft Succulent Cardstock
#159276 Basic White Cardstock
#161814 Fitting Florets Designer Series Paper (DSP)


Embellishments
#161822 Gold Adhesive-Backed Swirls
#104430 Dimensionals

Tools
#160623 Framed Florets Dies
#110755 Multipurpose Liquid Glue
#102300 Bone Folder
#103579 Paper Snips
#130148 Grid Paper
#152392 Paper Trimmer
#149653 Stampin' Cut & Emboss Machine
#126200 Stampin' Scrub
#153648 Stampin' Mist Cleaner
#118486 Clear Block C
#118485 Clear Block D


I hope you enjoyed today's floral birthday card. If you need supplies to make this card, please, shop my online store HERE.

Please, be mindful that the Fitting Florets Designer Series Paper and the Gold Adhesive-Backed Swirls are only available during the Fitting Florets Early Release period or while supplies last. Once they sell out, they are gone for good. So, please, don't wait! Place your order today!

If you have any questions about today's birthday card, please, don't hesitate to ask me.

Thanks for stopping by!
Beth

The Seasonal Sale is Coming November 15th!

Seasonal Sale November 15th-18th, 2022 graphic banner


Create more by spending less during the Seasonal Sale! Between November 15th and 18th, 2022, Stampin' Up! is offering select products from the 2022–2023 Annual Catalog on sale with the following discounts:

  • 10% off all punches
  • 15% of all stamps (Host stamp sets are not included in this sale)
  • 20% off all dies
  • 20% off all embossing folders
  • 20% off all non-specialty and non-assortment Designer Series Paper


With the season of giving upon us, this is a great opportunity to buy gifts for your fellow crafting enthusiasts, or to stock up on supplies for all your upcoming handmade projects. Remember, this sale is for four days only! Don’t miss out!


Download the Product List


download the product list graphic thumbnail Seasonal Sale 2022


  • Download the Product List HERE or click the above graphic. Use this list to see which products are on sale and their discounted price.


Promotion Deadlines

  • Ordering Deadlines
    • Phone: 18 November 2022, 6:59 p.m. (MT) 
    • Online: 18 November 2022, 11:59 p.m. (MT)
  • The Seasonal Sale is available through the online store as well as with demonstrator and workshop orders.

Seaonal Sale 2022 square graphic

There are so many fantastic Annual Catalog products on sale that it is hard to choose a favorite! 
 
I have been eyeing the Layering Diorama Dies for awhile now. I keep seeing amazing projects with them! I think they would pair well with the kayak stamp from #159103 Adventurous Journey stamp set. I am definitely putting the Layering Diorama Dies on my To Order List! 
 
#155565 Layering Diorama Dies Graphic

What products are on your To Order List?
 
This sale only lasts for four days November 15th-18th! So, don't miss out! Make your To Order List and then head on over to my online store November 15th-18th to get your favorite sale products! 

Happy Shopping!
Beth

Sunday, November 13, 2022

Second Sunday Sketches #43 Starts Right Now!

Craft with Beth Second Sunday Sketches graphic title graphic banner card sketch challenge with measurements

It is time for another Second Sunday Sketches challenge! If you are new to Second Sunday Sketches, please review the rules here or below. Each second Sunday of the month, I will post a card sketch. A sketch is graphic or drawing of how the elements of a card are arranged.

Craft with Beth: Stampin' Up! Second Sunday Sketches sketch card sketch challenge sample graphic


You will then use the sketch as a guide to create your own card. Your card must be a new creation and reflect the challenge guidelines. Your card must include the major elements of the card sketch, such as the number of layers and the general position of the embellishments and/or die cuts. You can rotate the sketch for a top-folding card or for a side-folding card.

You choose the occasion and the color palette as well as the stamp set(s) and the embellishments. I do ask that you use Stampin' Up! products (current or retired).

The measurements will also be included in the blog post for each Second Sunday Sketches sketch challenge. You can use the measurements as given or increase them or decrease them. For example, if a greeting is stamped on a 1" circle on the sketch, but the greeting you choose is 1-3/4", then increase the size of the circle to 1-3/4". You can also change the shape. Instead of a circle, you can use an oval, a square, a daisy punch, a monogram, etc.

The challenge will run from the second Sunday of the month until the last day of that month. 


Card Sketch

Below is November's card sketch.

Second Sunday Sketches card sketch challenge graphic #43 with measurements

Challenge Dates

November's challenge will run from November 13th, 2022 until November 30th, 2022 at 5pm EST.

If you would like to participate in the Second Sunday Sketches sketch challenge, please create a card using the sketch above and email me a photo of your card by November 30th, 2022 at 5pm EST with the subject line Second Sunday Sketches Entry. Putting this subject is the quickest way for me to see and respond to your email quickly.


Prize Drawing

The day after the last day of the month (December 1st), I will place all of the names of the participants in a proverbial hat and randomly draw a winner. The winner will receive a prize (contiguous US Residents only)! The prize each month will change and will be announced at the start of each challenge. November's Second Sunday Sketches sketch challenge prize is a surprise embellishment pack from my retired product cache and three hand-made cards from me.

November 2022 Second Sunday Sketches #43 card challenge sketch challenge prize graphic
 

Winner Announcement

If you are the winner, I will notify you by email. Please respond to my email with your complete mailing address, and I will mail you your prize! If the winner does not respond to my email within 7 days, I will draw another winner.

I will also post all of the entries on my blog (with your names attached to the photos) and the name of the winner.


Some Ideas on How to Make this Card Sketch Your Own

There are many ways to change this card to make it your own! You can rotate the card layout 90 degrees, change the banner to another shape like flowers or letters, move the banner somewhere else on the card front, make the mat layers smaller, use embossing folders to add more texture to a mat layer, and more! The center mat can be used for a technique too.


Card Sketch Sample

Here is a sample of how I interpreted this card sketch using Abigail Rose Designer Series Paper and the Cottage Rose stamp set. I changed the banner into the rose die cut and moved it to the lower left corner of the card front.


Abigail Rose birthday card flower floral Cottage Rose watercolor pencils

Share Second Sunday Sketches with a Friend

Be sure to join in on the fun and share with a friend! If you enter the Second Sunday Sketches challenge, you can get a bonus surprise prize by sharing this challenge with a friend (for US residents only)! Here's how to get a bonus surprise prize. Limit two bonus surprise prizes per person per month.
  1. Enter into this month's Second Sunday Sketches challenge
  2. Share this month's Second Sunday Sketches challenge with a friend (that hasn't participated before)
  3. Have your friend submit their this month's challenge card entry
  4. Email me that your friend has submitted their card entry. Submit your complete mailing address and the name of the friend that you shared with. I will confirm their entry and then send you a bonus surprise prize.


I am looking forward to seeing your personal take on the 43rd Second Sunday Sketches sketch challenge! If you have any questions about this card sketch challenge, please let me know! I am happy to assist!

Happy Stamping!
Beth
Thursday, November 10, 2022

Practice your Stampin' Blends skills with these friendship cards

Each Tuesday I send out my stamping newsletter to my email list. On November 15th, I will be sharing two autumnal friendship cards featuring the Hello Harvest Stamp Set and Die Bundle.


Hello Harvest autumnal floral friendship thinking of you card


These floral friendship cards is only available to my email list subscribers. If you are already on my email list, you will automatically receive the project supply list, measurements, and instructions for this card.

If you are not on my email list and would like to receive the project supply list, measurements, and instructions for this Christmas card, please, sign up for my email list by Monday, November 14th, 2022.

Sign up for my mailing list today HERE or in the bright blue sign up box in the upper right corner of my blog. I can't wait to welcome you as a subscriber!

Beth